Drum December, Drum Works, How Po Makes Hand Drums, Indigenous Art, Kingston Artist, Po's Drum Making Process, Portia Chapman, Uncategorized

Drum December Day 20 – Stringing Rawhide Completion – Ready for New Year’s Eve

A top-down view of the back of a frame drum resting on a red towel. The translucent rawhide is tightly laced to the dark wood frame with golden sinew, meeting in a central cross pattern. An artist's hand holds the remaining sinew. Bold white text reads "Day 20 Drum Has Been Strung."
The Marriage of Wood and Skin: Day 20 marks the completion of the stringing process, bringing us one step closer to the first heartbeat of the New Year.

The Final Stretch โ€” Ready for New Yearโ€™s Eve

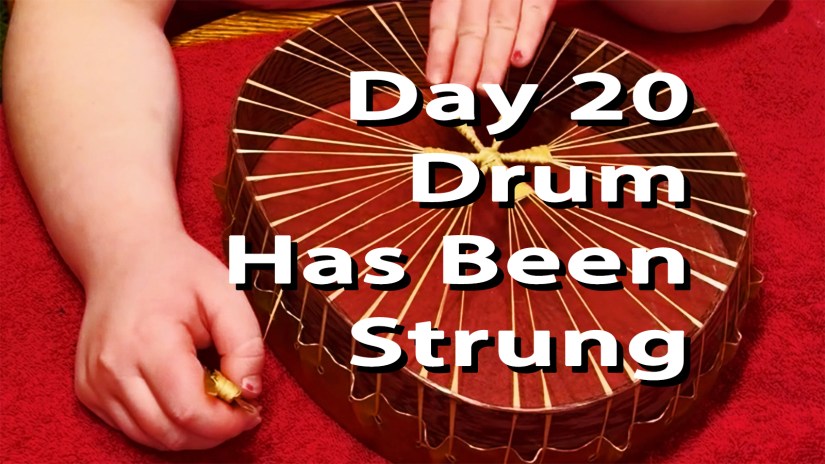
Day 20 is a momentous milestone in our journey! This update spans two high-energy daysโ€”December 27 and 29, 2025โ€”to bring us to the finish line. To ensure this drum finds its voice by New Yearโ€™s Eve, it had to be strung by midnight on December 27. Despite the whirlwind of Christmas festivities and a few winter storms, we made it!

As I write this on December 30, the drum is nearly cured. I have just tested its resonance, and it sounds heavenly. The deer rawhide has dried to a stunning, golden translucence, reminiscent of stained glass. We have successfully completed our 20-day journey together!

Measuring the Architecture of Sound

Before the lacing begins, precision in measurement is key. For a drum of this size, I use a specific formula: one armโ€™s-length of sinew per pleat (pair of stringing holes). With 22 pleats on this white oak frame, I measured out exactly 22 armโ€™s-lengths to ensure a continuous, strong lace.

Tightening and Learning

After threading the sinew from side to side around the frame, the focus shifts to tightening. This is a nuanced process I often teach in my workshops and include in my custom drum kit instructions. During this stage, my assistant asked several insightful questions that many first-time makers share. Weโ€™ve included that conversation here as a helpful learning moment for your own crafting journey.

Weaving the Spokes

By December 29, the rawhide was nearly dryโ€”the perfect window to create the spokes. Spokes serve two vital purposes:

Tuning: They gently tighten the rawhide to achieve the desired pitch.
Ergonomics: They provide a comfortable, secure grip for the drummerโ€™s hand.

I use a basket-weaving technique to create these, which can be an art form in itself, often resulting in patterns like trees or stars. For this specific drum, I crafted small, wide spokes for a sturdy and elegant finish.

20 Days of Transformation: A Retrospective

Think of how far we have come! Over these 20 days, we have:

  • Milled kiln-dried lumber and used sun-steaming to hand-bend the frame.
  • Dried, cut, glued, sanded, and finished the white oak with black cherry stain and varnish.
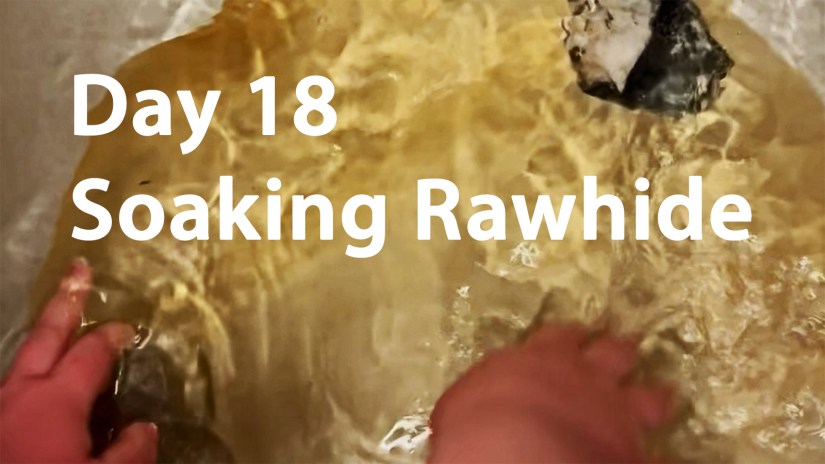
  • Rough-cut, soaked, and used digital templates to prepare the deer rawhide.
  • Punched stringing holes, measured sinew, and completed the final stretch.
  • Cured the hide and wove the spokes to secure a glorious, resonant sound.

Ready for the New Year

We are officially ready to drum in 2026! Come back tomorrow night to hear the first official heartbeat of this New Year’s Eve drum.


Bring the Rhythm Home If you feel called to own a custom drum or want to experience the making process yourself with a step-by-step drum kit, please reach out via my About Page or email me directly.

Join us tomorrow for Drum December Day 21, for the big New Year’s Eve Reveal!

Read more about my art and contact information at Love Art By Po and the many drums I make.


To contact me directly, please use this email:

๐Ÿ“ง Portia@loveartbypo.ca

Let Me Know What You Think! Start or Join the Convesation


Behind the Art, Behind the scenes, Drum December, How Po Makes Hand Drums, Indigenous Art, Kingston Artist, Portia Chapman

Drum December Day 18 – How to Soak Deer Rawhide Before Stringing the Drum

A top-down view of translucent deer rawhide submerged in a water bath, with an artist's hands guiding the skin and a large dark rock used as an anchor to keep the hide from floating.
The “Sacred Soak” begins. On Day 18, we prepare the deer skin for the white oak frame. This stage requires patience, clean water, and natural earth anchors like quartz or geodes to hold the hide beneath the surface for a full 24 hours.

Preparing the Rawhide is as Much About Honour as it is Technique

Preparing the rawhide on Day 18, we step away from the woodshop and begin the patient process of rehydrating the rawhide. This is a slow, quiet transformation that requires respect for the animal and an understanding of the specific needs of the skin.


Step 1: Choosing the Voice of the Drum

I source my rawhide from across Canada, and Iโ€™ve learned that even within the same species, every hide has its own unique quality. In my workshop, I work with deer, elk, moose, and bison.

  • The Rule of Thumb: Generally, the larger the drum, the larger the species of rawhide required.
  • The Scale: Deer is typically the thinnest and smallest, while moose and bison are the thickest and largest. Moose is so substantial that I often purchase it in quarter-sections.
  • Todayโ€™s Choice: Because our White Oak frame is on the smaller side, I am using a beautiful, translucent deer rawhide.

Step 2: The Rough-Cut

Before the water touches the skin, we must define its shape. I lay the drum frame directly onto the rawhide and cut a piece that extends about 2 inches beyond the frame all the way around.

  • Tools of the Trade: For deer and elk, a pair of tin-snip scissors works perfectly. For the heavy moose or bison, I switch to a jigsaw.
  • A Maker’s Hint: Trim off any sharp points or jagged edges during this stage. This prevents the rawhide from marking or scratching itself during the soaking and stretching process.

Step 3: Entering the Water

Soaking is about preservation. It is essential to use a clean vessel that is entirely free of soap residue, as we want to preserve the natural oils within the skin.

  • The Vessel: In the summer, I love using a galvanized wash tub filled with fresh rainwater. In the winter, I move to the laundry tub and use distilled water.
  • The Anchor: When the hide first enters the room-temperature water, it often wants to float. To keep it fully submerged, I weigh it down with rocksโ€”specifically geodes and quartz. I canโ€™t explain the science behind it; it simply feels right to anchor the animal skin with the bones of the earth.

Step 4: The Patient Wait

The rawhide needs time to remember its suppleness. I typically leave it to soak for 24 hours, though thicker hides like moose may need a little longer.

How do you know itโ€™s ready? You will feel a change in the texture. The rawhide will feel thick in your hands and the color will transition into a soft, opaque white.


Join us tomorrow for Day 19 (December 27, 2025). We will lift the rawhide from its bath and begin the powerful work of stretching it over our White Oak frame.

Read more about my art and contact information at Love Art By Po and the many drums I make.


To contact me directly, please use this email:

๐Ÿ“ง Portia@loveartbypo.ca

Let Me Know What You Think! Start or Join the Convesation