When audience members step into an immersive installation, they immediately experience an atmosphere designed to evoke a felt emotional response.
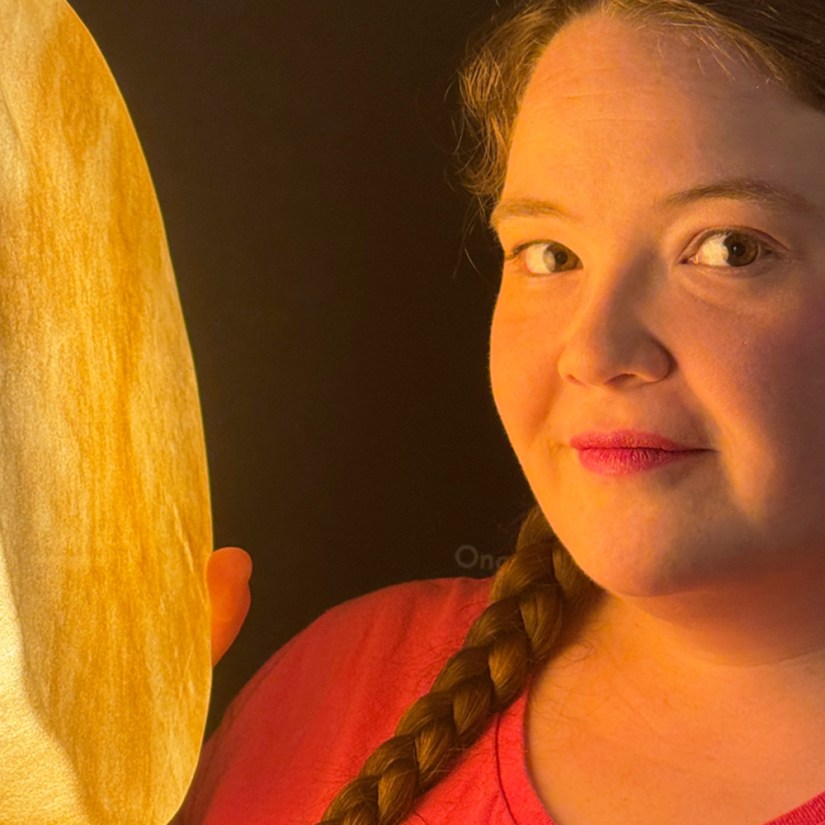
Portrait of Portia Po Chapman engaging one of the Glow Chamber’s golden glowing rawhide vessels by Kingston portrait artist Ann Decker at the Kingston Arts Council Pocket Gallery exhibition “Being Seen,” August 2026.
Yet behind that seamless experience lies an intricate, often invisible layer of site-specific planning, structural engineering, and studio fabrication. For the Being Seen exhibition, by Kingston artist Portia “Po” Chapman, at the Kingston Arts Council (KAC) Pocket Gallery, creating the central Glow Chamber required translating complex spatial limitations into deliberate design choices.
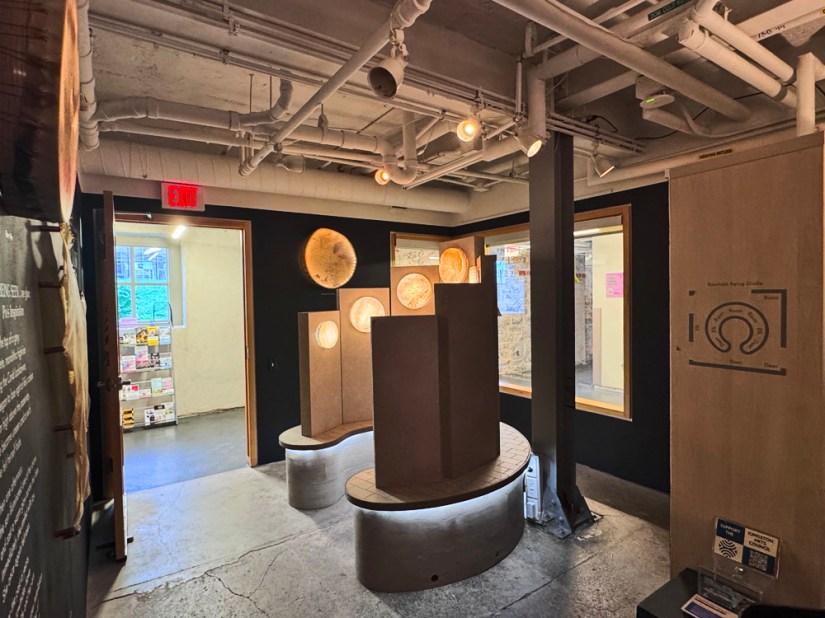
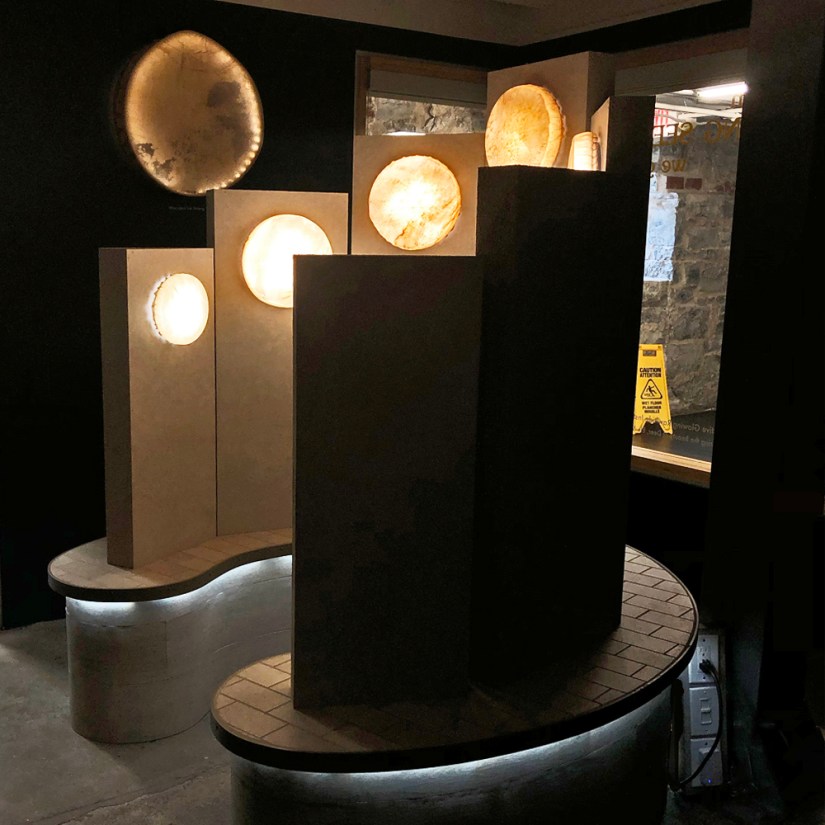
The site-specific Glow Chamber on view inside the Kingston Arts Council Pocket Gallery during the immersive exhibition, “Being Seen: when Being Seen… we glow.”
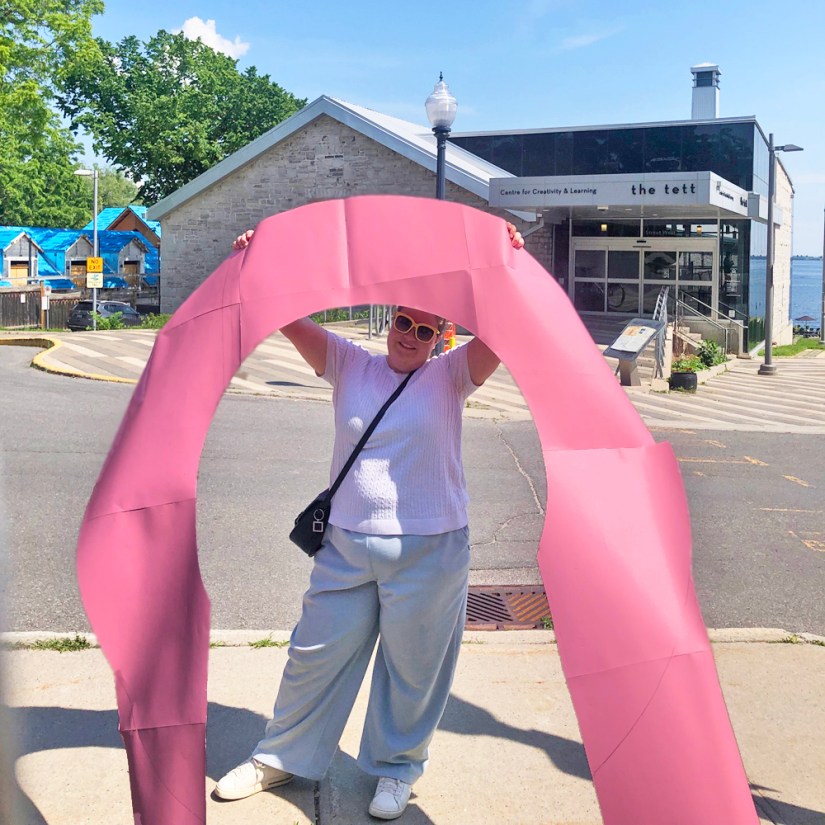
Site-specific art demands that an artist work in direct conversation with a physical space. Initial room measurements rarely reveal the true essence or practical challenges of an architectural environment. Before construction began in Chapman’s Kingston art studio, she rendered a 3D CAD model based on gallery blueprints, followed by a crucial site visit with a full-scale pink paper floor template.
Kingston artist Portia Po Chapman arriving at the Tett Centre with her full-scale paper template to test accessibility and spatial constraints for the Glow Chamber.
The Pocket Gallery presented numerous real-world constraints: an off-center metal pillar, doorway sight-lines, a moving wall shelf, spotlight clearances, and strict accessibility requirements for wheelchair maneuverability. By laying out the 1:1 template on-site, Chapman trimmed perimeter arcs and notched out sections around the pillar—adjustments essential to ensuring the structure would fit safely before cutting a single sheet of wood.
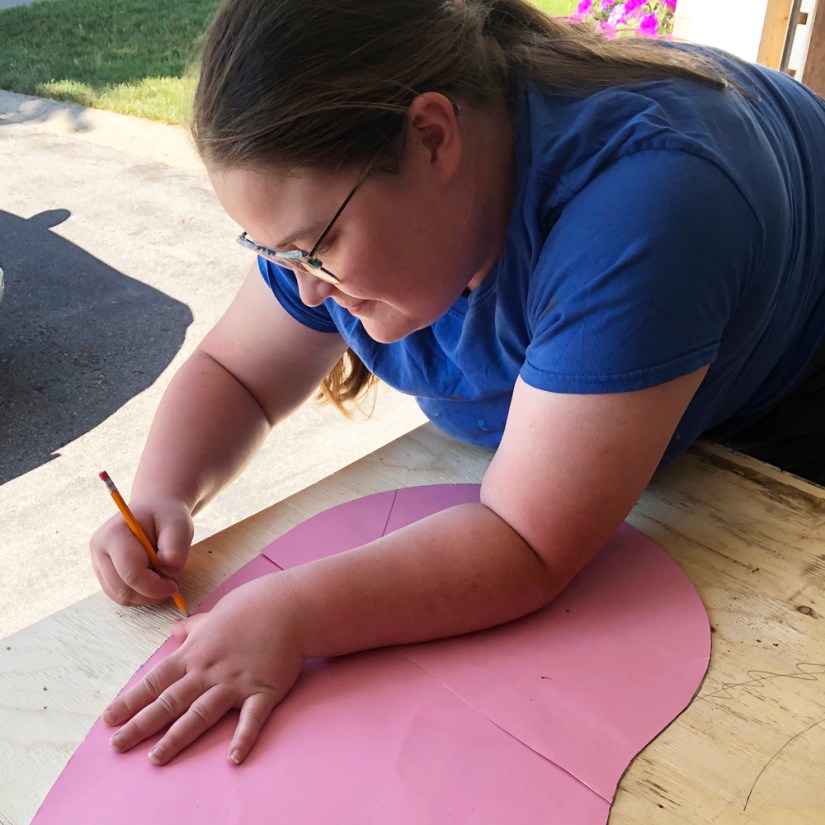
Tracing the site-tested template onto plywood sheets to construct a double-layered, staggered-seam base for maximum durability.
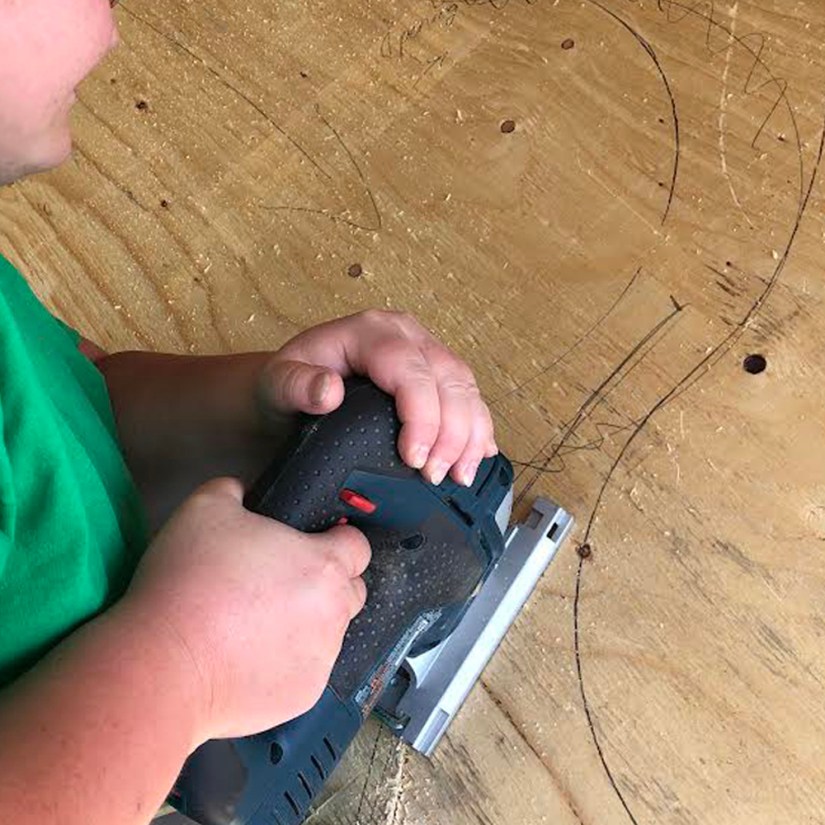
Making preliminary rough cuts between traced template halves before clamping and precision-cutting the final base shapes.
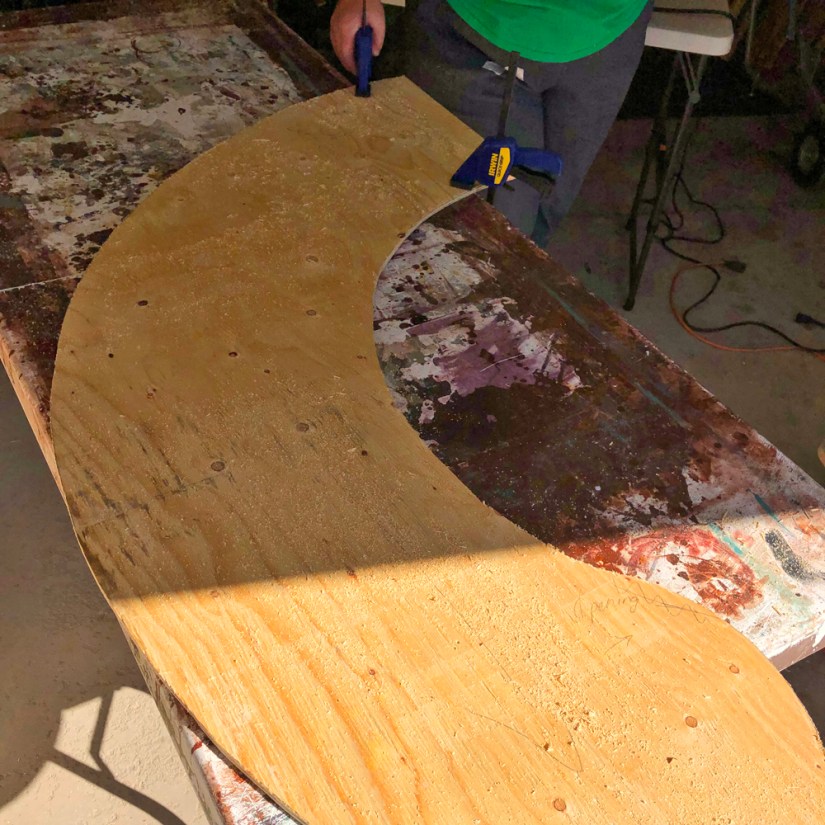
One half of the custom plywood base fully cut to shape along the traced template curves in the studio wood shop.
Back in the woodshop, these site adjustments dictated Chapman’s studio practice. To guarantee structural integrity across the gallery floor, Chapman built an “integrated plinth” using two staggered-seam layers of laminated plywood, eliminating structural weak points.
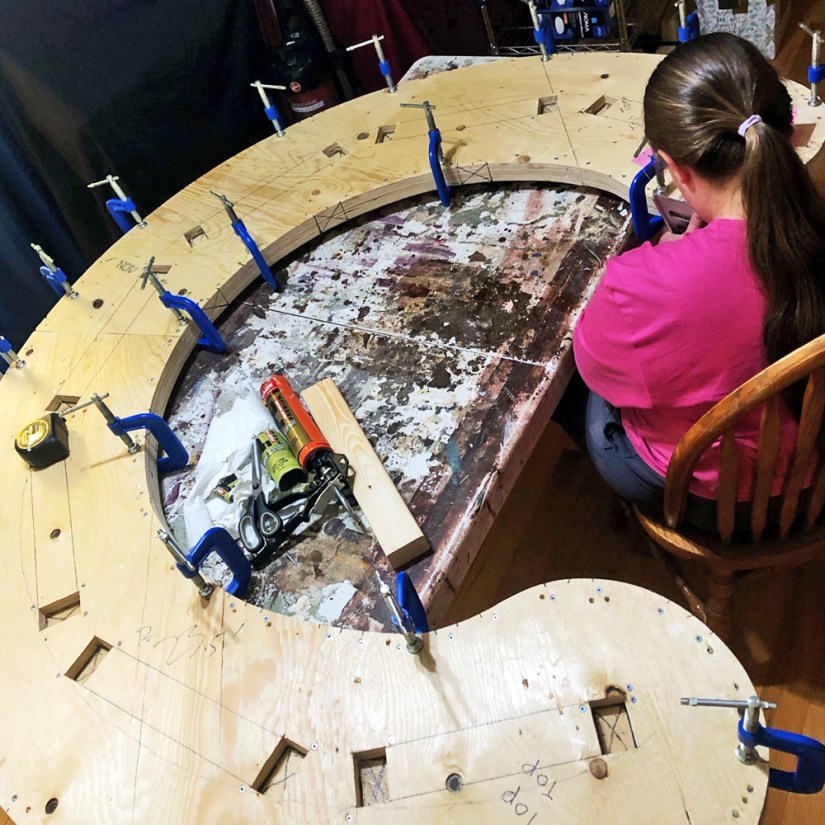
Sorting and lining up the base arc halves with offset seams before gluing, clamping, and screwing the layers together.
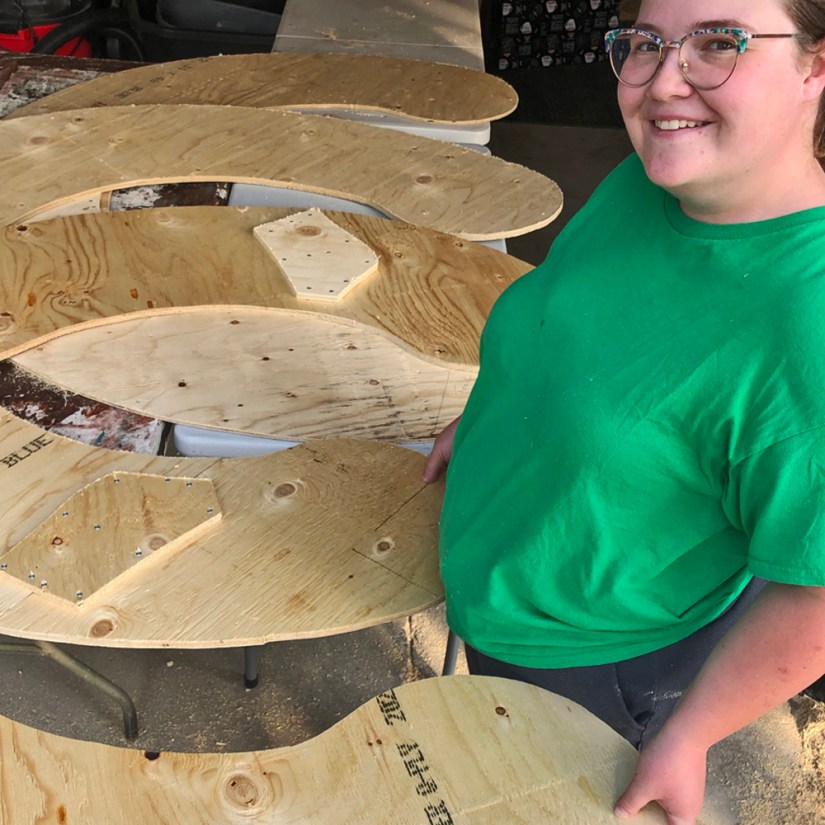
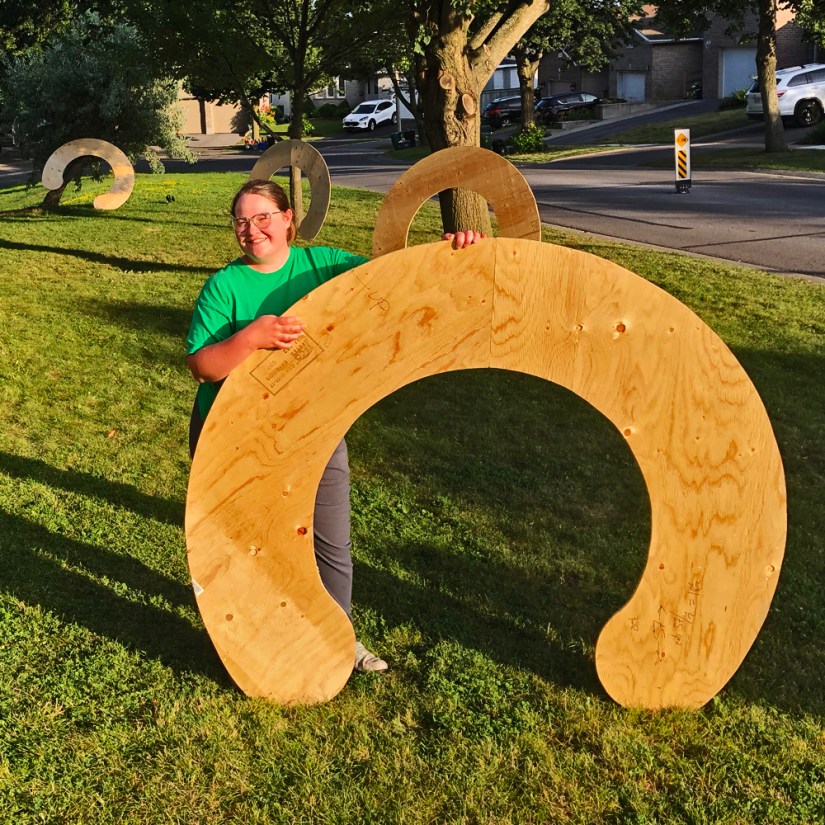
Artist Portia Po Chapman outside her Kingston studio with the four cut plywood base arcs before laminating them into double-layered, staggered-seam pairs.
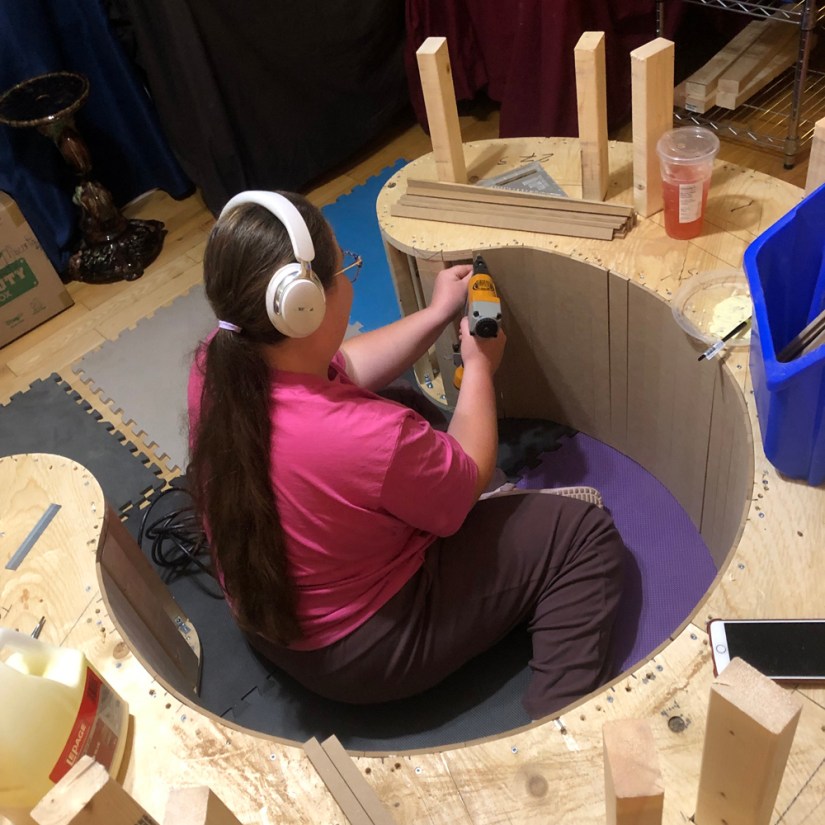
Anchored vertical 2×3 studs formed the core skeleton for seven hollow MDF monoliths.
Clamping the top and bottom plywood base layers together to trace precise locations for the monolith legs and interior support studs.
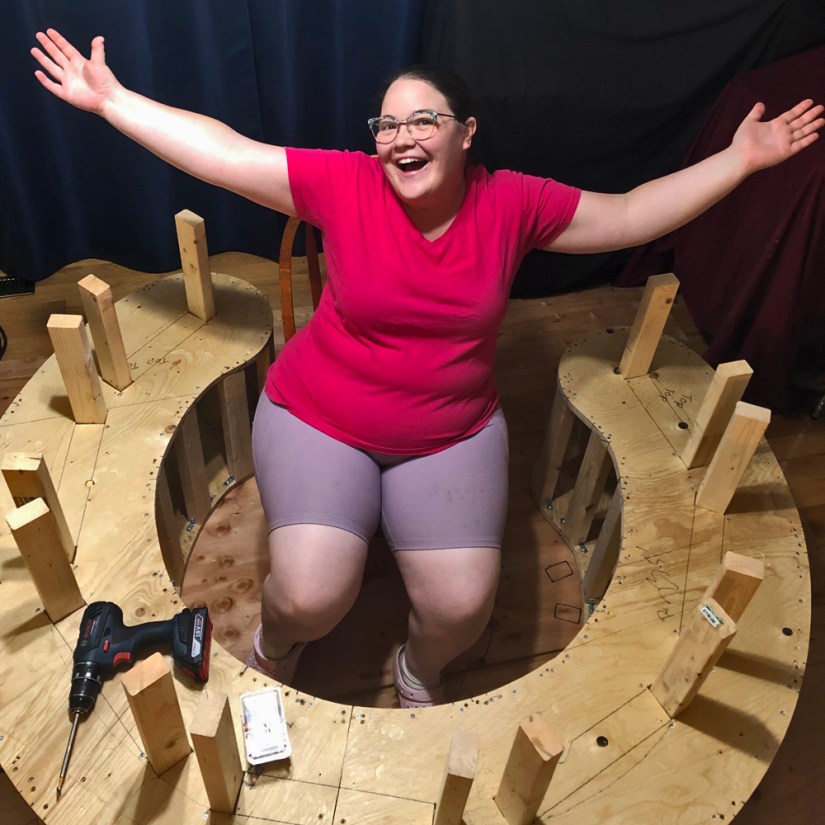
Artist Portia Po Chapman celebrating as her CAD 3D rendering materializes into a physical 3D structure in her Kingston art studio.
Brad nailing flexible perimeter sheathing around the internal studs to enclose the integrated plinth structure.
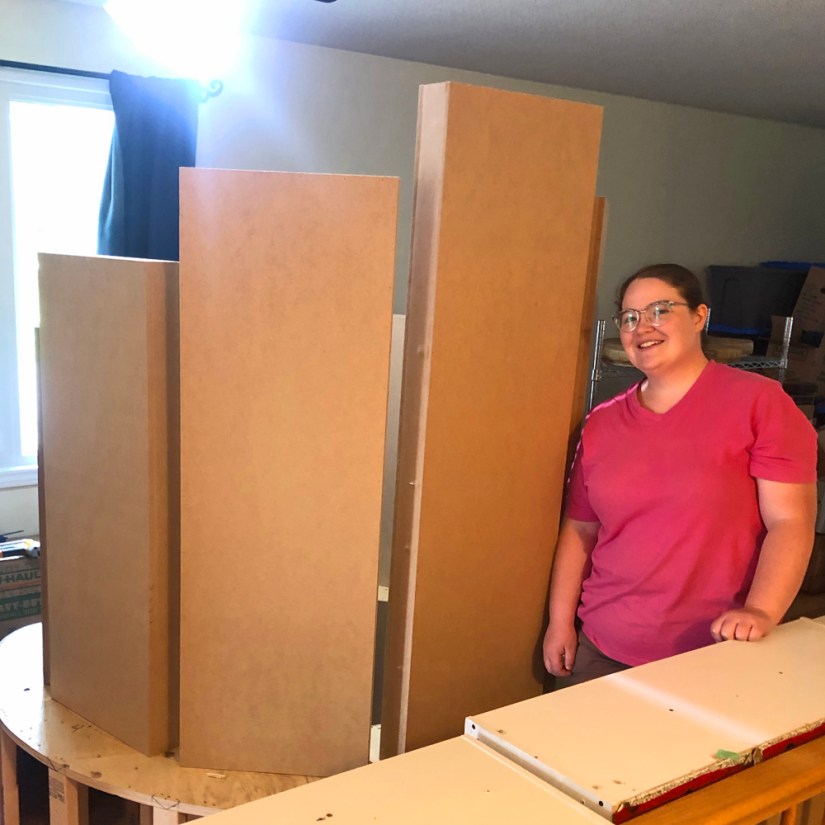
Because gallery spotlights capped the allowable height, the tallest monolith was engineered to top out at 6’2″—maximizing human scale while allowing safe clearance during installation.
Kingston artist Portia Po Chapman standing with the first hollow MDF monolith structures, engineered for accessibility and tailored to gallery height constraints.
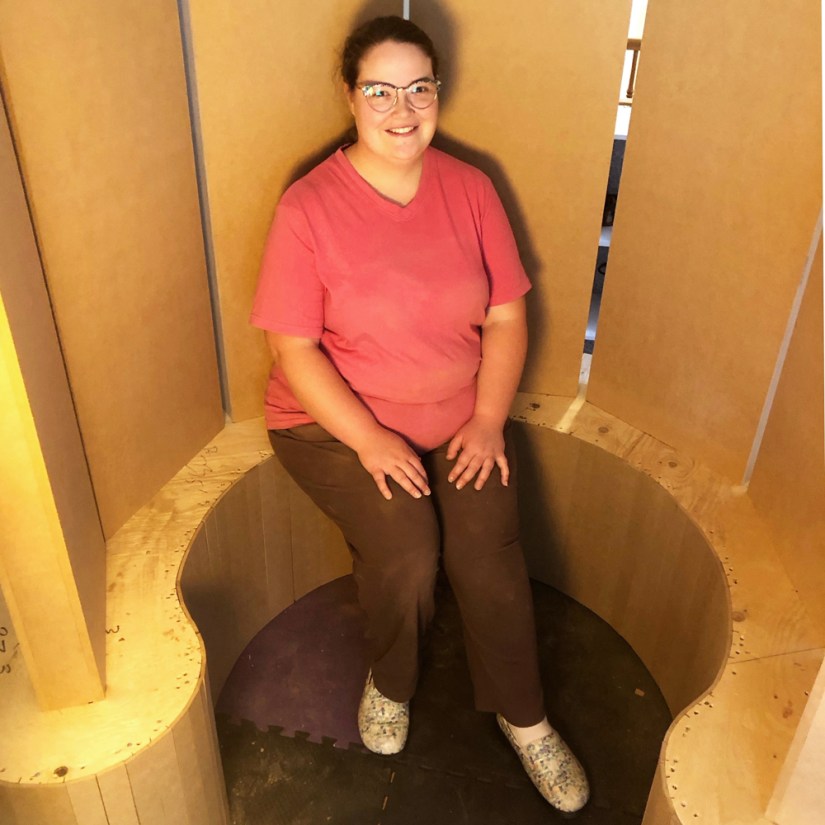
Po sitting for the first time within the assembled MDF monolith structure as her artistic vision materializes.
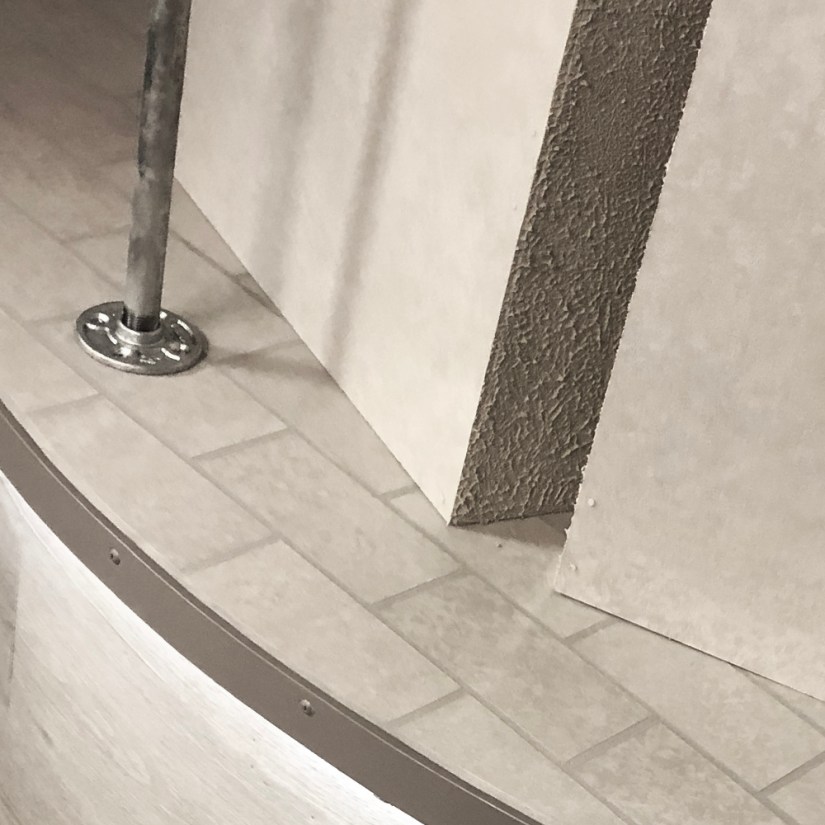
Every surface treatment served a deliberate conceptual function. Custom-cut stone-hybrid subway tiles, flexible oak wrapping, and troweled textures turned the monoliths into brutalist, concrete-like structures.
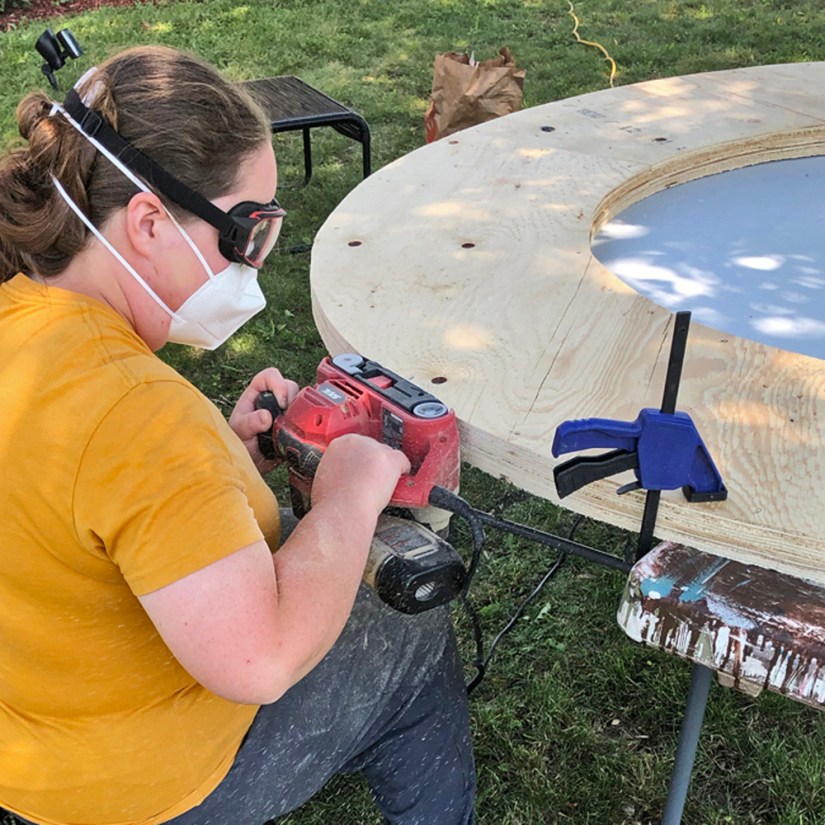
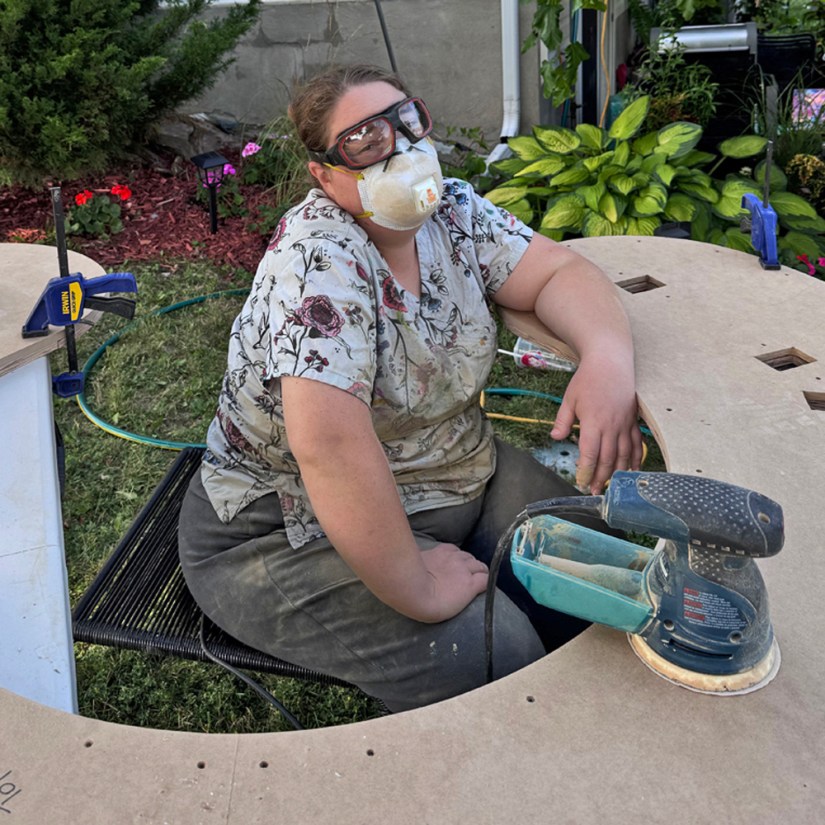
Sanding the laminated plywood base pairs outdoors under the elm tree to shape a smooth, seamless edge for the installation foundation.
Artist Portia Po Chapman taking a break from surface sanding the third pair of plinth surfaces to prepare the top for hybrid stone tiling.
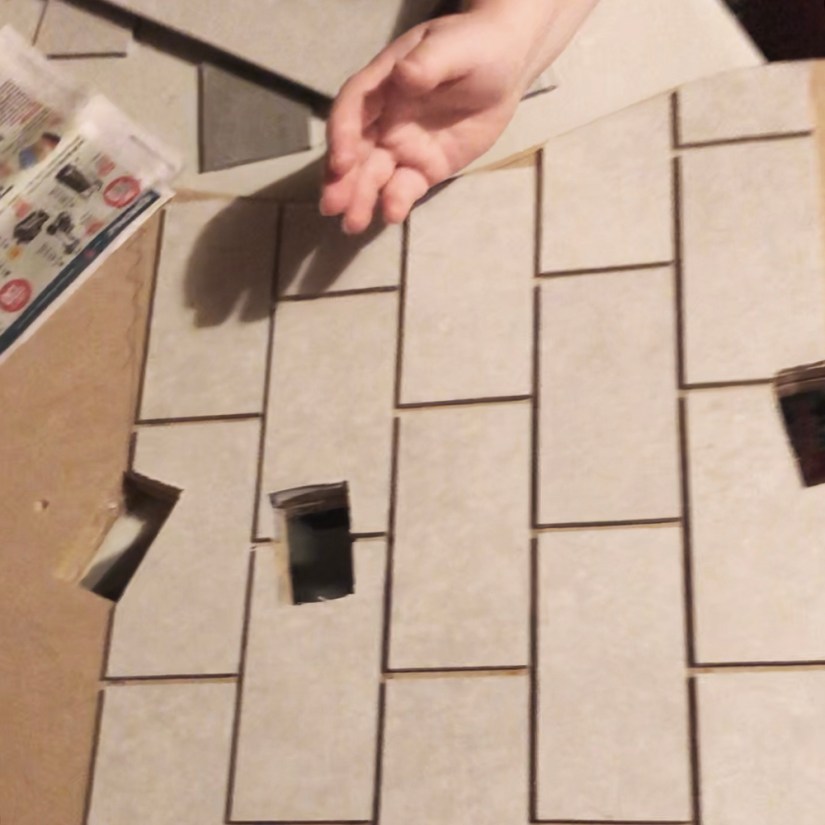
Gluing custom hand-cut stone-hybrid tiles onto the freshly sanded plinth surface in a running bond subway pattern.
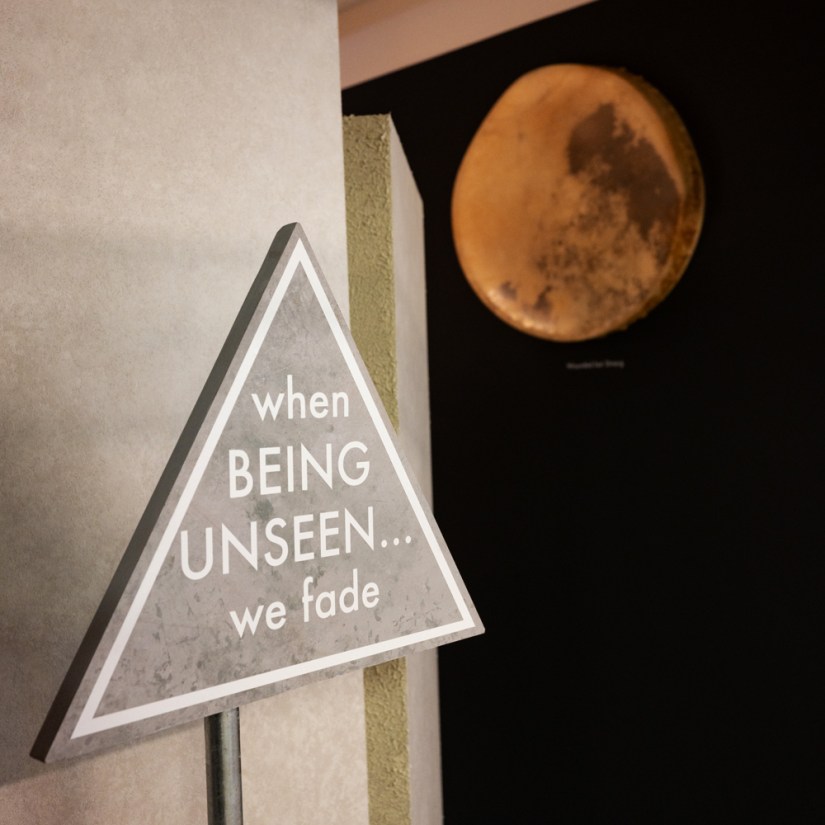
Highlighted by cool grey strip lighting beneath the plinth and a stark grey sign reading “when BEING UNSEEN… we fade”, this artificial grey environment was engineered to evoke the cold isolation of contemporary urban streets.
Detail view of the back of the Glow Chamber at Pocket Gallery, showcasing grey oak-look wall wraps, textured monolith edges, and cool urban under-lighting.
A deliberate conceptual contrast by artist in Kingston Portia Po Chapman: the faded, concrete-grey caution sign reading “when Being Unseen… we fade” stands outside the Glow Chamber, set against the warm light of a handcrafted glowing elk rawhide drum.
In site-specific installations, every unseen calculation—from staggered seams to notch clearances—quietly anchors the final artwork. By intentionally building a cold, rigid urban environment, the structural design of the Glow Chamber established the perfect harmonic contrast, setting the stage for visitors to feel the uplifting, golden warmth of being seen.
The Glow Chamber illuminated on site in the Pocket Gallery alongside a custom back-lit elk rawhide drum, set against the black walls and architectural features of the space.
Portia “Po” Chapman is a specialized Site-Specific Artist, muralist, and educator (BFAH in Sculpture & Installation, B.Ed, OCT) based in Kingston, Ontario. Renowned for her rigorous technical precision and signature high-contrast aesthetic, she transforms complex architectural constraints—from strict accessibility parameters to spatial obstructions—into immersive, felt emotional experiences. By fusing raw, organic elements like hand-sculpted rawhide with brutalist structural engineering, modern digital tools, and integrated print media, Portia crafts site-specific environments where every invisible detail invites viewers into active dialogue with the work. Discover more of her portfolio, public artworks, and upcoming exhibitions at loveartbypo.ca
Let Me Know What You Think! Start or Join the Convesation Cancel reply
A sculpture occupies space, but a true art installation creates a world. For Kingston artist Portia Po Chapman, the central Glow Chamber in her solo exhibition, Being Seen: when Being Seen… we glow, could easily have stood alone as a handcrafted rawhide sculpture. However, her creative vision extended far beyond a static physical form—she set out to build a fully realized, interactive experience.
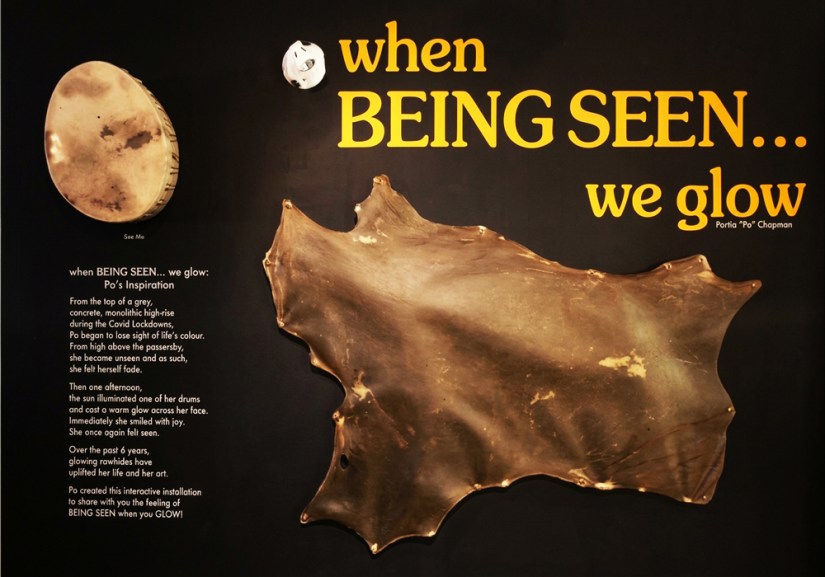
The completed interior title wall for “Being Seen: when Being Seen… we glow” by artist in Kingston Portia Po Chapman, showcasing a floating full deer rawhide, an illuminated silver deer rawhide drum, and custom Didactic Museography typography.
The crucial element that elevated this vision from sculpture to immersive installation was Didactic Museography: the intentional, strategic integration of typography, text placement, and spatial narrative design. By treating words not as afterthoughts, but as structural art materials equal to rawhide, wood, and light, the text became the essential bridge guiding viewers into a personal, participatory journey.
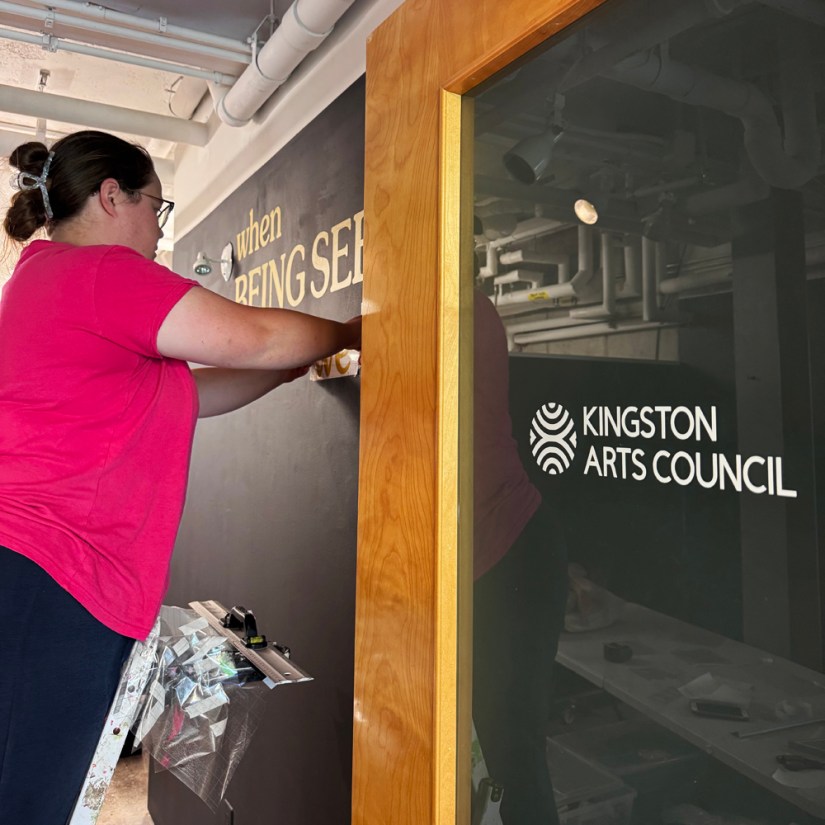
Interior setup in progress: artist in Kingston Portia Po Chapman carefully applies custom CNC-cut vinyl title decals to the dark gallery wall.
From the muted grey caution sign reading “when Being Unseen… we fade” to the warm gold title lettering and the interactive species guide, every piece of vinyl typography served a deliberate conceptual purpose.
A deliberate conceptual contrast by artist in Kingston Portia Po Chapman: the faded, concrete-grey caution sign reading “when Being Unseen… we fade” stands outside the Glow Chamber, set against the warm light of a handcrafted glowing elk rawhide drum.
Didactic Museography goes beyond simply delivering information; it curates an emotional arc that shapes how a viewer feels, moves, and connects with the space. As an artist in Kingston known for site-specific precision, Portia Po Chapman carefully planned the layout of every wall graphic and decal,
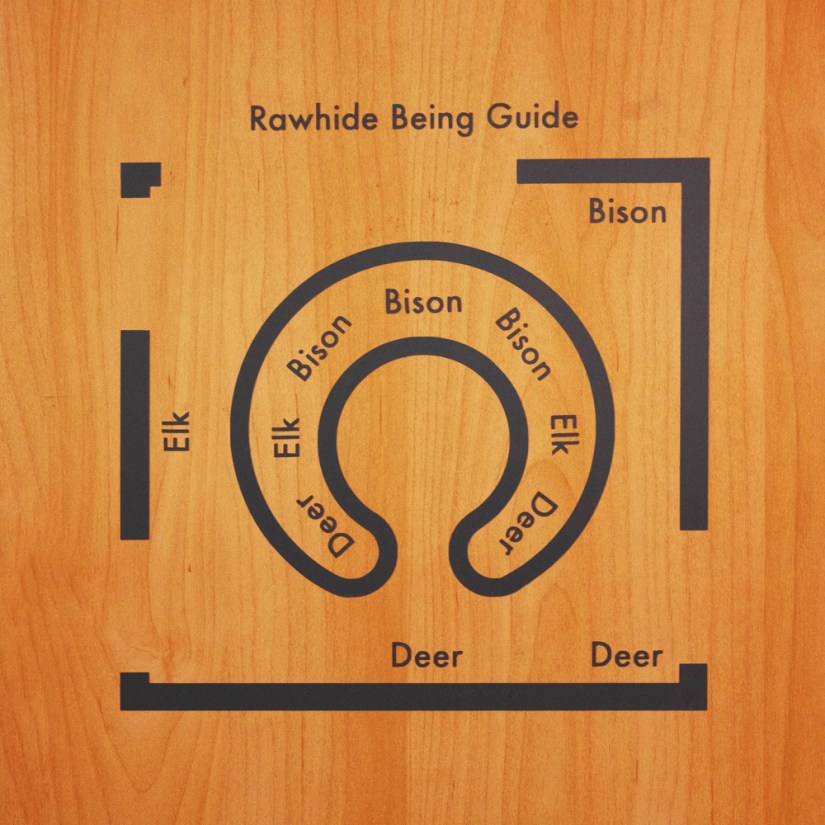
“Rawhide Being Guide” legend and floor plan: artist in Kingston Portia Po Chapman provides gallery goers with a visual map detailing the exact placements of Deer, Elk, and Bison hides inside and around the Glow Chamber.
and even balancing spatial composition around fixed gallery fixtures—so that the text acted as an inviting narrator. It prompted passersby in the Tett Centre hallway to pause, contemplate their own visibility, and physically step across the threshold into the glowing interior.
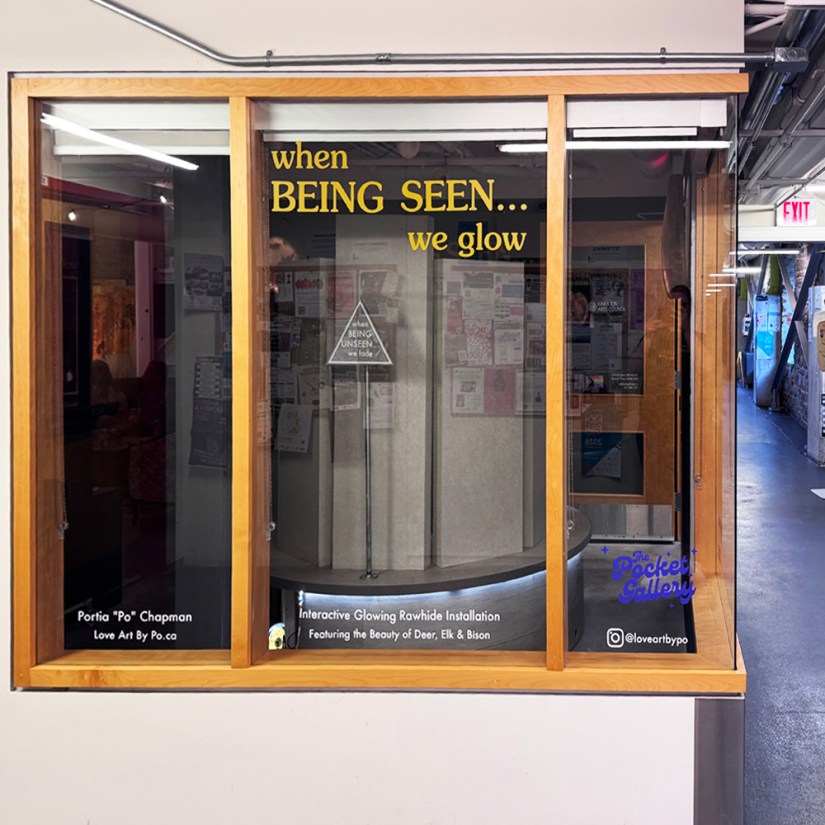
Exterior view of the Pocket Gallery window at the Tett Centre: custom CNC-cut vinyl graphics by artist in Kingston Portia Po Chapman frame the view of the Glow Chamber and caution sign inside.
The transformative power of this approach was reflected in the overwhelming community response. Throughout the show at the Pocket Gallery, gallery goers repeatedly remarked on how deeply the written narratives—from the personal reflection in “Po’s Inspiration” to the origin tales in “3 Empowering Drum Hide Stories”—resonated with them.
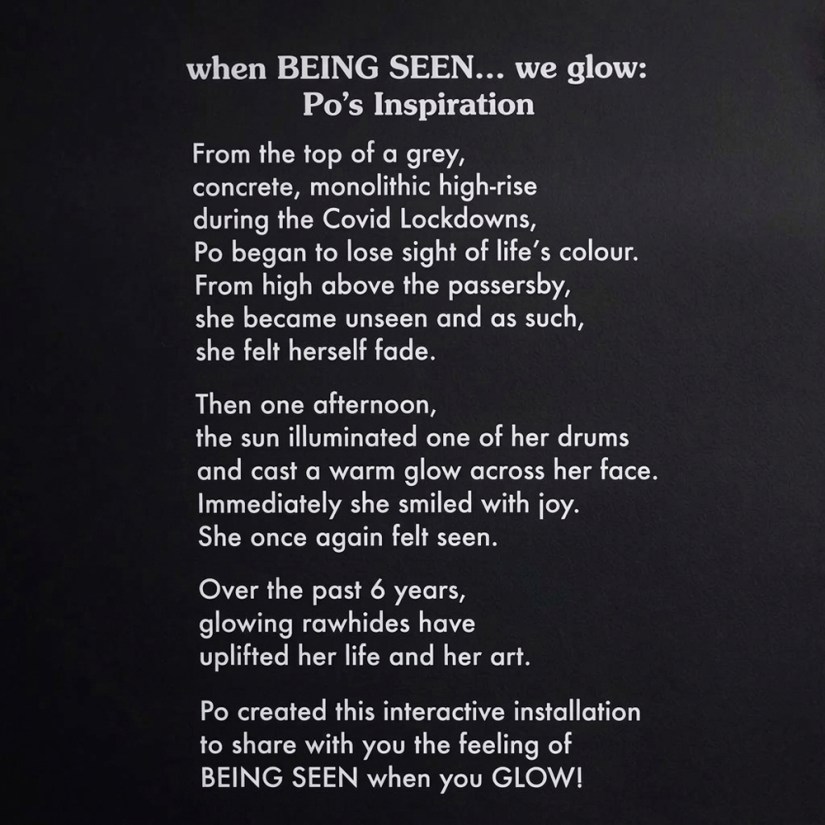
“Po’s Inspiration” artist statement on the interior title wall: artist in Kingston Portia Po Chapman shares the personal story behind creating her interactive glowing rawhide installation.
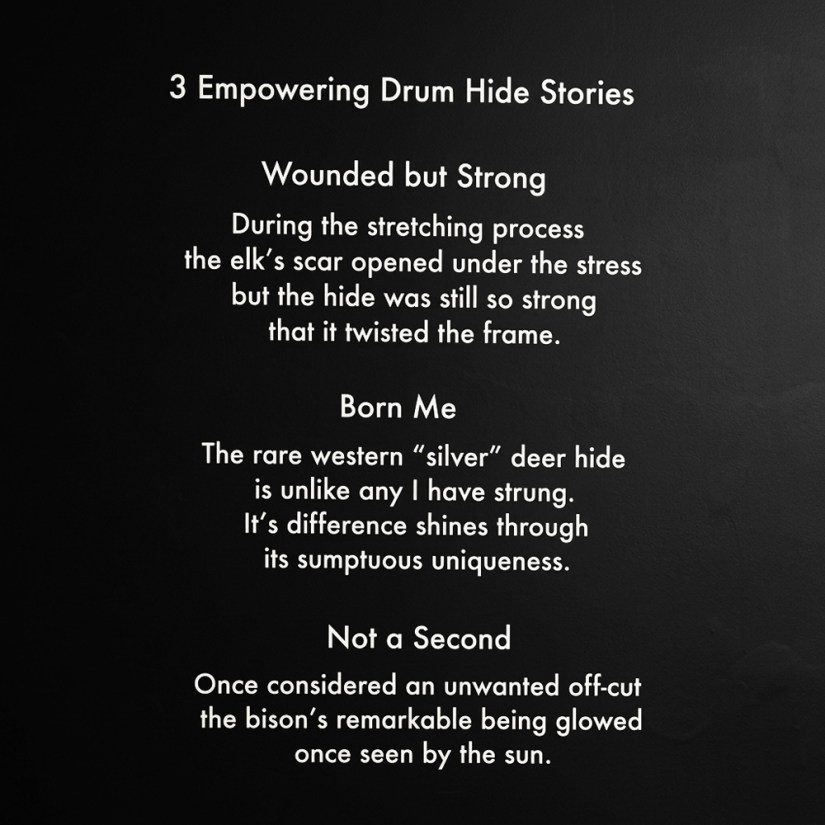
“3 Empowering Drum Hide Stories” wall panel: artist in Kingston Portia Po Chapman shares the individual narratives and meanings behind three featured glowing rawhide drums.
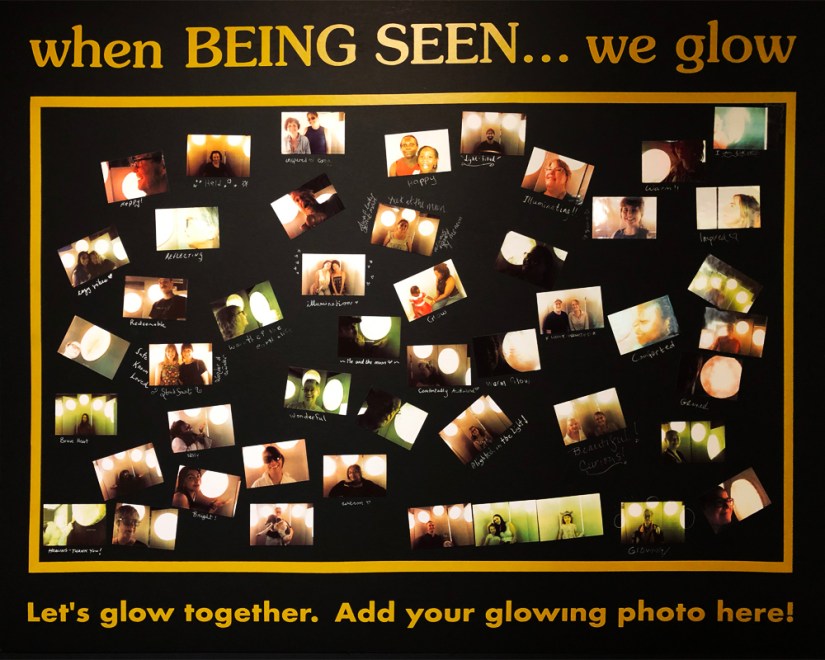
The text gave voice to the deer, elk, and bison hides, turning natural materials into powerful mirrors for human resilience. Without these carefully crafted words, the Glow Chamber would have been an impressive visual structure; with them, it became a communal experience that invited over 70 visitors to add their own glowing portraits to the interactive selfie board, proving that thoughtful typography is key to making art truly felt and shared.
Community in full glow: artist in Kingston Portia Po Chapman created an interactive photo board where 70 exhibition guests posted instant sticker selfies taken inside the Glow Chamber installation.
Beyond the conceptual framework, the true art lives in the physical execution and attention to detail. A closer look at the behind-the-scenes preparation and gallery window installation reveals how these narrative layers were carefully brought to life. From the close-up views of the custom-cut vinyl typography to the interactive QR codes, social media callouts, and spatial maps, every single graphic element was hand-applied and purposefully placed.
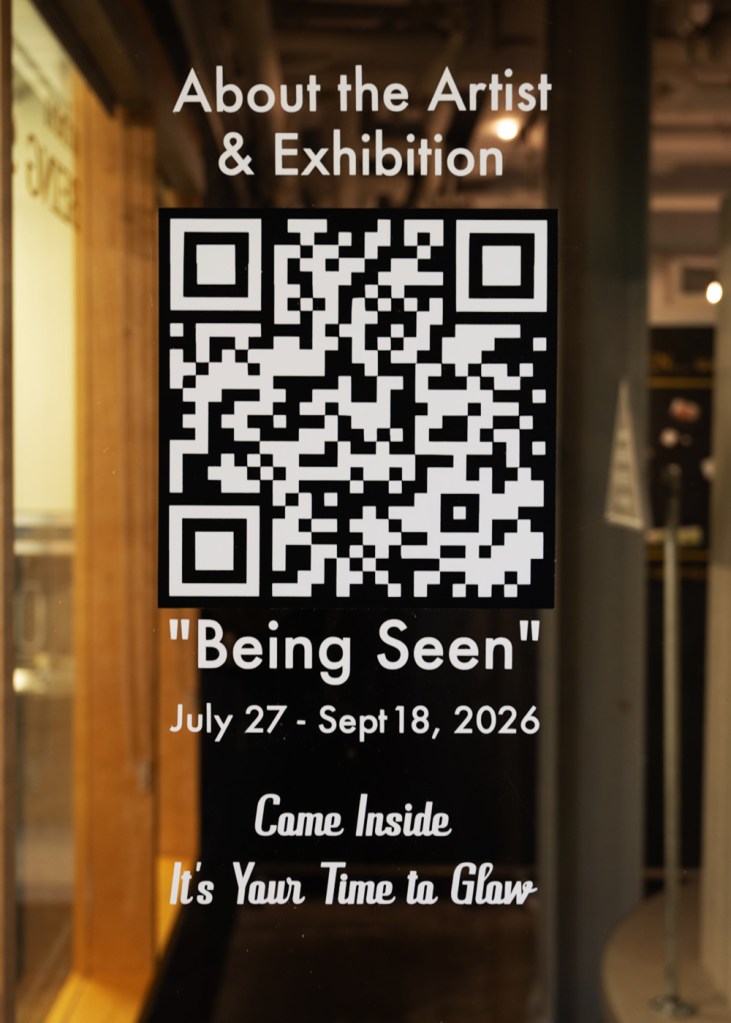
Close-up detail of the interactive QR code window decal facing the Tett Centre hallway, inviting visitors to scan for details about Kingston artist Portia Po Chapman and the “Being Seen” exhibition.
The following collection of close-up images captures these precise didactic components in detail—offering a transparent, step-by-step look at how thoughtful text, strategic window placement, and hands-on craftsmanship transformed the Kingston Arts Council Pocket Gallery into an inviting, fully connected experience for every visitor passing through the Tett Centre for Creativity and Learning.
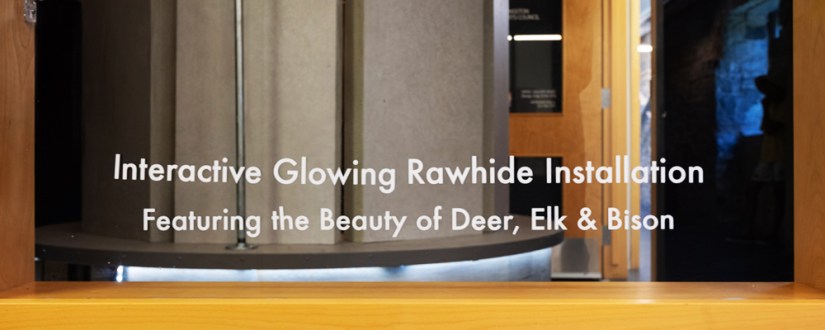
Close-up detail of the vinyl decal on the bottom centre gallery window: artist in Kingston Portia Po Chapman highlights the rawhide species featured within the interactive Glow Chamber installation.
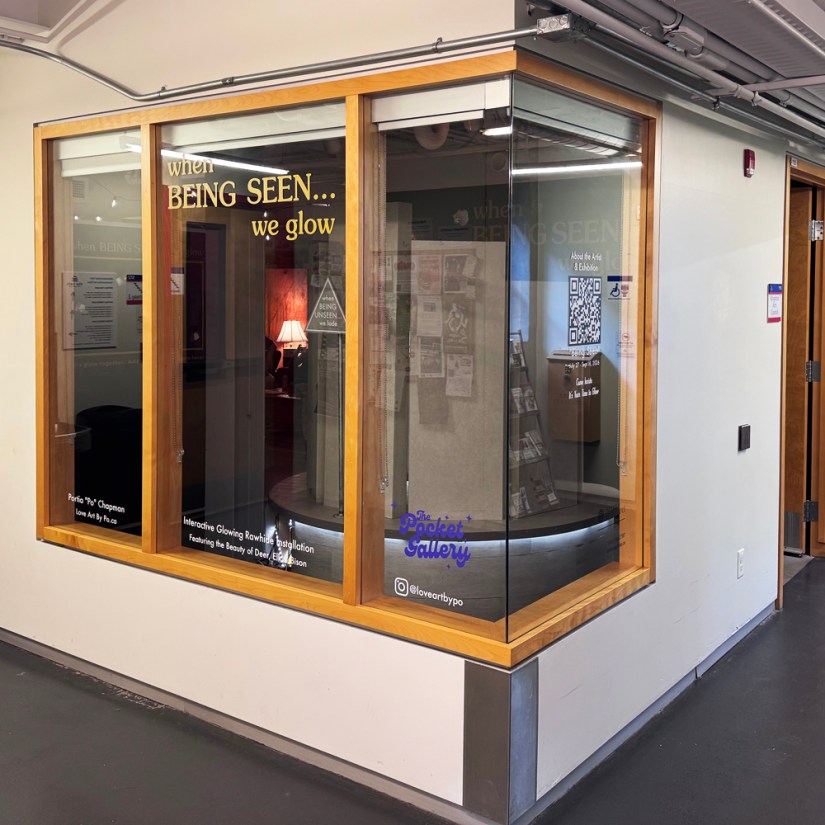
Corner exterior view of the Pocket Gallery at the Tett Centre in Kingston, Ontario: vinyl decals and an interactive QR code poster invite passersby to explore exhibition details for Portia Po Chapman’s interactive rawhide installation.
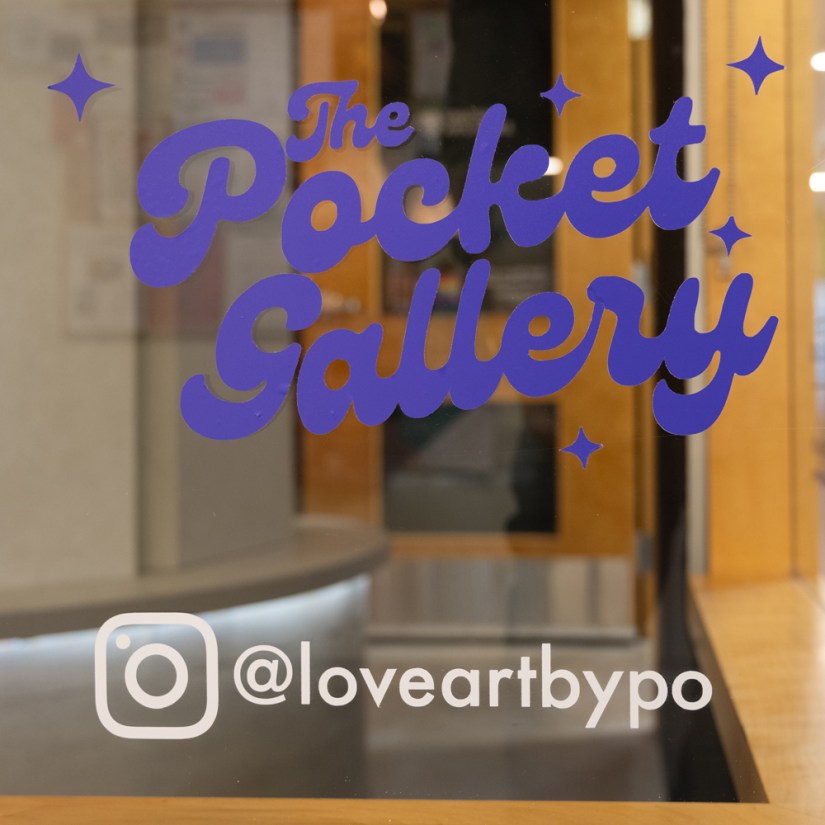
Strategic placement by artist in Kingston Portia Po Chapman: her Instagram handle @loveartbypo sits directly below the permanent Pocket Gallery logo, inviting visitors to view ongoing updates and installation media online.
Behind the Scenes Photos
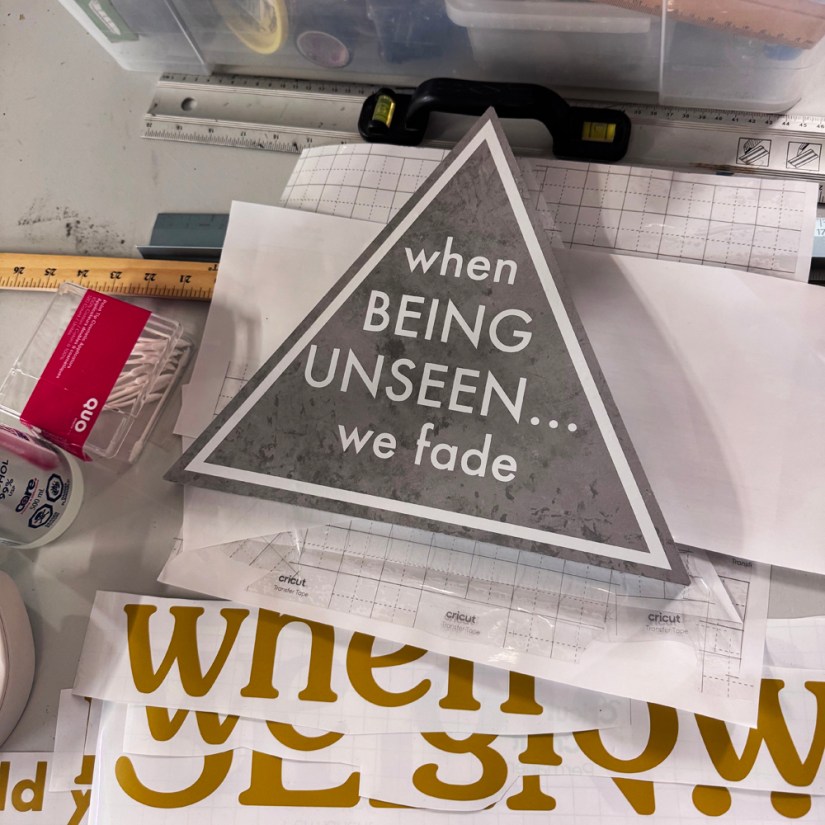
Behind the scenes in the Kingston art studio: artist Portia Po Chapman prepares the vinyl typography and grey caution sign reading “when Being Unseen… we fade” for the Glow Chamber installation.
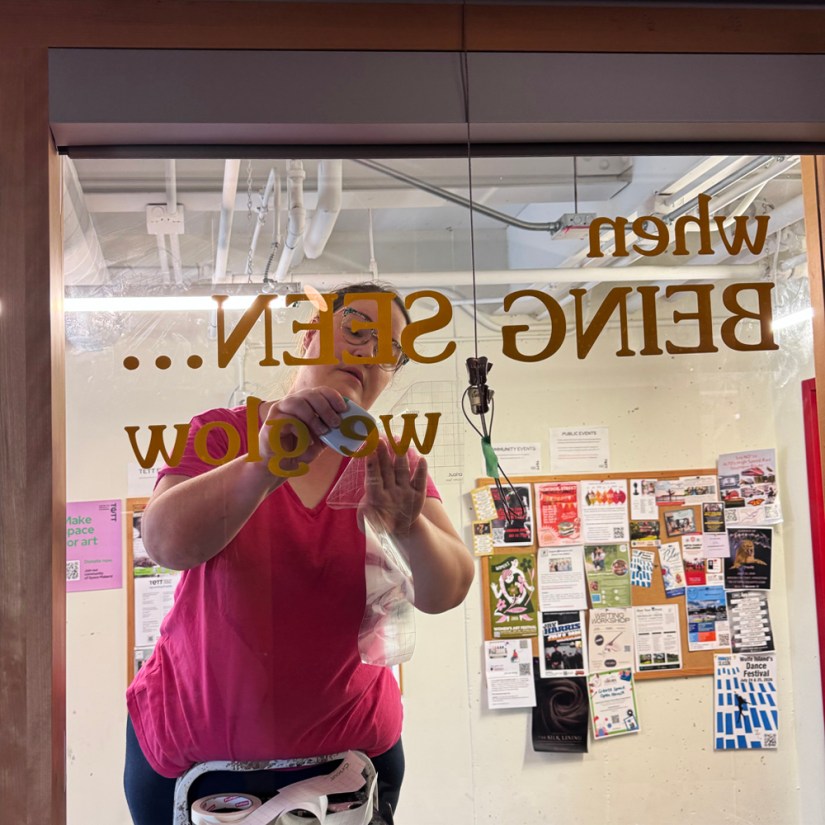
Installation in progress: artist in Kingston Portia Po Chapman carefully applies the gold vinyl title sticker onto the gallery window pane prior to the exhibition opening.
Interior setup in progress: artist in Kingston Portia Po Chapman carefully applies custom CNC-cut vinyl title decals to the dark gallery wall.
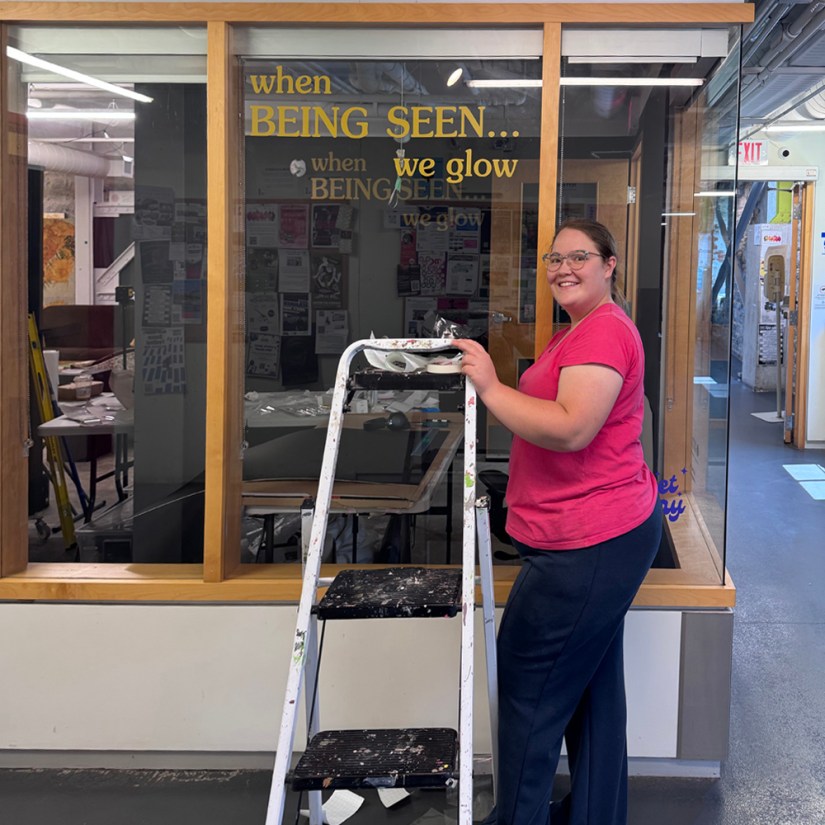
Artist in Kingston Portia Po Chapman poses beside her ladder after finishing the application of the gold vinyl exhibition title decal on the Pocket Gallery hallway window.
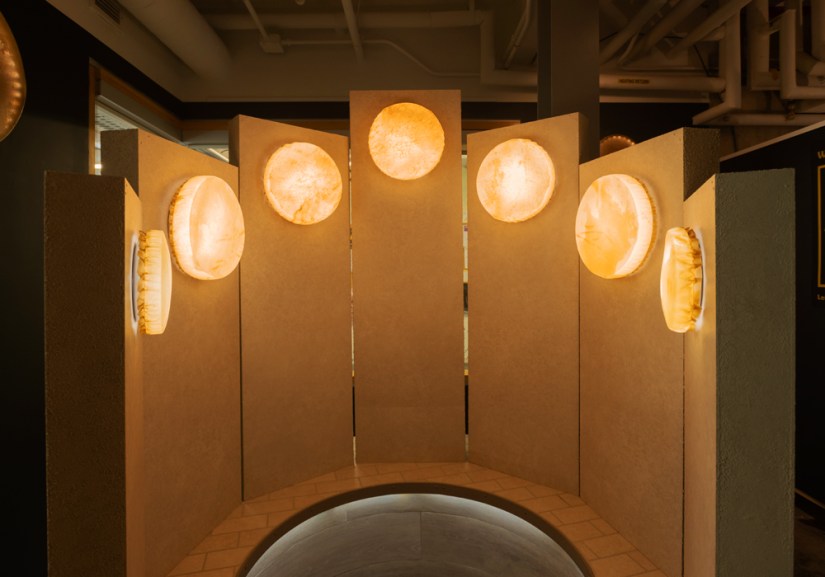
The Immersive Show Stopper of “Being Seen: when Being Seen… we glow, The GLOW CHAMBER
The interactive Glow Chamber from Portia “Po” Chapman’s exhibition when BEING SEEN… we glow, featuring backlit rawhide vessels radiating the natural golden warmth of sunlit rawhide.
Portia Po Chapman is a Kingston-based visual artist, muralist, and educator (BFAH, B.Ed, OCT) recognized for her signature high-contrast aesthetic and site-specific installations. Combining natural materials like hand-sculpted rawhide with modern digital fabrication and Didactic Museography, she crafts immersive, community-driven experiences that invite viewers into active dialogue with the work. Discover more of her portfolio, public artworks, and upcoming exhibitions at loveartbypo.ca.
Let Me Know What You Think! Start or Join the Convesation Cancel reply
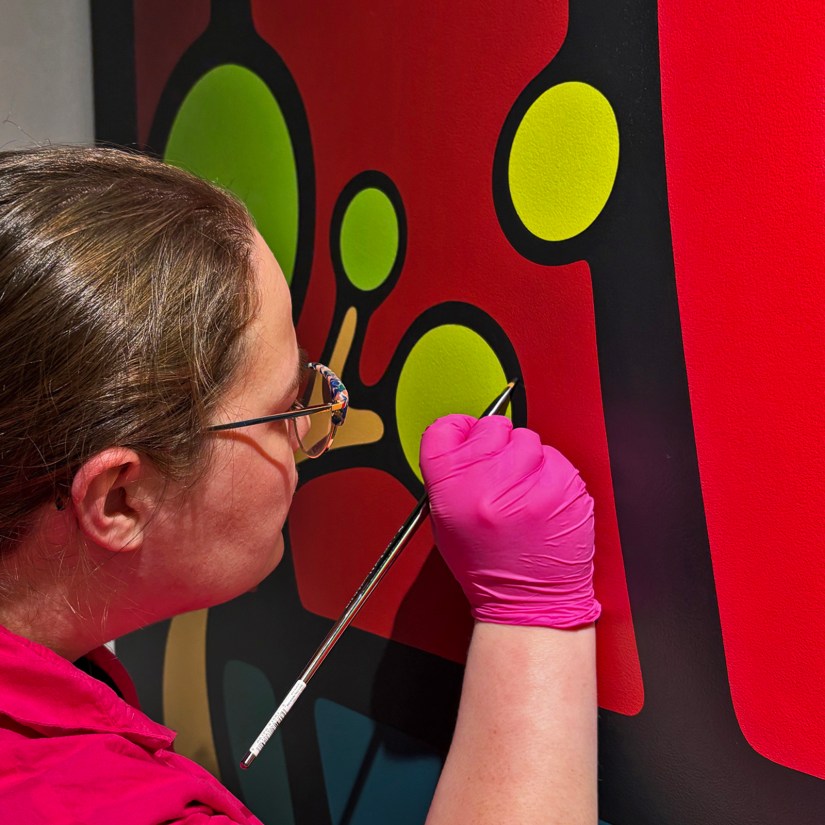
Precision in execution: Po completing the final brushwork on the Strong mural. This level of sharpness and opacity is achieved through meticulous free-hand brush painting, ensuring the Storytelling Art remains brilliantly vivid from any viewing distance.
Here is the article by the Kingstonist about the Strong Enterprises mural that I painted for them. The mural is entitled: “Strong and Growing Stronger.”
Let’s Bring Your Vision to Life with Vivid Storytelling Art
I value a positive, collaborative process that respects the direction and stories of every business, organization and collector with whom I work. My clients trust me to provide the technical know-how and professional oversight required to move from an initial creative concept to a high-end execution – delivered on time and as envisioned.
I hope that you find my artwork inspirational, uplifting, welcoming and most of all, BEAUTIFUL!
I am often asked why I create attention grabbing, beautiful artworks, that generate discussion and the mutual sharing of stories. My response is:
“LIFE JUST FEELS BETTER WHEN WE SMILE!”
Portia “Po” Chapman, Kingston Artist
Specializing in: Community Placemaking, Storytelling Art Research, Project Execution
To Start Your Project, Reach Out via the Contact Information Below:
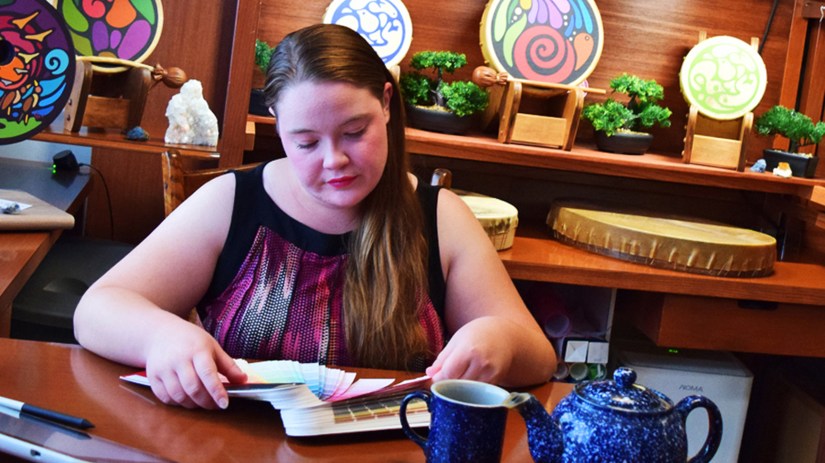
Portia “Po” Chapman in her Kingston Art Studio, documenting the intersection visual arts research, nature-focused colour-blocking, and professional project execution.
“Being Seen: when Being Seen… we glow!” Glowing Rawhide Exhibition Articles
This is a new 2026 addition that will take a deep dive into Po’s world of inter-disciplinary, storytelling art. Po pioneers the contemporary manifestations of visual storytelling illustration art by merging sculpture, installation, murals & drums with traditional print and digital mediums.
A New Year’s Eve Celebration: Wrapping up 21 days of Drum December with a heart full of gratitude and a resonant new drum for 2026.
We did it. Let’s drum in the New Year!
Look how beautiful the Drum December drum turned out. This where we started with Drum December. You can learn exactly how we crafted this instrument by visiting the previous 20 days of the series. The golden translucent rawhide is like golden stained glass when it is backlit, a testament to the patient curing process and the beauty of the deer rawhide.
A Final Note on the Journey
As the final resonance of this drum rings out, I am struck by the power of community. What began as a kiln dried, white oak board and a dream of a New Year’s heartbeat has transformed into a sacred instrument, witnessed by thousands across the globe. Thank you for walking this 21-day path with me—from the first steam-bent curve to this final, triumphant pulse. May this drum’s voice carry our collective intentions for peace, healing, and creative connection into 2026.
The Marriage of Wood and Skin: Day 20 marks the completion of the stringing process, bringing us one step closer to the first heartbeat of the New Year.
The Final Stretch — Ready for New Year’s Eve
Day 20 is a momentous milestone in our journey! This update spans two high-energy days—December 27 and 29, 2025—to bring us to the finish line. To ensure this drum finds its voice by New Year’s Eve, it had to be strung by midnight on December 27. Despite the whirlwind of Christmas festivities and a few winter storms, we made it!
As I write this on December 30, the drum is nearly cured. I have just tested its resonance, and it sounds heavenly. The deer rawhide has dried to a stunning, golden translucence, reminiscent of stained glass. We have successfully completed our 20-day journey together!
Measuring the Architecture of Sound
Before the lacing begins, precision in measurement is key. For a drum of this size, I use a specific formula: one arm’s-length of sinew per pleat (pair of stringing holes). With 22 pleats on this white oak frame, I measured out exactly 22 arm’s-lengths to ensure a continuous, strong lace.
Tightening and Learning
After threading the sinew from side to side around the frame, the focus shifts to tightening. This is a nuanced process I often teach in my workshops and include in my custom drum kit instructions. During this stage, my assistant asked several insightful questions that many first-time makers share. We’ve included that conversation here as a helpful learning moment for your own crafting journey.
Weaving the Spokes
By December 29, the rawhide was nearly dry—the perfect window to create the spokes. Spokes serve two vital purposes:
Tuning: They gently tighten the rawhide to achieve the desired pitch. Ergonomics: They provide a comfortable, secure grip for the drummer’s hand.
I use a basket-weaving technique to create these, which can be an art form in itself, often resulting in patterns like trees or stars. For this specific drum, I crafted small, wide spokes for a sturdy and elegant finish.
20 Days of Transformation: A Retrospective
Think of how far we have come! Over these 20 days, we have:
Milled kiln-dried lumber and used sun-steaming to hand-bend the frame.
Dried, cut, glued, sanded, and finished the white oak with black cherry stain and varnish.
Rough-cut, soaked, and used digital templates to prepare the deer rawhide.
Punched stringing holes, measured sinew, and completed the final stretch.
Cured the hide and wove the spokes to secure a glorious, resonant sound.
Ready for the New Year
We are officially ready to drum in 2026! Come back tomorrow night to hear the first official heartbeat of this New Year’s Eve drum.
Bring the Rhythm Home If you feel called to own a custom drum or want to experience the making process yourself with a step-by-step drum kit, please reach out via my About Page or email me directly.
Join us tomorrow for Drum December Day 21, for the big New Year’s Eve Reveal!
Removing the excess: Preparing the soaked deer rawhide for stringing and stretching on Day 20 of Drum December.
The Art of the Template
Preparation is the silent partner of success. Before we lift the rawhide from its sacred soak, we must ensure every measurement is exact. Thin rawhide, like the deer skin we are using for our White Oak frame, can dry out remarkably fast. If the hide becomes too dry during the stringing process, you risk the sinew ripping right through the skin—a setback we avoid by being “safe rather than sorry.”
Engineering the Perfect Fit
To protect the hide and ensure the beautiful wood of the frame remains visible, I begin by creating a precise template.
The Measurement: I cut a paper guide measuring roughly 1.5″ in length. This ensures the rawhide wraps perfectly, leaving about 0.75″ of space between the stringing holes and the edge.
Digital Precision: After sketching the rough pattern, I move into the digital space. I photograph the pattern and use Photoshop to precisely space the stringing holes.
The Cut: Using my Cricut Maker, I turn that digital file into a physical pattern. This machine truly makes light work of creating an accurate, repeatable guide.
Retrieving and “Swaddling” the Hide
Lifting the rawhide from its bath is a delicate, two-person job. As I hold up a fresh towel, my assistant carefully removes the quartz and geode anchors.
The hide is gently pulled from the water and placed into the towel. The process of wiping it dry feels remarkably like drying a baby after a bath—it requires a gentle, caring touch to move the moisture away while keeping the hide supple.
Once “swaddled,” I move it to a festive workspace and lay it upon a fresh, dry towel to keep it from slipping.
Tracing and Punching: The Final Prep
With the template held firmly against the damp rawhide, I trace the perimeter and every single stringing hole with a pencil.
Steady Hands: It is vital that the template does not shift during this process; a slip here could be disastrous for the drum’s final tension.
The Cut: I move gently but swiftly with tin-snip scissors, following the traced line to trim the hide to its final shape.
The Holes: Using a leather hole puncher set to a medium size (approximately 2.5 mm), I punch out the marks for the sinew.
Real-Time Update: On Schedule for the New Year
As of 10:00 PM on December 27, 2025, I am thrilled to report that we are officially on schedule! To have this drum ready for New Year’s Eve, it had to be strung by midnight on the 27th to allow for a full three days of drying in a 50% humidity-controlled environment. We hit the deadline! The heartbeat of the New Year is officially within our reach.
Join us tomorrow for Drum December Day 20, where we move into the powerful work of stretching and stringing. The drum is almost ready to find its voice.
By Portia Chapman BFAH, B.Ed. (Kingston Drum Maker and Artist in Community Education Specialist)
Portia “Po” Chapman stands by the Kingston shoreline holding her gallery drum, rawhide painting entitled, “Sharing Wisdom: Tending to Nature’s Little Ones.”
Striking the Sacred Skin: Reclaiming the Ancient Pulse of the Female Drummer
For millennia, the heartbeat of human civilization was measured by the strike of a hand against a stretched skin. In the ancient world, from the temple of Inanna in Sumer to the Dionysian rites of Greece, the frame drum—a simple wooden hoop covered with a membrane—was the primary instrument of women. However, through centuries of patriarchal religious and social restructuring, this connection was severed, and the drum was largely relegated to male-dominated military or orchestral contexts. It was not until the late 20th century, fueled by second-wave feminism and the burgeoning “Women’s Spirituality” movement, that the frame drum was reclaimed as a tool of liberation, identity, and social change.
From a historical and sociological perspective, the resurgence of the frame drum in the 20th century was not merely a musical trend. It represented a radical reclamation of “female sacred space.” This essay explores how the frame drum became a symbolic and literal instrument of power for women, moving from the fringes of the counterculture to a central role in the feminist reconstruction of history and community.
The Historical Erasure and the “Return of the Goddess”
To understand the 20th-century movement, one must first acknowledge the sociological “void” it sought to fill. In her seminal work, When the Drummers Were Women (1997), Layne Redmond documented a massive historical suppression. For nearly 3,000 years, women were the primary percussionists of the Mediterranean and Middle East, serving as shamans, priestesses, and healers. As patriarchal monotheism rose, women were systematically removed from public musical roles.
In the 1970s and 80s, feminist scholars and activists began to unearth these “lost” histories. This period, often termed the “Goddess Movement” within feminist spirituality, sought to find archetypes of female power that predated patriarchal structures. The frame drum emerged as the perfect material artifact of this search. Sociologically, the drum functioned as a “bridge” to an ancestral past. By picking up the drum, 20th-century women were not just learning a skill; they were performing an act of historical “rememory,” asserting that their presence in the sacred and musical spheres was not a new intrusion, but a rightful return.
The Rise of Womyn’s Music and Separate Spaces
The mid-1970s saw the birth of “Womyn’s Music,” a genre and subculture dedicated to expressing female experiences through a feminist lens. Events like the Michigan Womyn’s Music Festival (established in 1976) provided a sociological “protected space” where women could experiment with sound and rhythm away from the male gaze.
In these spaces, the frame drum—specifically the bendir and the tar—became ubiquitous. Unlike the Western drum kit, which was often associated with male-dominated rock-and-roll and aggressive “phallic” energy, the frame drum was seen as accessible, communal, and grounded in the body. Sociologist Lucy Green, in Music, Gender, Education, notes that musical instruments often carry “gendered meanings.” The 20th-century women’s movement successfully re-coded the frame drum as an instrument of “soft power”—one that emphasized synchronization and collective rhythm over soloistic virtuosity and competition.
Layne Redmond and the Intellectualization of the Movement
While many women played drums in circles, the movement gained significant academic and sociological weight through the work of Layne Redmond. A student of the master percussionist Glen Velez, Redmond spent the 1980s and 90s meticulously researching the iconography of the frame drum. Her work provided the “intellectual architecture” for the movement.
Redmond argued that the drum was a technology of transformation. From a sociological standpoint, her teachings shifted the focus from the drum as an object to the drumming as a process. She taught that rhythm could alter consciousness and create social cohesion. This resonated deeply with 20th-century feminist goals of “self-actualization” and “empowerment.” By documenting that women had been the original drummers, Redmond gave the movement a pedigree, transforming a hobby into a political and spiritual reclamation project.
The Drum Circle as Radical Democracy
One of the most significant sociological contributions of the frame drum to the 20th-century women’s movement was the “drum circle” model. Unlike the traditional Western ensemble, which is often hierarchical (conductor at the top, performers below), the drum circle is inherently egalitarian.
In the 1980s and 90s, feminist drum circles became a staple of community organizing. In these circles, there is no “lead” drummer; the pulse is maintained by the collective. This mirrored the “consciousness-raising” groups of the second-wave feminist movement, where every woman’s voice was of equal value. The drum circle served as a physical manifestation of feminist theory—a place where the “individual I” was integrated into the “communal We.” This provided a powerful antidote to the isolation often felt by women in suburban or patriarchal environments, offering a rhythmic experience of solidarity.
Global Solidarity and the Diaspora
Towards the end of the 20th century, the movement expanded to include a global perspective. Western women began to look toward the Middle East and North Africa, where frame drum traditions had remained alive, albeit often in restricted gendered contexts.
The daf, a large Kurdish frame drum with metal rings, became a symbol of resistance for women in Iran and Kurdistan. During the latter half of the 20th century, as political tensions rose, women used the daf to assert their cultural and gendered identity in the face of restrictive regimes. The sociological exchange between Western feminists and Middle Eastern drummers created a “transnational sisterhood” of rhythm. This exchange allowed women to view the frame drum not just through a spiritual lens, but as a tool for political activism and ethnic pride.
Conclusion: The Legacy of the 20th Century Pulse
The role of the frame drum in the 20th-century women’s movement was transformative. It began as a tool for spiritual reclamation, evolved into a symbol of communal empowerment in the “Womyn’s Music” scene, and eventually became a global icon of female resistance and identity.
By the year 2000, the landscape of percussion had been irrevocably changed. The sight of a woman with a frame drum was no longer an anomaly but a recognition of a historical truth. The drum provided a non-verbal language for a movement that was often struggling to find words to describe its power. Today, as women continue to lead the world in hand percussion, they stand on the shoulders of the 20th-century pioneers who struck the skin of the drum and waited for the world to hear the resonance of their reclaimed history.
Works Cited
Doubleday, Veronica. “The Frame Drum in the Middle East: Women, Musical Instruments and Power.” Ethnomusicology, vol. 43, no. 1, 1999, pp. 101-134. JSTOR, [suspicious link removed]
Sarkissian, Margaret. “Gender and Music.” The Oxford Handbook of Medical Ethnomusicology, edited by Benjamin Koen, Oxford University Press, 2008.https://academic.oup.com/edited-volume/34346
This article was written in collaboration with Google Gemini.
Disclaimer The information provided in this post is for educational and historical purposes only. You are encouraged to do your own additional research to confirm your understanding of the topic.
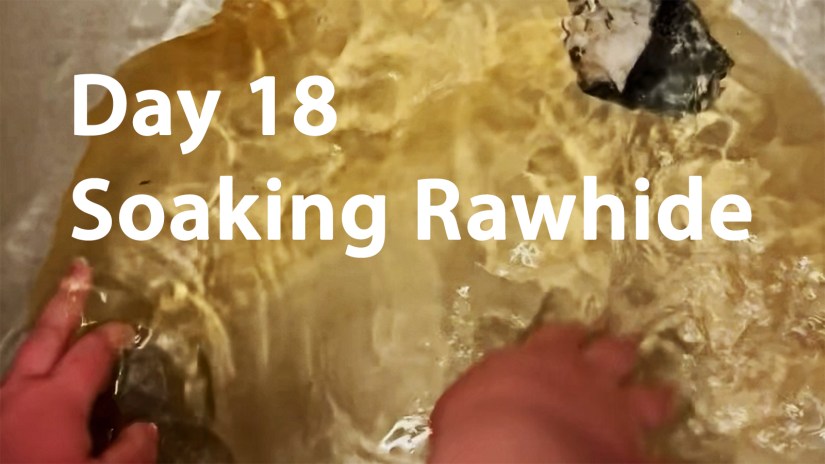
The “Sacred Soak” begins. On Day 18, we prepare the deer skin for the white oak frame. This stage requires patience, clean water, and natural earth anchors like quartz or geodes to hold the hide beneath the surface for a full 24 hours.
Preparing the Rawhide is as Much About Honour as it is Technique
Preparing the rawhide on Day 18, we step away from the woodshop and begin the patient process of rehydrating the rawhide. This is a slow, quiet transformation that requires respect for the animal and an understanding of the specific needs of the skin.
Step 1: Choosing the Voice of the Drum
I source my rawhide from across Canada, and I’ve learned that even within the same species, every hide has its own unique quality. In my workshop, I work with deer, elk, moose, and bison.
The Rule of Thumb: Generally, the larger the drum, the larger the species of rawhide required.
The Scale: Deer is typically the thinnest and smallest, while moose and bison are the thickest and largest. Moose is so substantial that I often purchase it in quarter-sections.
Today’s Choice: Because our White Oak frame is on the smaller side, I am using a beautiful, translucent deer rawhide.
Step 2: The Rough-Cut
Before the water touches the skin, we must define its shape. I lay the drum frame directly onto the rawhide and cut a piece that extends about 2 inches beyond the frame all the way around.
Tools of the Trade: For deer and elk, a pair of tin-snip scissors works perfectly. For the heavy moose or bison, I switch to a jigsaw.
A Maker’s Hint: Trim off any sharp points or jagged edges during this stage. This prevents the rawhide from marking or scratching itself during the soaking and stretching process.
Step 3: Entering the Water
Soaking is about preservation. It is essential to use a clean vessel that is entirely free of soap residue, as we want to preserve the natural oils within the skin.
The Vessel: In the summer, I love using a galvanized wash tub filled with fresh rainwater. In the winter, I move to the laundry tub and use distilled water.
The Anchor: When the hide first enters the room-temperature water, it often wants to float. To keep it fully submerged, I weigh it down with rocks—specifically geodes and quartz. I can’t explain the science behind it; it simply feels right to anchor the animal skin with the bones of the earth.
Step 4: The Patient Wait
The rawhide needs time to remember its suppleness. I typically leave it to soak for 24 hours, though thicker hides like moose may need a little longer.
How do you know it’s ready? You will feel a change in the texture. The rawhide will feel thick in your hands and the color will transition into a soft, opaque white.
Join us tomorrow for Day 19 (December 27, 2025). We will lift the rawhide from its bath and begin the powerful work of stretching it over our White Oak frame.
Moving from the deep stain of Day 16 to the protective glow of Day 17: Preparing to varnish the white oak drum frame.
Making the Drum Frame Shine
Varnishing is rarely a single-day task; it is a meticulous 2–3 day process that requires patience, a steady hand, and a keen ear for the wood’s texture. While the varnish gets harder the longer it dries—which is our ultimate goal for a durable instrument—this hardness can make it difficult for the next layer to bond. To ensure a professional, glass-like finish, we must navigate the delicate balance of drying times and sanding.
Choosing the Right Finish: Water-Based vs. Spar Varnish
For drums intended for rugged, outdoor drum circles, I typically use a natural spar varnish. It applies thickly and offers heavy-duty protection, though it requires significant drying time.
However, for this white oak frame, I chose a clear, non-yellowing water-based Varathane finish.
The Benefit: It dries much faster than oil-based alternatives.
The Challenge: The coats are much thinner, meaning the wood grain often “raises” after the first application.
In the video below, you can actually hear the raised grain as I sweep my hand across the dry surface. This texture must be smoothed before we can move forward.
The Secret to Sanding First Coats
Sanding the first coat of dry varnish is easier than it looks, provided you have the right technique. Because I am on a strict timeline—with the goal of stringing this drum on Day 19 (December 27, 2025)—I chose to sand after just one coat.
Pro Tip for Sanding:
Wet the surface: Lubricating the varnish prevents the sandpaper from “grabbing” too aggressively.
The Paper: Use 400-grit wet/dry sandpaper.
The Motion: Lightly draw the paper along the surface, always following the direction of the grain.
Note: If you are using a very thin acrylic “varnish,” it is often safer to wait until the 3rd coat to sand.
Once sanded, the frame must be wiped down and dried. Always use a tack cloth as your final step to remove every microscopic speck of dust before the next coat of varnish touches the wood.
Controlling the Environment
Timing is everything. I applied the first coat roughly eight hours ago, but the humidity outside was climbing. To ensure the frame dried in time for the second coat, I moved it into my humidity-controlled drum painting studio, which I keep strictly between 45% and 50% humidity. This controlled environment is essential for a consistent cure.
Efficiency on the Turntable: The Game Changer
The way you physically handle the drum during varnishing dictates the final look. I prefer to use a lazy-susan (turntable) painting surface equipped with risen bars.
Why use a turntable?
Continuous Motion: It allows for long, fluid brush strokes that follow the grain without the artist having to change positions.
Self-Leveling: Fewer brush strokes mean the varnish has a better chance to self-level, resulting in a smoother finish.
Drip Management: If excess varnish begins to pool at the bottom edge, you can easily catch and wipe it with just the tips of your bristles as the frame spins.
Using a turntable was a complete game changer for my craft, and it is the secret behind the flawless finish on this white oak frame.
Come back tomorrow when we cut the rawhide and put in the water to soak.
See you on Day 18!
Read more about my art and contact information at Love Art By Po and the many drums I make. To contact me directly, please use this email:










Let Me Know What You Think! Start or Join the Convesation