Behind the Art, Behind the scenes, Drum December, Drum Works, How Po Makes Hand Drums, Kingston Artist, Po's Drum Making Process, Portia Chapman, Uncategorized

Drum December Day 8 – Compressing and Marking the Drum Frame

On Day 8 of Drum December, at the Love Art By Po Kingston Art Studio, Po's assistant compresses the bent oak drum frame while Po marks the board where she will cut it on Day 9.
On Day 8 of Drum December, Po’s assistant compresses the bent oak while Po marks the board where she will cut it on Day 9.

Thank you for watching along as we engage on this drum making adventure. This is the first time that I have made a white oak drum frame and as you can see, it has been an adventure.

On Day 8 of Drum December, my assistant and I prepare the steam-bent white oak which is to be cut off in order to create my preferred drum diameter. The reason I mark the wood this way is because the best sounding drums have the least glue. So by marking it with both ends overlapping, I can judge how large the completed joint will become. I aim for a 2″ drum frame joint when the drum is complete.

For more information about Love Art by Po drums see here.

The Art of Compression Without Snapping the Frame

The process of compression without snapping the frame is exceptionally nuanced and requires much attention. This is the reason why I prefer dry-bending the final bend. The stunning personality of every piece of milled and bent timbre is felt as the compression reaches its limit. I have tried mechanical bending methods but those methods remove the connection with the fibres, and this process needs to be gentle and understanding.

Hugging Drums is Like Hugging Trees

Just because a tree is cut down and made into lumber, it never stops being a tree. I grew up listening to trees. For 18 years of my life, they sheltered me, comforted me, and taught me ancient lessons of beauty and strength. I met my ancestors as they stooped down, inviting me to sing as their branches drummed a beat for me to follow. In my second year of my BFA, the apple tree, that I used to climb as a child, died and began falling to the ground. In a way, I felt to blame for its loss of health.

You see, I left it in the field when I went away to University. So for my first large sculpture installation, I gave it back its voice by sculpting it back to its life giving form – even with birds nests and robin eggs. I could once agin hear it whisper. In the spring, when I returned to the field, the apple tree, at the very top, was growing leaves reaching to the sky. Today, as I make frame drums, it is my way of giving back to the trees – to hear their voices sing again. For me, I feel blessed to be a drum maker. It is a calling. It is LIFE! When shaping drum frames, I hug them just like I hug trees still able to stand. Every drum frame is realized out of love and respect.

To read more about Indigenous relationships with trees, follow this link. But please come back.

Gentleness Guided the Bend

For the compression, you will notice in the video, my assistant has rested the white oak on his lap. By doing so, he makes full contact with both sides of the new drum frame shape. He can feel the oak tighten and relax. He makes it look so easy after many years of woodworking, but this critical step truly requires inner stillness. After all, I learned to hug trees because of him. As he bends it, he can hear the oak say when it has coiled enough. Just as it reaches its chosen limit, I can sense it too.

This white oak, has required understanding more than the other hardwoods. But, when it reached its bend limit, instead of screaming out, it gave a relaxed sigh of relief, like it said: “Finally back home.”
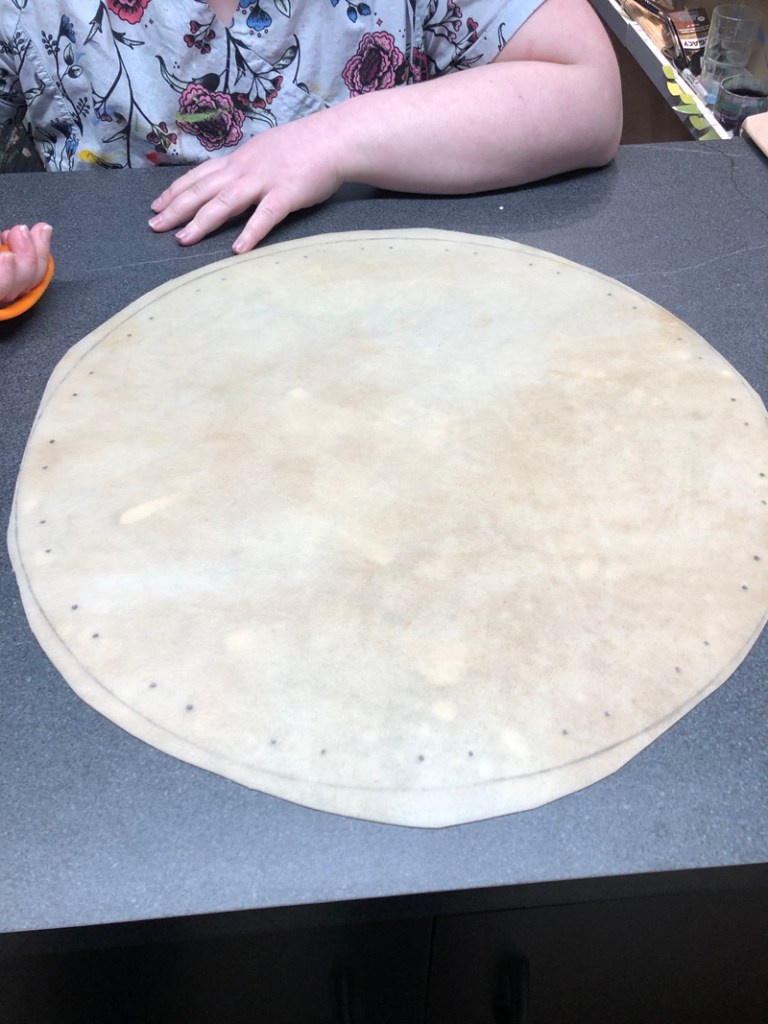
Marking the Board

Due to the length of the video, it is unclear where I marked the piece. In this case, I marked it in two locations. Often, I do one continuous mark across both edges. Again, this is not a science. I wish that I could give a clear instruction, but it really is again about… Knowing the right spot(s).

To read more about my art practise, please click this link:

When I set out to write this post about this seemingly simple bend and mark, it was not my intention to share the spiritual, soulful relationship of bending drum frames. I guess, the ancestors thought that it was a good time to remind us that drum frames and drums are just as much part of this life as they were as trees. Please know that when you buy (adopt) one of the drums that I make, your drum has been nurtured into existence with care.

Come back tomorrow for Day 9 – the painful moment of cutting the frame to size.

See you tomorrow!

📧 Portia@loveartbypo.ca

2 responses to “Drum December Day 8 – Compressing and Marking the Drum Frame”

  1. Drum December Day 10 | How to Glue Before Clamping Drum Frame – Love Art by Po Avatar

    […] To solve this, I developed a proprietary dry-bending technique. The wood is pre-bent and shaped before the glue is ever applied. You can see the foundation of this technique in my previous posts: Day 5, Day 7, and Day 8. […]

  2. Drum December Day 9 | Trimming the Drum Frame to Size – Love Art by Po Avatar

    […] day 8, my trusty assistant compressed the dry bent oak to the size that I wanted for the finished drum to […]

Let Me Know What You Think! Start or Join the Convesation

Behind the Art, Behind the scenes, Drum December, Drum Works, How Po Makes Hand Drums, Kingston Artist, Po's Drum Making Process, Portia Chapman, woodworking

Drum December Day 4 | Finding the Nerve to Bend

Po and her assistant sharing a moment of nervous laughter while preparing to bend sun-steamed white oak for a drum frame during Drum December Day 4 at Po’s Kingston Art Studio.
Po and her assistant share a moment of nervous laughter.

Today, Po takes the next brave step in her sun-steaming white oak experiment — the moment when softened hardwood meets human hands for its very first bend. And this time, the studio was full of laughter, nerves, and a little bit of chaos.

Preparing for the First Bend

After three days of solar steaming and fibre relaxation, the white oak was finally ready to move toward its circular drum shape. But white oak is known for being stubborn — unlike red oak or cherry, which tend to cooperate more easily. This was Po’s very first time attempting to bend white oak, and the air carried that charged mix of excitement and hesitation.

Because the frame pieces were long, Po called in an assistant during this stage. Today, she chose DAD.

Before the camera was rolling, Po looked at her assistant with a theatrical seriousness and joked:

“If it breaks, you can be the one to blame!
I don’t want to be the one who snaps it.”

That set the tone.
The wood was ready.
We… were getting there.

The Moment Before the Bend

As her assistant stood there, holding one end of the hot, hopefully flexible, board trying to work up the courage for the first bend, Po stepped beside her trusty assistant to offer support — and then they immediately broke into laughter. She tucked herself halfway behind his arm, peeking out like someone about to watch a suspenseful scene in a movie.

The cameraperson had already begun losing patience with how long it was taking and insisted that they stop laughing and get serious. She wanted to get the shot. Then she started laughing.

This is the real life of drum frame bending at Po’s Kingston Art Studio — part process, part comedy, all family, ALL ART. Drum making is a beautiful, love-filled-art, and this short video illustrates the joy that cheers out with exuberance of Love Art By Po.

Nervous Laughter, Real Art

In today’s short video, you can witness the exact moment when nervous laughter gives way to determination. Po, her assistant and cameraperson take their positions, breathe through the tension, and finally begin the first coaxing bend of the white oak.

It’s only a small curve — a gentle start — but it marks the beginning of the transformation, from plank to drum. And as simple as it looks, this step matters: the first bend dictates how the wood will behave when the full circular frame is shaped and clamped.

A Family Moment in the Making of a Drum

What the video doesn’t capture — but what filled the studio — is the feeling of teamwork.
Making drums in this space has always been infused with love, humour, and family togetherness. Today was no exception.

Drum-making is not simply about shaping wood at Love Art By Po;
it’s about beautiful, shaping moments — that make everyone stronger.

Making drums has taught Po an incredible life lesson – a circle of wood is like a circle of loved-ones, when you push on them – they get stronger as they find their harmonious tune.

Join us again for Day 5, where Po continues shaping the wood — and the shared moments — that make every drum a circle of strength and love.

📧 Portia@loveartbypo.ca

Let Me Know What You Think! Start or Join the Convesation


How Po Makes Hand Drums, Portia Chapman, Uncategorized

Step-by-Step Guide to Stringing a Rawhide Drum with Portia “Po” Chapman, Kingston

A Photo Reference – Your Step-by-Step Guide

Po Stringing the Spokes of a 14″ Rawhide Drum
Po has Drawn on Shape and String Holes
and is Ready to Cut the Rawhide

In order to cut the shape, I first draw on the pattern. In order to do this, I lay the drum frame on the soaked rawhide and draw the shape with an HB pencil that is not very sharp. The size that I draw on is usually about 2-1/2″ larger all the way around the frame. So for a 14″D frame, I draw on a 19″D shape that is the same shape of the frame. After I do this, I mark the string pleating holes, to be punched out later. This can be a very frustrating step, so I create a paper template and fold the paper to assure that the pleat holes are perfectly symmetrical. I will be posting another how-to concerning this step, but basically the two holes close together are for the pleat and the wider space is where the hide will lay flat against the frame when dry. The number one thing to remember is, the pleats must be evenly spaced and even in number, such as 8, 12, 16 pleats and so on. Keep the string holes about 3/4″ from the edge, all the way around. Premium drums have 16+ pleats. But to begin, I would only use 8 or 12 pleats.

Po Cutting Soaked Rawhide to be Stretched Over
the Drum Frame

Cutting rawhide is fairly easy to do if the hide is thin. In this step-by-step guide, I am using opaque elk because this drum head will be painted. Elk and deer are from the same family. Deer is typically the more thin of the two. I will be posting another guide concerning the different rawhides, but for now a rule of thumb is: 14″D and smaller drums use deer or elk. In the photo at the top of this post, I am stringing a 14″ D drum with a coiled white cedar frame that I have painted. In order to cut thin elk, I find that using kitchen sheers or fabric scissors does a good job.

Po Punching Hole in Rawhide for Stringing the Frame Drum

This step is quite simple, once you have the hole spacing figured out. After I mark on the dots for stringing the drum skin pleats, I use a leather hole punch. There are two hole punches that are readily available to purchase at craft and building supplies stores, they are: ones that work like scissors (as in the photo above), and punches that resemble awls that you hammer through the rawhide. The former is usually strong enough for deer and elk, but the latter may need to be used when punching moose and bison. Punching holes through rawhide is not like punching holes through note paper. Rawhide is fibrous, almost stringy. When it is soaked, it becomes thick and rubbery too. In other words, every hole punches differently from each other.

Po Placing Drum Frame in Centre of Cut Rawhide

Before stringing, I check to make sure that everything fits and is evenly spaced. I place the finished drum frame in the centre of the cut and punched rawhide. To assure that it fits the way I want it to fit, I use a ruler and measure the distances between the frame and the edge. All the way around, there should be the same amount of rawhide outside the drum frame.

Po Stringing Through First Punched Hole
After Measuring Out Sinew String/Lace

I use synthetic sinew for stringing. Some people call the sinew, “string,” and other people call it, “lace.” There are 4 types of string/lace, that are commonly used, they are: sinew (from a deer’s Achilles Tendon), synthetic sinew (buy by the spool), rawhide (thin strips that are cut from the perimeter of a soaked piece of rawhide), and rope for large moose, double headed, pow-wow drums. Measuring out the sinew is a tricky, nerve wrecking procedure. The length you need, needs to be one continuous strip. I measure about 5′ of string for every 1″ of drum frame diameter. So for a 14″D drum, I measure out 70′ of sinew. For a 24″ drum, I measure out 120′ of sinew. Also, just to be safe, I measure out another 20′ of sinew. I ran short once. I never want that to happen again. So now I wheel off extra! “Better safe than sorry,” as they say. This is the number 1 reason I use synthetic sinew. It is the best choice to use 120′ of continuous string.

While Stringing the Drum, Po Measures the Edges
to Assure that the Drum Frame
has Remained in Place

To string a drum, I pull one end of the string through one hole and then through the hole on the exact opposite side. Please note, I pull the entire strand through both holes, leaving about 2′ hanging outside the first hole. Then I continue to do the same, all the way around the drum, crossing the strings through the centre. In the image immediately above, notice that the string passes through the frame-side of the pleats (the two closest hole pairs). This allows for an attractive, elegant pleating of the hide. So when stringing, pass your needle through the outside of the hide, across the inside, and then through the inside to the outside. You’ll catch on. The practical reason I do this is due to physics. By pleating through two holes, rather than one, creates a stronger hold while applying less pulling on the individual holes. If you use one hole, you stand a pretty good chance that the rawhide will rip through. Believe me when I say: “YOU DO NOT WANT THAT!” Please note that I am creating a video to illustrate this more clearly and will be posting in the near future.

After Stringing, Po Creates Spokes to Hang Onto While Drumming

Before I begin with this step, take a look at how the pleats look after the rawhide has been stretched and strung. By stringing through the frame side of the pleats, a uniform pleating is created and the pulled holes are firm and uniform. If you want to make a premium drum, you will need to master this step with this method of drum stringing. Now onto the spokes. From what I can tell, in various traditions, the spokes are formed by wrapping cord, sinew, or deer hide. Locally, they are formed and wrapped using split deer hide. I prefer using the continuous synthetic sinew because it is strong and I prefer the appearance. So what I do is, I wrap the sinew around multiple pleat (forming) strings. As you can see in the photo, I am wrapping 10 strings (5 pleats’ worth) together. I wrap them as far up as I want to achieve the desired tightness of hide. When I reach the furthest point desired, I weave the sinew through the individual strings 3 or 4 times. This creates a basket weave appearance. I do this to anchor the spoke so that it won’t slide out of place. When the weaving is complete, I wind the sinew back down the spoke. Once the centre knot of the strings is reached, I wrap the centre knot a few times and pull it tightly. Then I proceed to create another spoke. Once all 4 spokes have been created, I knot off the string behind the main centre knot. At this point, the drum is complete. I then sit the drum in a dryish (50% humidity) location with good ventilation above and below the drum. In just a few days the drum is ready to be drummed.

Materials you need:
– scissors ($10-$50)
– darning needle ($2)
– pencil ($1)
– paper and tape ($10)
– hole puncher ($30)
– finished drum frame ($100-$300)
– soaked rawhide ($300-$700)
– synthetic sinew ($30)
– patience (priceless)

Go back

Contact Email Confirmation

Hi, Po here! Thanks for sending me an email. I will get back to you within a few days. Have a beautiful day!
Warning
Warning
Warning
Warning.