A New Year’s Eve Celebration: Wrapping up 21 days of Drum December with a heart full of gratitude and a resonant new drum for 2026.
We did it. Let’s drum in the New Year!
Look how beautiful the Drum December drum turned out. This where we started with Drum December. You can learn exactly how we crafted this instrument by visiting the previous 20 days of the series. The golden translucent rawhide is like golden stained glass when it is backlit, a testament to the patient curing process and the beauty of the deer rawhide.
A Final Note on the Journey
As the final resonance of this drum rings out, I am struck by the power of community. What began as a kiln dried, white oak board and a dream of a New Year’s heartbeat has transformed into a sacred instrument, witnessed by thousands across the globe. Thank you for walking this 21-day path with me—from the first steam-bent curve to this final, triumphant pulse. May this drum’s voice carry our collective intentions for peace, healing, and creative connection into 2026.
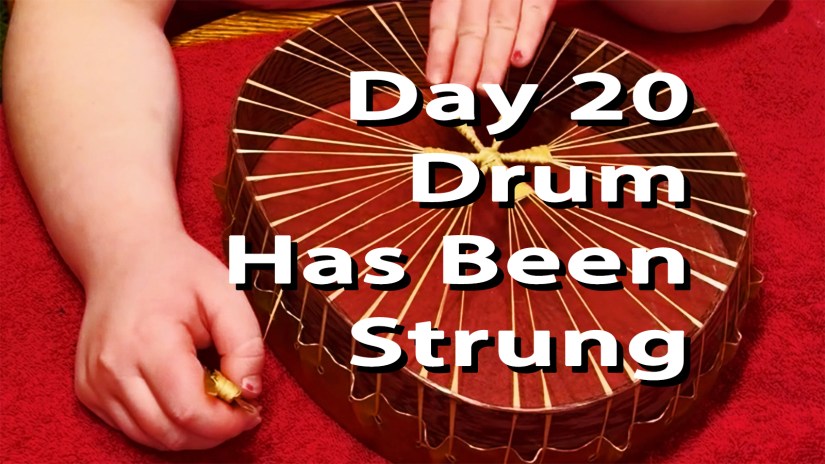
The Marriage of Wood and Skin: Day 20 marks the completion of the stringing process, bringing us one step closer to the first heartbeat of the New Year.
The Final Stretch — Ready for New Year’s Eve
Day 20 is a momentous milestone in our journey! This update spans two high-energy days—December 27 and 29, 2025—to bring us to the finish line. To ensure this drum finds its voice by New Year’s Eve, it had to be strung by midnight on December 27. Despite the whirlwind of Christmas festivities and a few winter storms, we made it!
As I write this on December 30, the drum is nearly cured. I have just tested its resonance, and it sounds heavenly. The deer rawhide has dried to a stunning, golden translucence, reminiscent of stained glass. We have successfully completed our 20-day journey together!
Measuring the Architecture of Sound
Before the lacing begins, precision in measurement is key. For a drum of this size, I use a specific formula: one arm’s-length of sinew per pleat (pair of stringing holes). With 22 pleats on this white oak frame, I measured out exactly 22 arm’s-lengths to ensure a continuous, strong lace.
Tightening and Learning
After threading the sinew from side to side around the frame, the focus shifts to tightening. This is a nuanced process I often teach in my workshops and include in my custom drum kit instructions. During this stage, my assistant asked several insightful questions that many first-time makers share. We’ve included that conversation here as a helpful learning moment for your own crafting journey.
Weaving the Spokes
By December 29, the rawhide was nearly dry—the perfect window to create the spokes. Spokes serve two vital purposes:
Tuning: They gently tighten the rawhide to achieve the desired pitch. Ergonomics: They provide a comfortable, secure grip for the drummer’s hand.
I use a basket-weaving technique to create these, which can be an art form in itself, often resulting in patterns like trees or stars. For this specific drum, I crafted small, wide spokes for a sturdy and elegant finish.
20 Days of Transformation: A Retrospective
Think of how far we have come! Over these 20 days, we have:
Milled kiln-dried lumber and used sun-steaming to hand-bend the frame.
Dried, cut, glued, sanded, and finished the white oak with black cherry stain and varnish.
Rough-cut, soaked, and used digital templates to prepare the deer rawhide.
Punched stringing holes, measured sinew, and completed the final stretch.
Cured the hide and wove the spokes to secure a glorious, resonant sound.
Ready for the New Year
We are officially ready to drum in 2026! Come back tomorrow night to hear the first official heartbeat of this New Year’s Eve drum.
Bring the Rhythm Home If you feel called to own a custom drum or want to experience the making process yourself with a step-by-step drum kit, please reach out via my About Page or email me directly.
Join us tomorrow for Drum December Day 21, for the big New Year’s Eve Reveal!
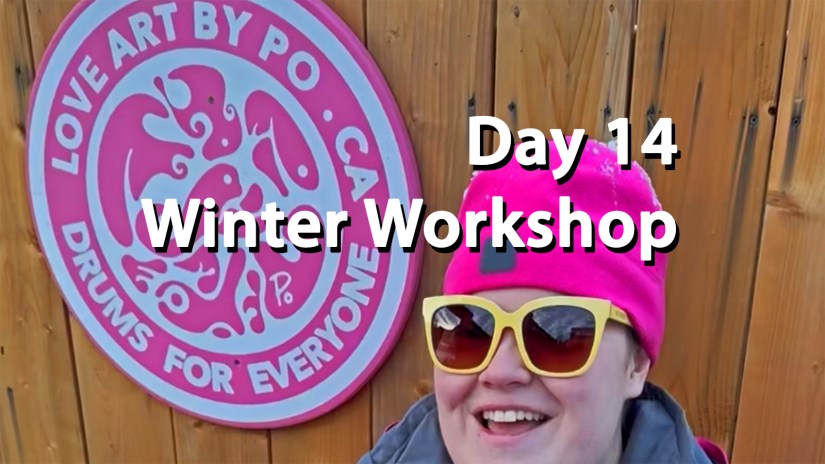
Stepping into the winter workshop for Day 14! The real-time race to New Year’s Eve begins.
From Summer Bends to New Year’s Song: The Real-Time Race to December 27
Welcome to Day 14! The seasons have shifted, and it is officially winter here at the Love Art By Po studio. As I toss this fresh Kingston snow into the air, I am inviting you to step out of the summer archives and follow along with the Drum December real-time videos from inside my workshop, where it is warm.
We have finally moved back into the winter wood shop to finish the frames that we have been working on throughout the first thirteen days of Drum December. Sitting here at my bench, surrounded by some of the cherry, maple white oak frames I crafted in the heat of the summer, the journey ahead feels both exciting and urgent. On New Year’s Eve, I plan to drum a drum made from one of these hardwood dry-bent drum frames.
It is December 22nd, and we are now in real-time. My goal is to transform this raw white oak frame into a finished work of art—much like this sanded, green-stained, and varnished maple frame beside me (featured in the video below).
The clock is ticking toward my December 27th deadline. We must have the frame ready to string by then so the rawhide has the time it needs to dry, allowing us to drum in the New Year together.
Between Christmas celebrations and family gatherings over the next four days, I will be balancing holiday joy with shop discipline. To transform these raw summer hoops into a finished masterpiece, I need to follow these specific steps:
The 8-Step Sprint to Stringing
Level the Joint: Using a drum sander, I’ll sand the joint edges. The goal is to make the overlapped ends appear as one continuous, seamless hoop.
Progressive Sanding: I’ll sand the entire frame using 80, 120, and then 220 grit papers. It is vital to start coarse and transition progressively to the finest grit.
Detail Work: Using a “mouse,” palm sander, or oscillating sander, I will delicately sand every inch until the wood is perfectly smooth and all scratch marks vanish.
The Hand-Finished Touch: I’ll complete the final sanding by hand for total control.PRO-TIP: Do NOT use 400+ grit sandpaper. If the wood is too “polished,” the stain cannot penetrate effectively to reveal the beautiful, natural woodgrain.
Custom Color: I’ll hand-mix a custom stain and apply it to the wood with a cloth to bring out its unique personality.
The First Coat: The frame moves to the painting studio for its first layer of varnish.
Refining the Finish: Once dry, I’ll lightly sand the varnished frame and wipe it down with a tack cloth to ensure it is dust-free.
The Final Glow: I’ll apply the remaining coats. While I hope for two, sometimes it takes three or four to reach the perfect luster.
Why the Frame Matters
I treat my drum frames like a standalone piece of art because I choose not to fully cover the outside edge with the rawhide. I want the wood to highlight and accent the rawhide head, not just support it.
Come back tomorrow for Day 15 for the full drum sanding tutorial. It is truly amazing how rough, unfinished wood can be transformed to look like opaque stained glass.


Let Me Know What You Think! Start or Join the Convesation