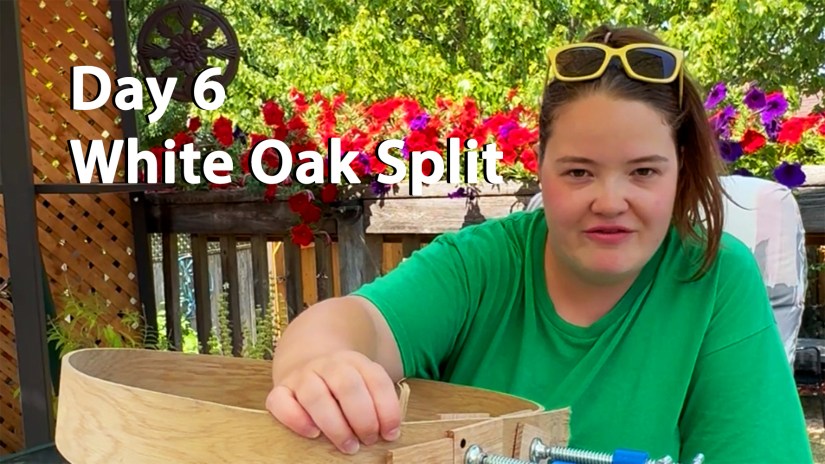
Day 6: A small white oak split appears after the first bend — an expected part of pushing hardwood to its limits.
Today marks the moment of truth for the first bend of the white oak drum frame. After spending the night under clamps, the wood finally revealed how it responded to yesterday’s bending session — and as always, the material had a story to tell.
If you’re new here and want to learn more about who I am and the work I do, you can visit my About & Contact page.
When I brought the frame into the studio this morning, the very first thing I did was check the inside curve. And there it was: a small split along the tightest part of the bend.
For many people, that might feel alarming. But for me, this isn’t unusual at all — especially with a dense hardwood like white oak. Pushing any wood to the minimum bend radius it can tolerate means you’re working right at the threshold where the fibres must stretch, compress, and adapt. Sometimes, a small split appears as part of that process.
What a Split Really Means in Drum Making
A split doesn’t automatically mean failure.
It’s a diagnostic clue.
It tells me:
how far the wood was willing to travel,
how much internal tension remains in the frame,
and whether the second bend — the glued dry-bend — will seat properly.
In this case, the split is shallow and controlled. That tells me the clamps did exactly what they were supposed to do: prevent the fibres from opening too far while still allowing the bend to hold.
This is why clamp placement is a true art form in drum making. You don’t just tighten clamps to tighten clamps. You tighten them in anticipation of how the wood is likely to react.
If you’d like to explore my handmade drums, see past builds, or learn about upcoming workshops, visit my Drum Page here.
White oak is expressive — and today, it expressed itself in a way that still sets us up for a strong final frame. As well, the location of the minor breakage will be cut off before gluing the final bend. I don’t sweat these things now, but when I first started bending drum frames, I was totally panicked when the first breakage happened. It was a learning experience – that is for sure!
Reading Tension, Relaxation, and “Feel”
Every wood species responds differently during the first bend. White oak? Well…It hums with a very particular kind of density.
When I picked up the bent frame today, I could feel subtle tension still living inside the curve. That’s not unexpected — in fact, with white oak, it’s quite normal. White oak, unlike red oak, doesn’t particularly like being bent.
The key for Day 6 is simply evaluating:
Did the bend hold its overall shape?
Is the curve even?
Is the split stable and non-progressive?
Does the wood want to spring open dramatically or gently?
All signs today point to a solid first bend. It was a success. PHEW!!!
Come back tomorrow, Day 7, to watch and read about the what happened when I released the clamps.
The next step — which comes tomorrow — is the careful release of the clamps. That’s where I discover how much reflex the wood has stored and whether it settles into the intended diameter or pushes back aggressively.
For now, the job is simply to observe, interpret, and prepare.
White oak may be challenging, but today’s results show that this drum frame is very much on track.
Po and her assistant share a moment of nervous laughter.
Today, Po takes the next brave step in her sun-steaming white oak experiment — the moment when softened hardwood meets human hands for its very first bend. And this time, the studio was full of laughter, nerves, and a little bit of chaos.
Preparing for the First Bend
After three days of solar steaming and fibre relaxation, the white oak was finally ready to move toward its circular drum shape. But white oak is known for being stubborn — unlike red oak or cherry, which tend to cooperate more easily. This was Po’s very first time attempting to bend white oak, and the air carried that charged mix of excitement and hesitation.
Because the frame pieces were long, Po called in an assistant during this stage. Today, she chose DAD.
Before the camera was rolling, Po looked at her assistant with a theatrical seriousness and joked:
“If it breaks, you can be the one to blame! I don’t want to be the one who snaps it.”
That set the tone. The wood was ready. We… were getting there.
The Moment Before the Bend
As her assistant stood there, holding one end of the hot, hopefully flexible, board trying to work up the courage for the first bend, Po stepped beside her trusty assistant to offer support — and then they immediately broke into laughter. She tucked herself halfway behind his arm, peeking out like someone about to watch a suspenseful scene in a movie.
The cameraperson had already begun losing patience with how long it was taking and insisted that they stop laughing and get serious. She wanted to get the shot. Then she started laughing.
This is the real life of drum frame bending at Po’s Kingston Art Studio — part process, part comedy, all family, ALL ART. Drum making is a beautiful, love-filled-art, and this short video illustrates the joy that cheers out with exuberance of Love Art By Po.
Nervous Laughter, Real Art
In today’s short video, you can witness the exact moment when nervous laughter gives way to determination. Po, her assistant and cameraperson take their positions, breathe through the tension, and finally begin the first coaxing bend of the white oak.
It’s only a small curve — a gentle start — but it marks the beginning of the transformation, from plank to drum. And as simple as it looks, this step matters: the first bend dictates how the wood will behave when the full circular frame is shaped and clamped.
A Family Moment in the Making of a Drum
What the video doesn’t capture — but what filled the studio — is the feeling of teamwork. Making drums in this space has always been infused with love, humour, and family togetherness. Today was no exception.
Drum-making is not simply about shaping wood at Love Art By Po; it’s about beautiful, shaping moments — that make everyone stronger.
Making drums has taught Po an incredible life lesson – a circle of wood is like a circle of loved-ones, when you push on them – they get stronger as they find their harmonious tune.
Join us again for Day 5, where Po continues shaping the wood — and the shared moments — that make every drum a circle of strength and love.
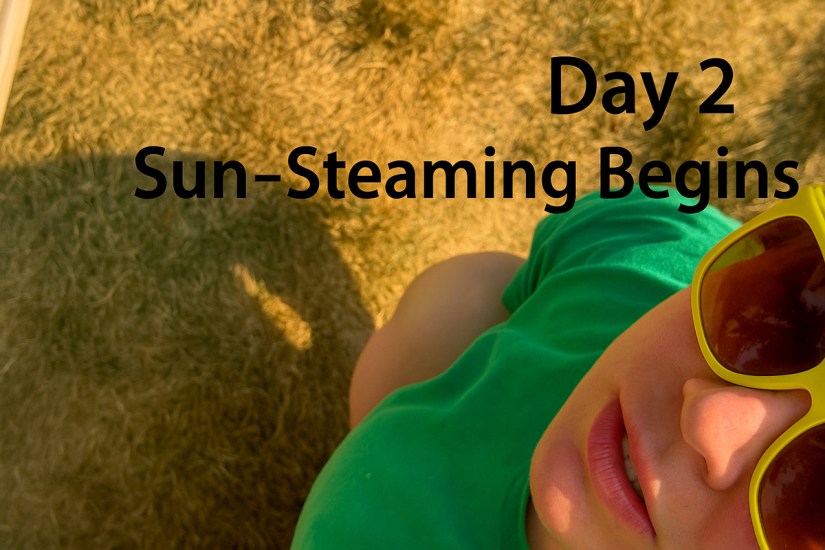
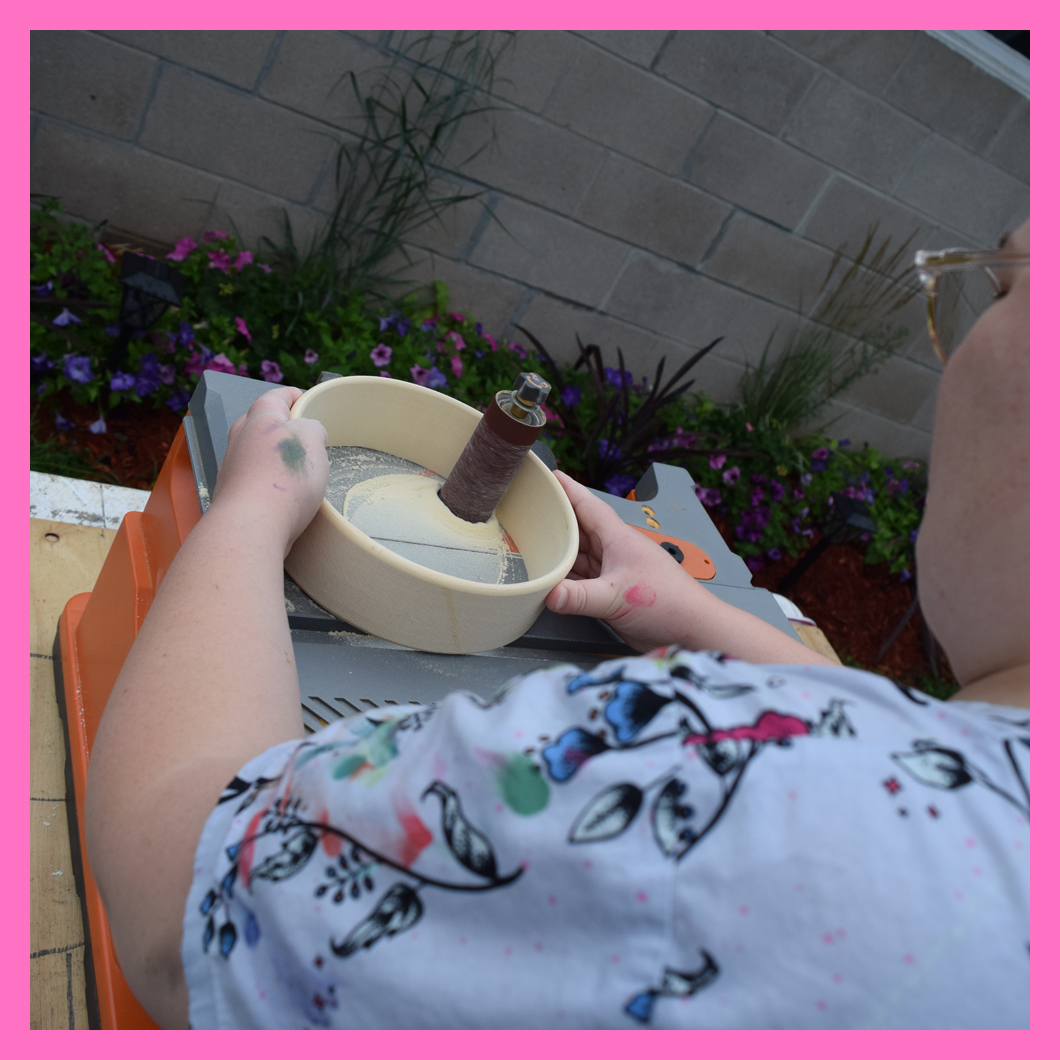
Day 2: Po begins her sun-steaming process for crafting hardwood drum frames.
Welcome to Day 2 of Drum December!
Today, Po begins the very first step in her innovative sun-steaming method — a sustainable process she personally developed to prepare kiln-dried hardwood for her premium drum frames and exposed stretchers.
Sun-steaming is a technique that Po pioneered to reduce the environmental impact of traditional wood steaming. Instead of soaking the kiln-dried wood for two days and then heating it with electricity, Po slides the carefully milled hardwood into a long black tube with ridges along its interior.
The ridges guide the wood as it slides in, producing a distinctive sound — the beginning of the transformation.
Once the hardwood is inside the tube, Po fills it with water and lets the sun do all the work. For three full days, the water naturally heats within the sealed tube, allowing the wood fibres to relax and prepare for bending.
An Energy-Conscious Method for Steaming the Wood:
Removes the two-day soaking stage
Uses no electricity
Reduces water consumption
Produces a more responsive bend
Creates the smooth, elite-quality curves Po’s drum frames are known for
This is where Po’s craftsmanship begins — with innovation, patience, and the sun itself.
Tomorrow, we’ll continue documenting this process as Drum December unfolds, one beautifully authentic step at a time.
Tomorrow, Po continues the transformation as she assesses the wood to see whether it has relaxed enough to become bendy and ready for shaping.
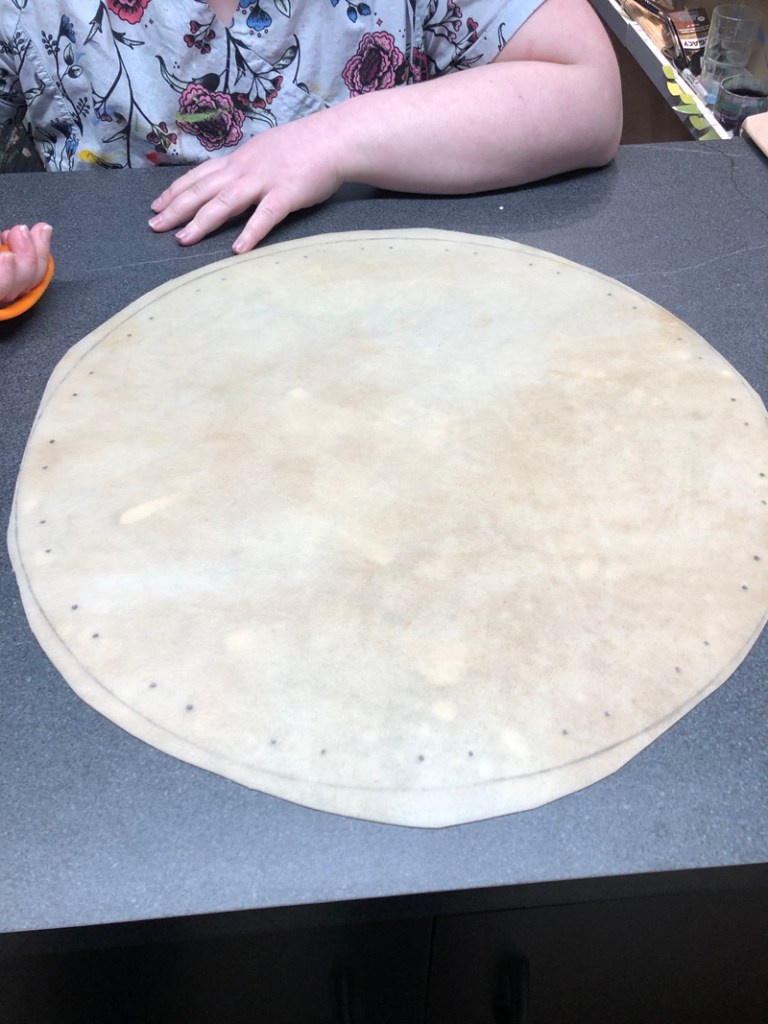
Po has Drawn on Shape and String Holes and is Ready to Cut the Rawhide
In order to cut the shape, I first draw on the pattern. In order to do this, I lay the drum frame on the soaked rawhide and draw the shape with an HB pencil that is not very sharp. The size that I draw on is usually about 2-1/2″ larger all the way around the frame. So for a 14″D frame, I draw on a 19″D shape that is the same shape of the frame. After I do this, I mark the string pleating holes, to be punched out later. This can be a very frustrating step, so I create a paper template and fold the paper to assure that the pleat holes are perfectly symmetrical. I will be posting another how-to concerning this step, but basically the two holes close together are for the pleat and the wider space is where the hide will lay flat against the frame when dry. The number one thing to remember is, the pleats must be evenly spaced and even in number, such as 8, 12, 16 pleats and so on. Keep the string holes about 3/4″ from the edge, all the way around. Premium drums have 16+ pleats. But to begin, I would only use 8 or 12 pleats.
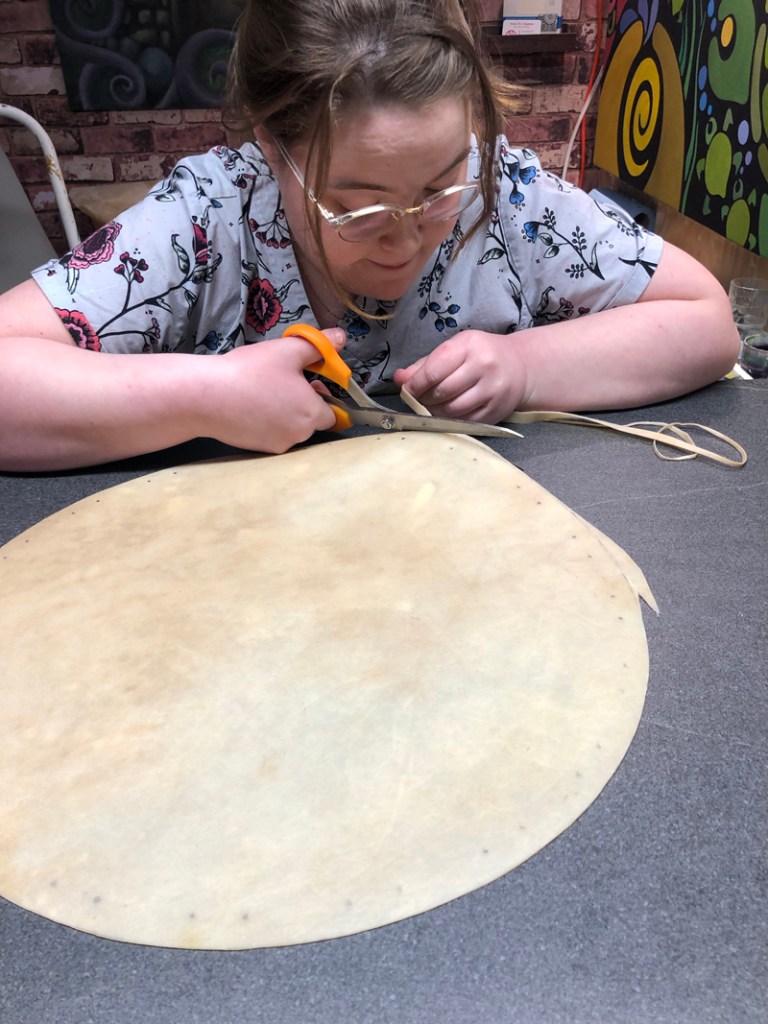
Step 2: Cutting the Rawhide
Po Cutting Soaked Rawhide to be Stretched Over the Drum Frame
Cutting rawhide is fairly easy to do if the hide is thin. In this step-by-step guide, I am using opaque elk because this drum head will be painted. Elk and deer are from the same family. Deer is typically the more thin of the two. I will be posting another guide concerning the different rawhides, but for now a rule of thumb is: 14″D and smaller drums use deer or elk. In the photo at the top of this post, I am stringing a 14″ D drum with a coiled white cedar frame that I have painted. In order to cut thin elk, I find that using kitchen sheers or fabric scissors does a good job.
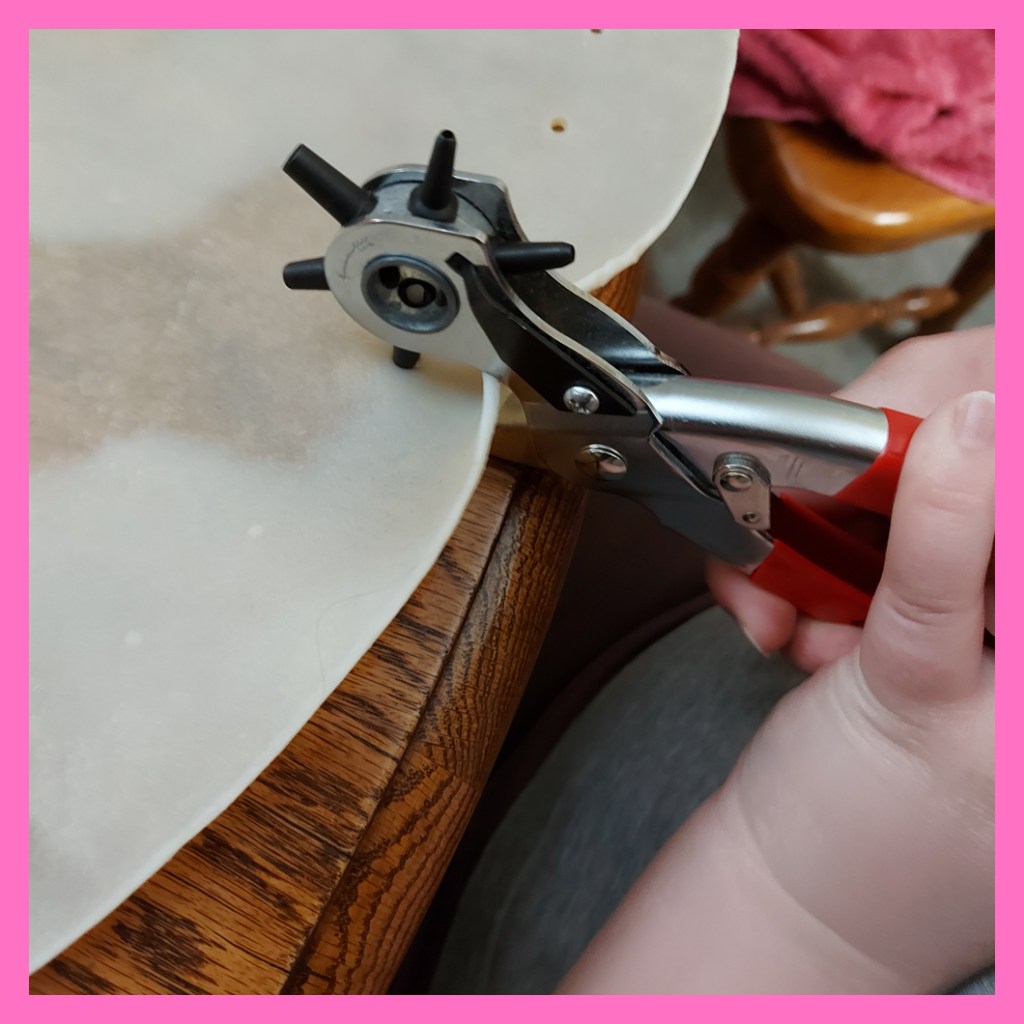
Step 3: Punching the String Holes
Po Punching Hole in Rawhide for Stringing the Frame Drum
This step is quite simple, once you have the hole spacing figured out. After I mark on the dots for stringing the drum skin pleats, I use a leather hole punch. There are two hole punches that are readily available to purchase at craft and building supplies stores, they are: ones that work like scissors (as in the photo above), and punches that resemble awls that you hammer through the rawhide. The former is usually strong enough for deer and elk, but the latter may need to be used when punching moose and bison. Punching holes through rawhide is not like punching holes through note paper. Rawhide is fibrous, almost stringy. When it is soaked, it becomes thick and rubbery too. In other words, every hole punches differently from each other.
Step 4: Situating the Drum Frame
Po Placing Drum Frame in Centre of Cut Rawhide
Before stringing, I check to make sure that everything fits and is evenly spaced. I place the finished drum frame in the centre of the cut and punched rawhide. To assure that it fits the way I want it to fit, I use a ruler and measure the distances between the frame and the edge. All the way around, there should be the same amount of rawhide outside the drum frame.
Step 5: Measuring out the Sinew
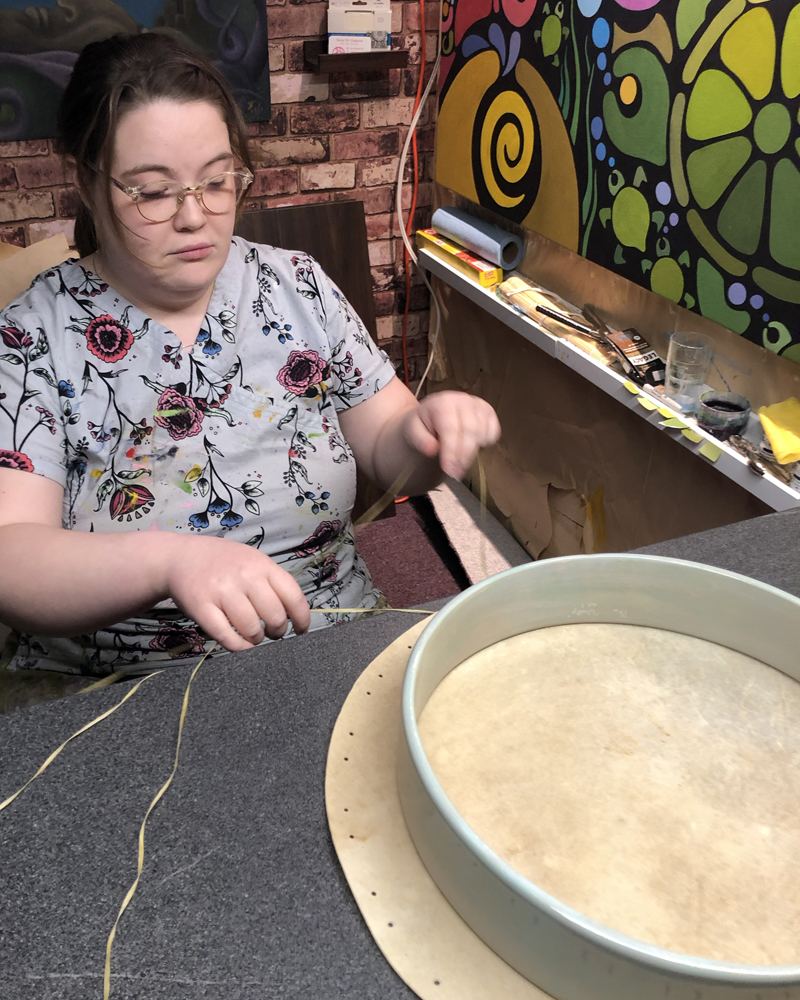
Po Stringing Through First Punched Hole After Measuring Out Sinew String/Lace
I use synthetic sinew for stringing. Some people call the sinew, “string,” and other people call it, “lace.” There are 4 types of string/lace, that are commonly used, they are: sinew (from a deer’s Achilles Tendon), synthetic sinew (buy by the spool), rawhide (thin strips that are cut from the perimeter of a soaked piece of rawhide), and rope for large moose, double headed, pow-wow drums. Measuring out the sinew is a tricky, nerve wrecking procedure. The length you need, needs to be one continuous strip. I measure about 5′ of string for every 1″ of drum frame diameter. So for a 14″D drum, I measure out 70′ of sinew. For a 24″ drum, I measure out 120′ of sinew. Also, just to be safe, I measure out another 20′ of sinew. I ran short once. I never want that to happen again. So now I wheel off extra! “Better safe than sorry,” as they say. This is the number 1 reason I use synthetic sinew. It is the best choice to use 120′ of continuous string.
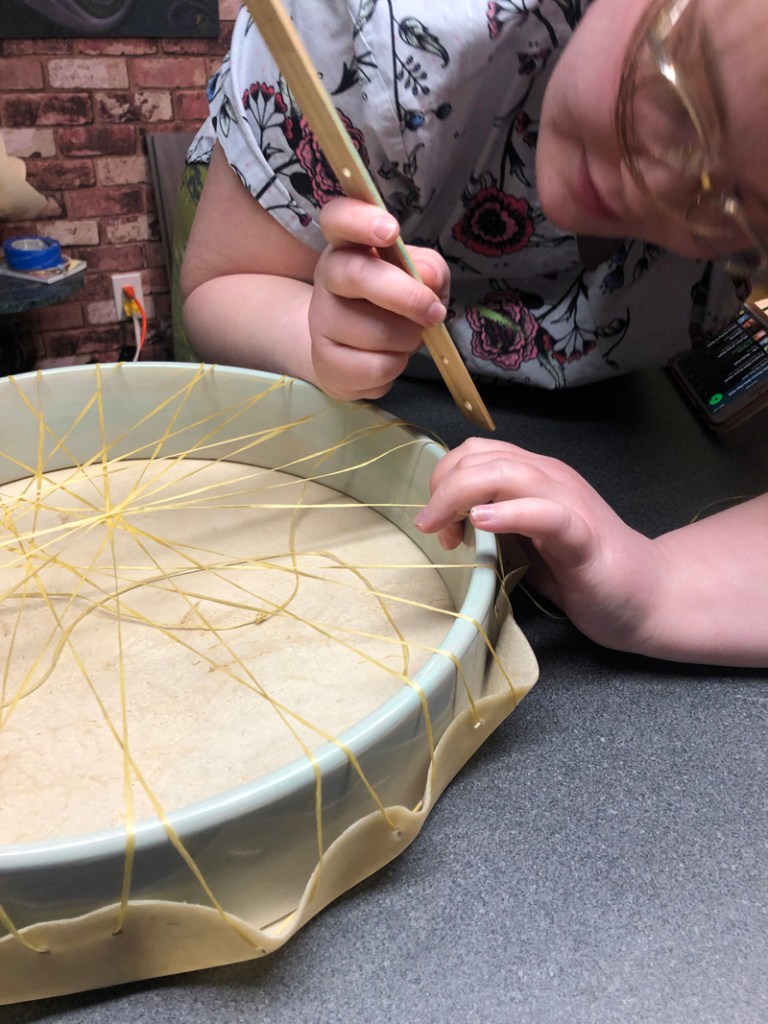
Step 6: Stringing the Drum
While Stringing the Drum, Po Measures the Edges to Assure that the Drum Frame has Remained in Place
To string a drum, I pull one end of the string through one hole and then through the hole on the exact opposite side. Please note, I pull the entire strand through both holes, leaving about 2′ hanging outside the first hole. Then I continue to do the same, all the way around the drum, crossing the strings through the centre. In the image immediately above, notice that the string passes through the frame-side of the pleats (the two closest hole pairs). This allows for an attractive, elegant pleating of the hide. So when stringing, pass your needle through the outside of the hide, across the inside, and then through the inside to the outside. You’ll catch on. The practical reason I do this is due to physics. By pleating through two holes, rather than one, creates a stronger hold while applying less pulling on the individual holes. If you use one hole, you stand a pretty good chance that the rawhide will rip through. Believe me when I say: “YOU DO NOT WANT THAT!” Please note that I am creating a video to illustrate this more clearly and will be posting in the near future.
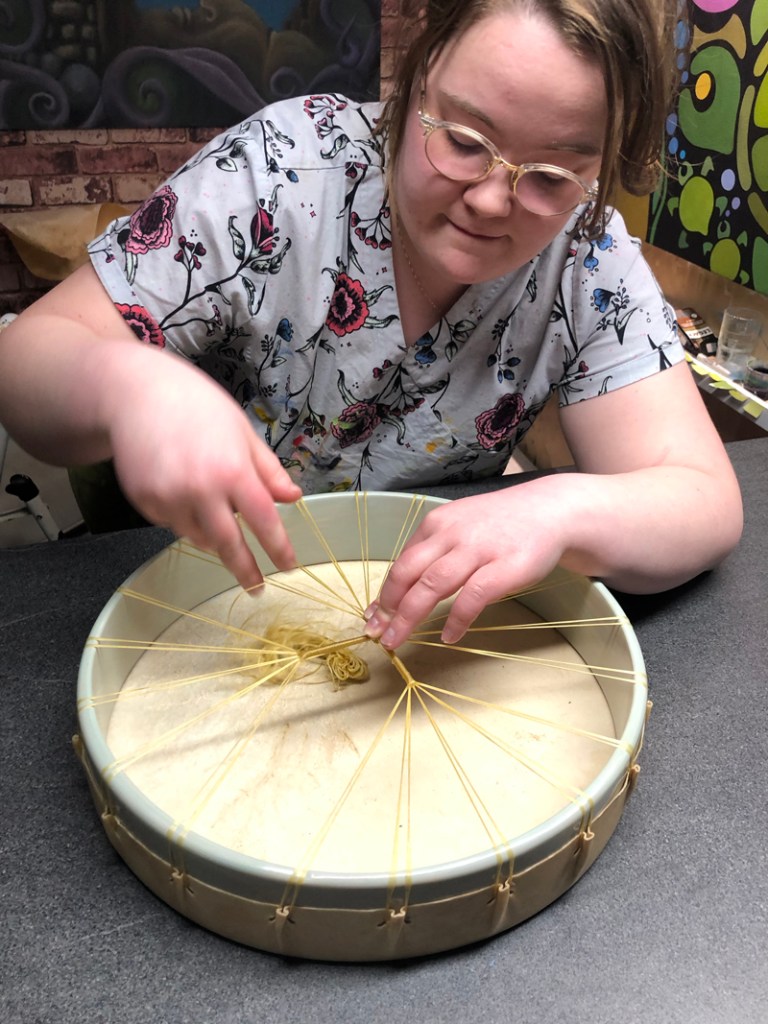
Step 7: Creating the Strung Spokes
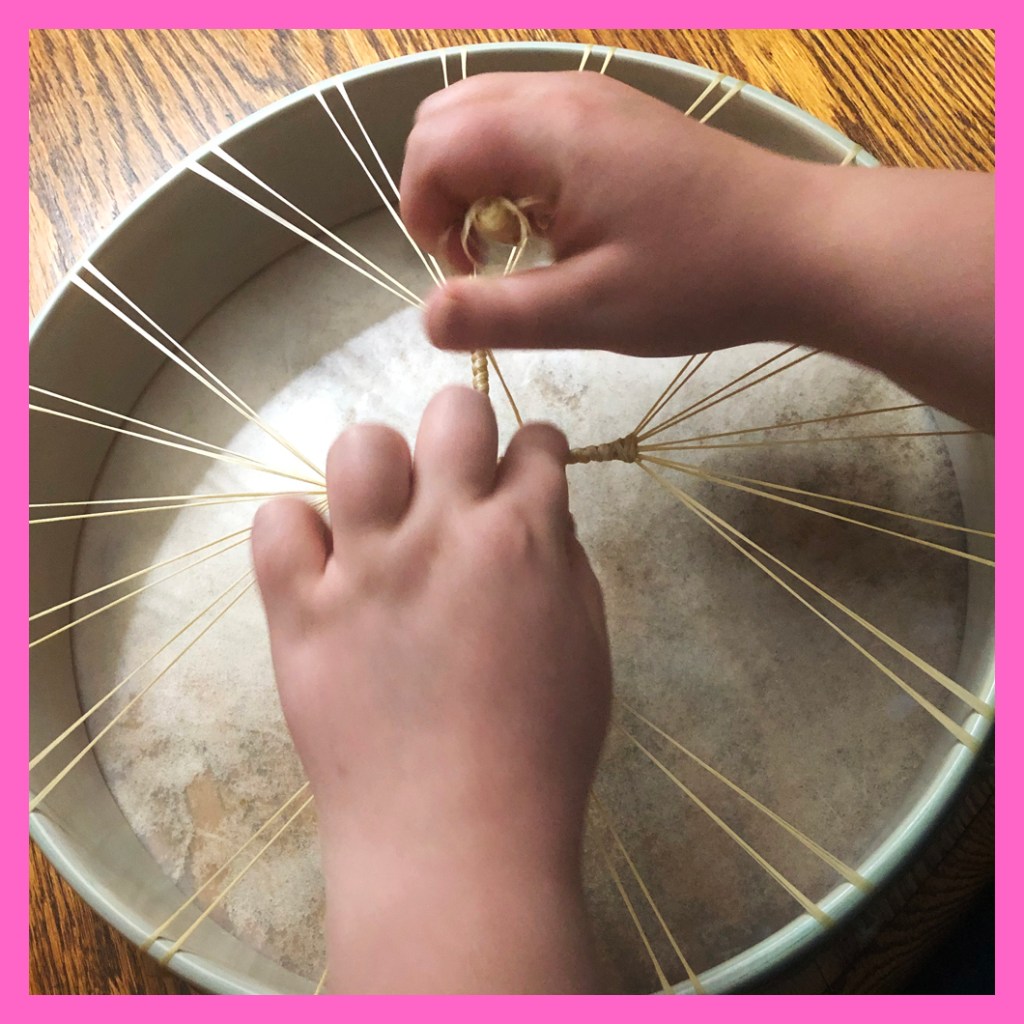
After Stringing, Po Creates Spokes to Hang Onto While Drumming
Before I begin with this step, take a look at how the pleats look after the rawhide has been stretched and strung. By stringing through the frame side of the pleats, a uniform pleating is created and the pulled holes are firm and uniform. If you want to make a premium drum, you will need to master this step with this method of drum stringing. Now onto the spokes. From what I can tell, in various traditions, the spokes are formed by wrapping cord, sinew, or deer hide. Locally, they are formed and wrapped using split deer hide. I prefer using the continuous synthetic sinew because it is strong and I prefer the appearance. So what I do is, I wrap the sinew around multiple pleat (forming) strings. As you can see in the photo, I am wrapping 10 strings (5 pleats’ worth) together. I wrap them as far up as I want to achieve the desired tightness of hide. When I reach the furthest point desired, I weave the sinew through the individual strings 3 or 4 times. This creates a basket weave appearance. I do this to anchor the spoke so that it won’t slide out of place. When the weaving is complete, I wind the sinew back down the spoke. Once the centre knot of the strings is reached, I wrap the centre knot a few times and pull it tightly. Then I proceed to create another spoke. Once all 4 spokes have been created, I knot off the string behind the main centre knot. At this point, the drum is complete. I then sit the drum in a dryish (50% humidity) location with good ventilation above and below the drum. In just a few days the drum is ready to be drummed.
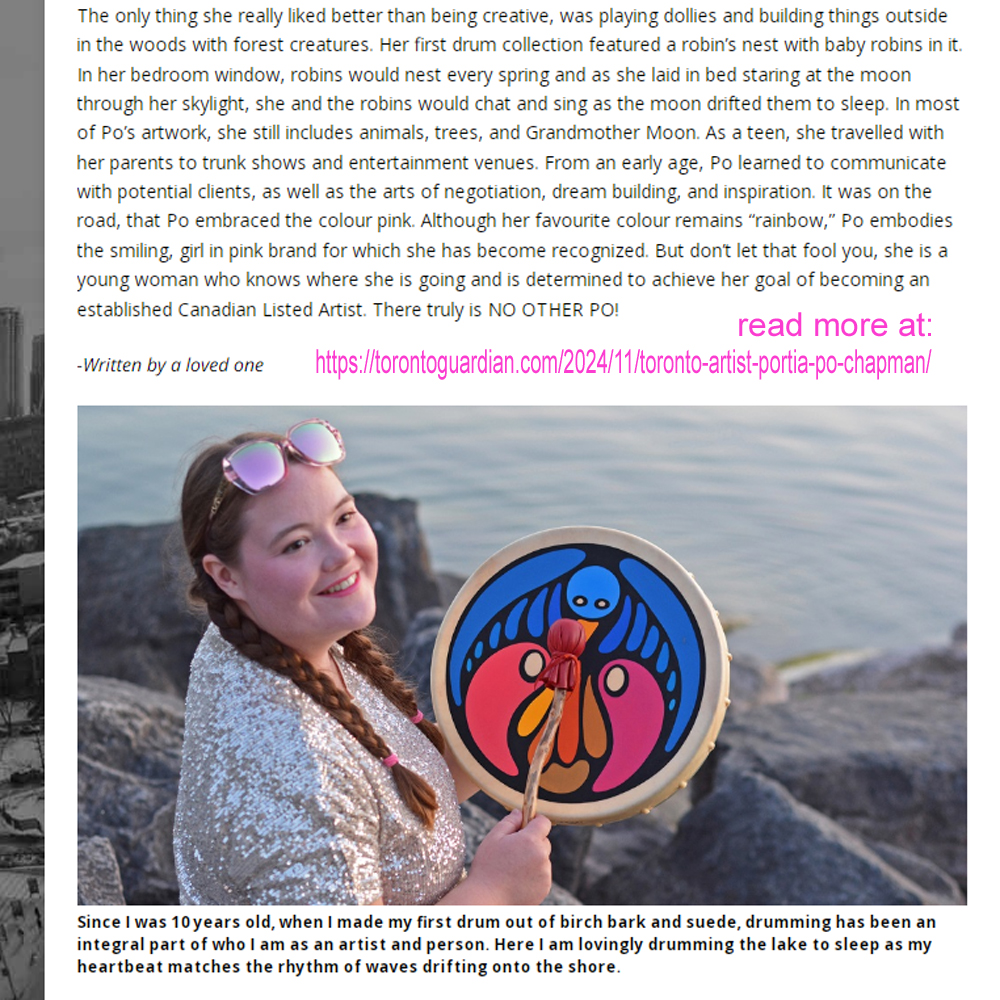
Day in the Life of Portia Po Chapman by the Toronto Guardian, November 13, 2024 was Published in Response to Kingston’s Portia “Po” Chapman Mural Competition Win for Strong Enterprises in Belleville.
The Toronto Guardian headline states that Po is a Toronto artist. Although she is a Muralist trying to break into the GTA art market, Po is based in Kingston, Ontario. Other than that edit, the following “Day in the Life” article was an accurate telling of Po’s story in 2024.
I want to thank Emilea Semancik for doing a smashing job on this article.
As an emerging contemporary artist in Ontario, Canada, it has been an exciting month, November 2024 and we are only 13 days in. I received two public features and one day-in-the-life article. I presented my drums and educated the public about drumming and the beauty of the drum making process. Plus my “Sharing Wisdom: Tending to Nature’s Little Ones,” drum was featured in the entrance of the Kingston City Hall gallery in the inaugural show: Kingston Artists’ Showcase. Many more exciting things too. You’ll just have to wait to find out.
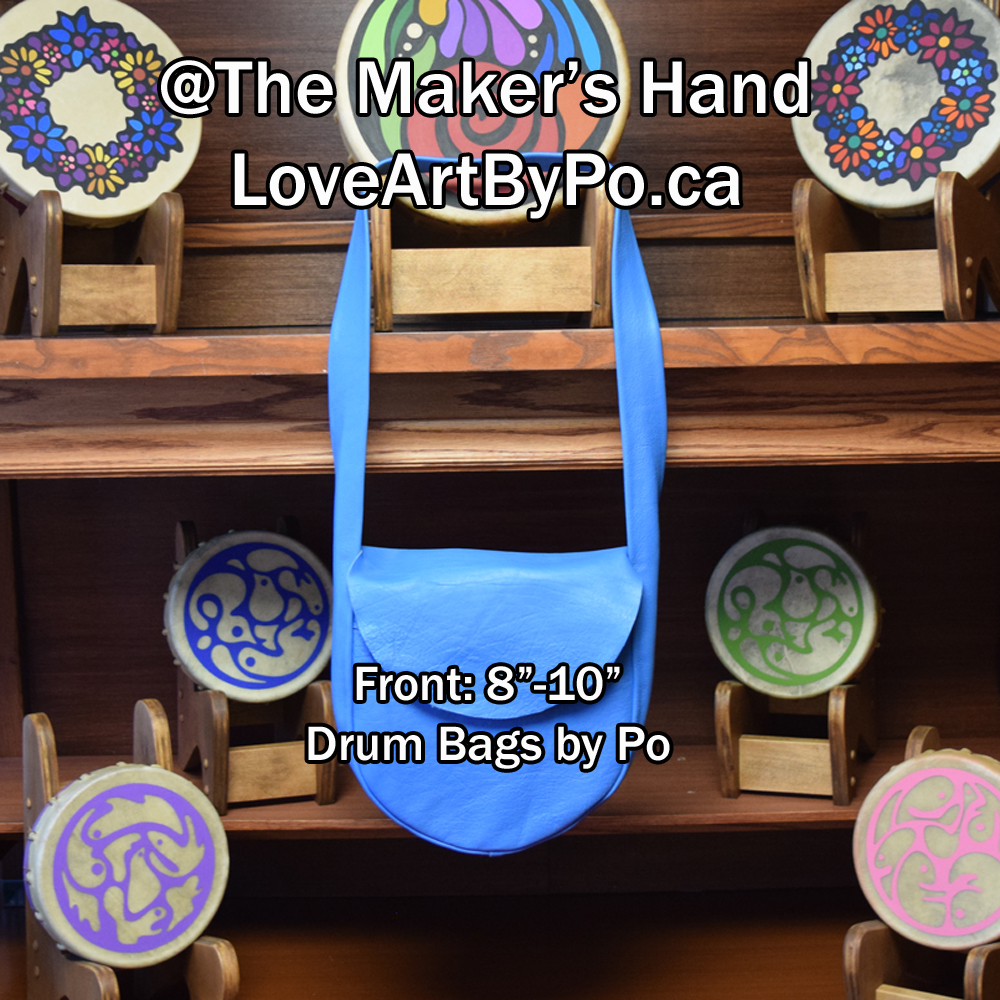
Portia Po Chapman Reveals Drum Bag Collection at The Maker’s Hand
This is my first year exhibiting at the juried craft show, The Maker’s Hand. As a drum maker, I am often asked if I sell drum bags. Well… up until now, the answer was, “NO.” I have been working on the drum bag design since March Break 2024. I attempted 3 prototypes and without the appropriate leather, sewing machine and hand threading equipment, the bags just didn’t stand up to my creative vision. Those 3 bag designs, in other words, are on hold for now. But in desperation to produce a bag so close to the show date, my creativity engine kicked into high gear. I had been overthinking it. So, knowing what worked and did not work with my previous attempts, I figured out this amazing bag. I’m sure that you’ll love it as much as I do. Below is a sample of the bags that I will be selling at The Maker’s Hand in Wellington, Ontario on November 8-10, 2024.
Portia Po Chapman created blue leather drum bag front. To be sold at The Maker’s Hand in Wellington on November 8-10, 2024.
Portia Po Chapman created blue leather drum bag back. To be sold at The Maker’s Hand in Wellington on November 8-10, 2024.
The above images are of the blue small drum bag that I have created. It fits an 8″ or a 10″ drum.
At The Maker’s Hand, I will be featuring for sale 2 sizes: Small (8″-10″ drum size) and Medium (12″-14″ drum size).
Colours available will be: Blue, Pink, White and Metallic Copper.
All of the leather is genuine cow-hide from Calgary. The leather is the same chaps leather that is used at the Calgary Stampede. It is supple and snuggle worthy while being strong and rugged enough to take to drum circles.
In this collection, I integrated a drum stick pocket at the front which makes it convenient to travel with your drum stick securely stored without hitting the drum while travelling.
Also no hardware, buttons, latches, etc. are on the drum bags – this means that your drum can be carried / stored without the worry of your drum bag scratching or denting the face of your LoveArtByPo.ca drum.
Photos of Portia Po Chapman Making Hand Drums During 2021-2023
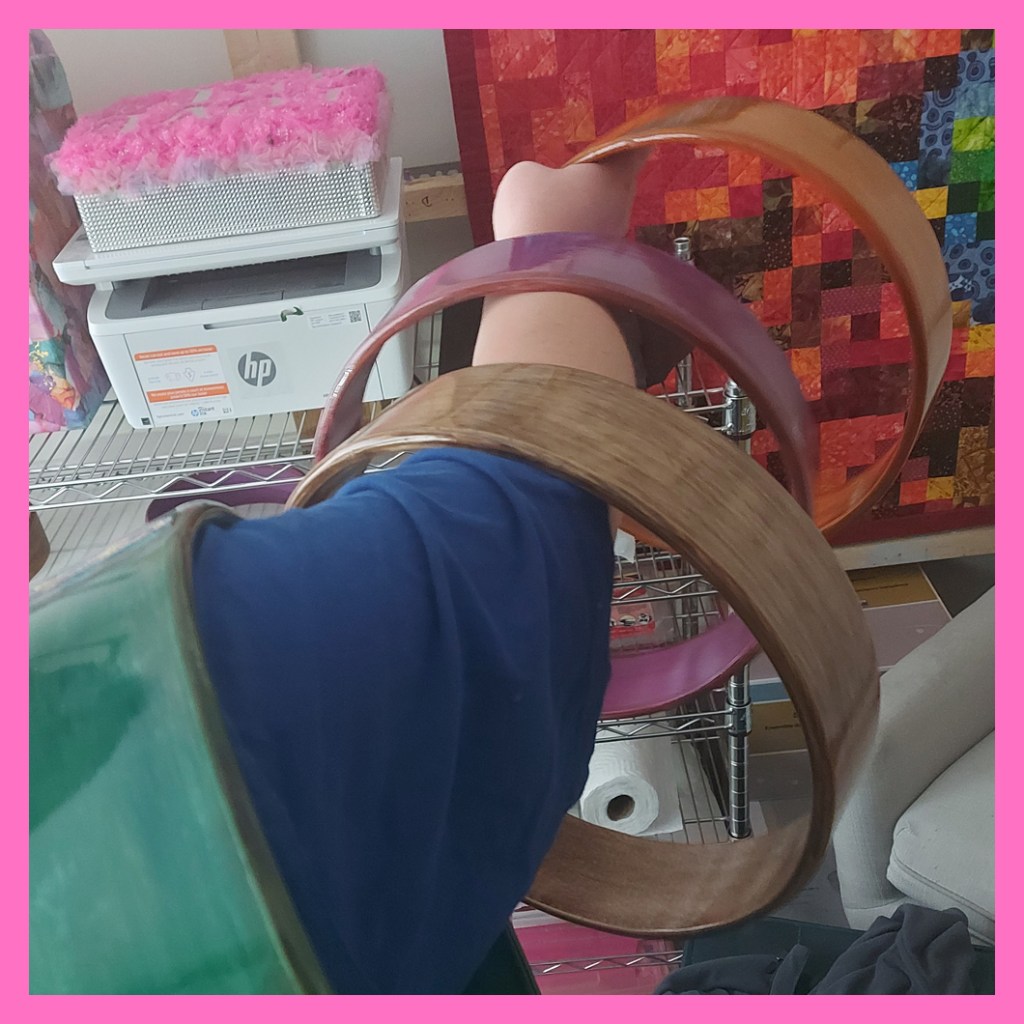
In the winter of 2024, Po began making hand-bent oak drum frames and in the summer she began making maple drum frames as well. All three, current (July 2024) drum frames available for hand drums have their own character, tone and resonance. Rawhide options include: 3 types of Deer, Moose, Elk, and Bison from across Canada.
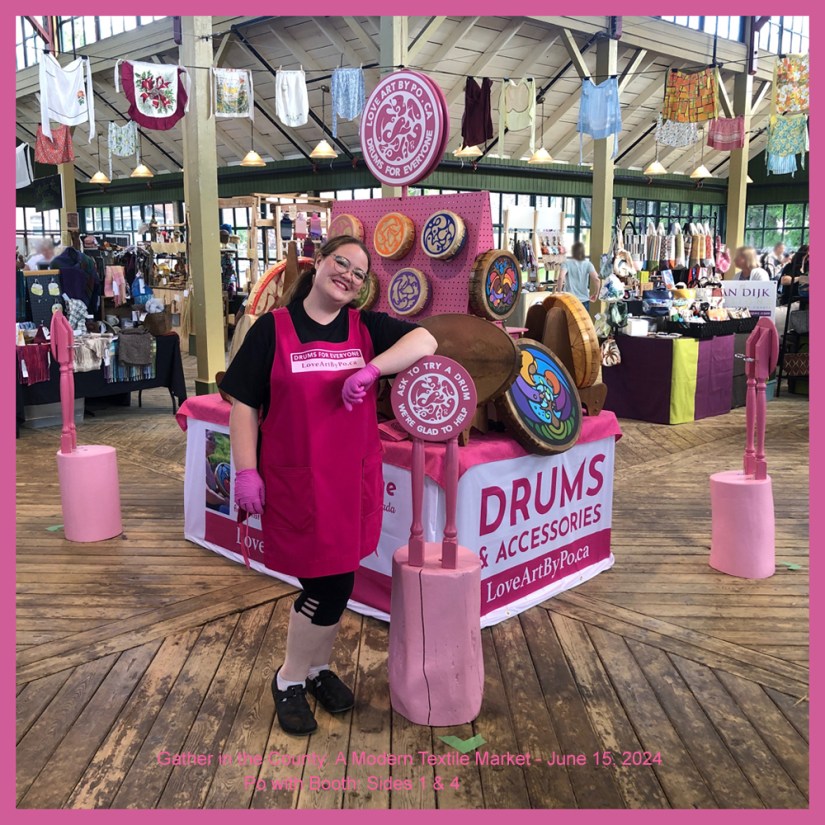
Po unveiled some new drums at the 2024 Gather in the County: Modern Textile Market in Picton ON on June 15, 2024
Po is currently producing a few how-to make hand drum videos using her special techniques. In the mean time, Po has created 3 blog posts that list the steps of making the drum frames, stretching the raw hide, and painting the faces of the drums. Drums made by Po are considered “PREMIUM.”
The hand drums in the 2023 collection were meticulously handmade by Po using the following method:
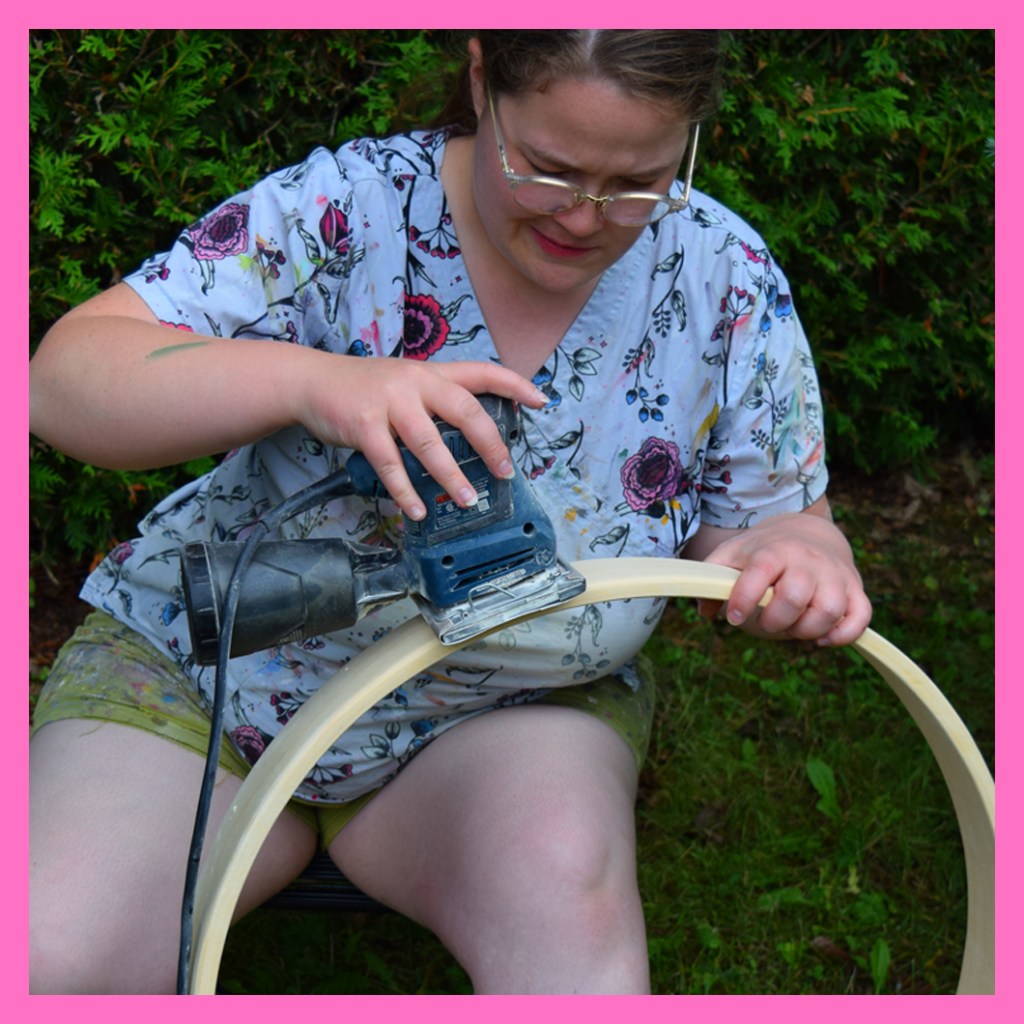
Cedar Drum Frames: Receiving, Sanding & Painting
The raw drum frames are shipped in from Western Canada. Po has built a wood steamer and will be bending her own frames over the winter.
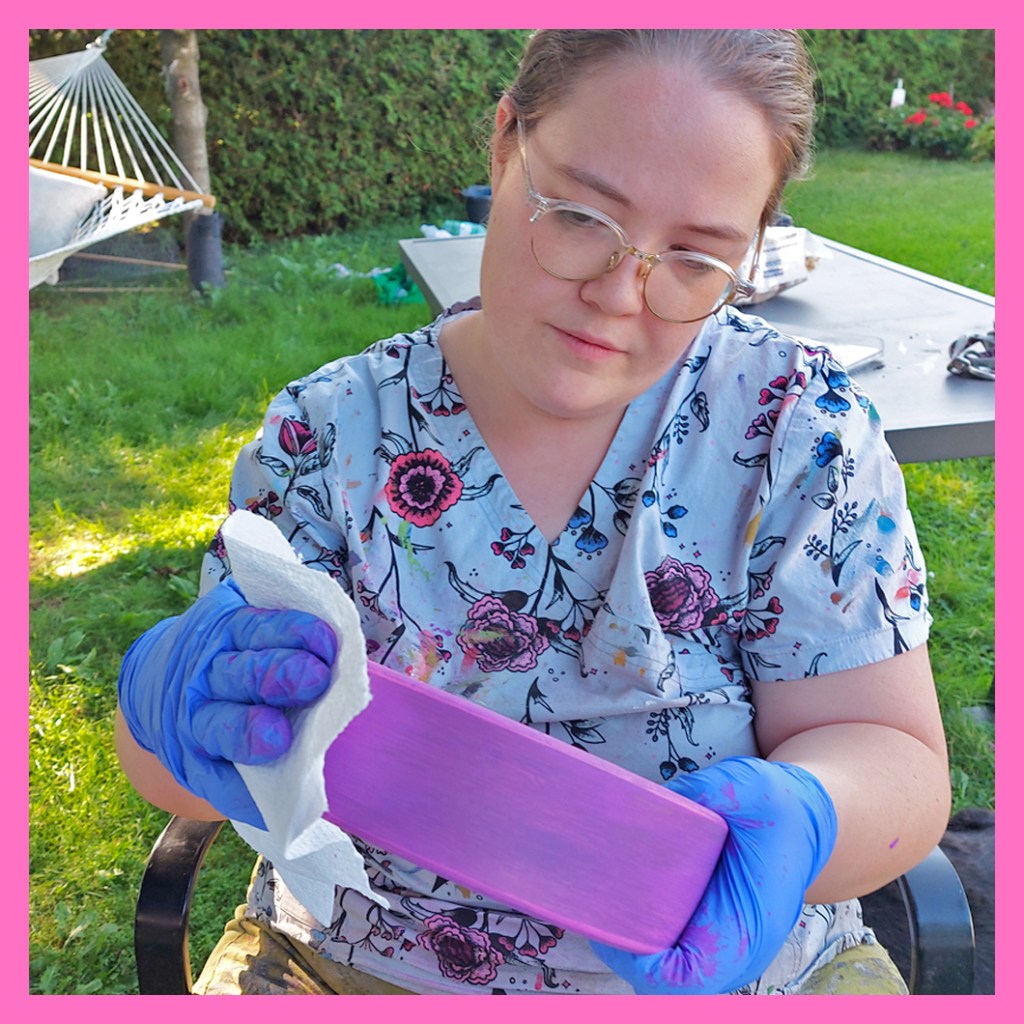
The raw drum frames are sanded using machinery and then finished by hand.
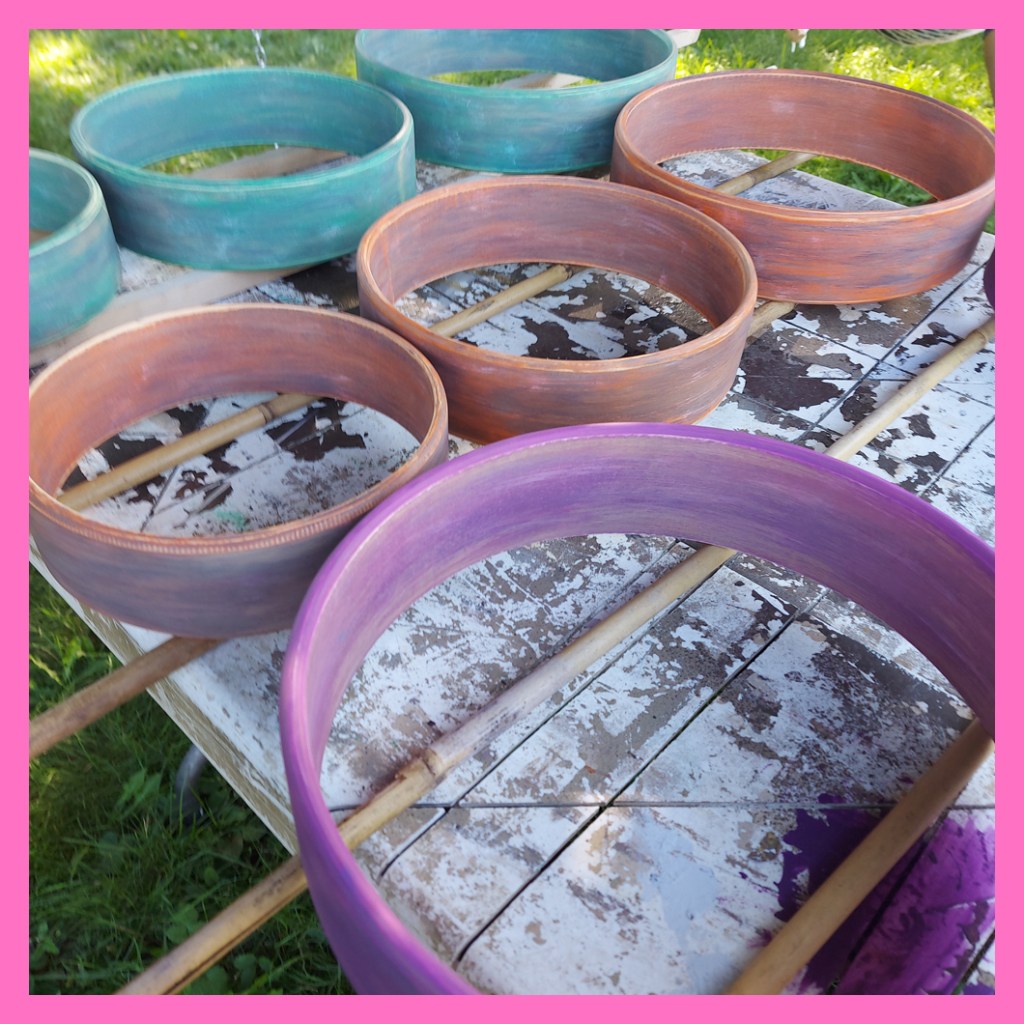
The sanded drum frames are then hand painted using a multi-layer rubbing technique. The drum frames used in the buffalo drums are stained/waxed. Both painted and stained frames are varnished in an oil based spar varnish so that the drums can be taken to outside drum circles.
Rawhide: Receiving, Cutting, Soaking & Stretching
For this collection, the buffalo and elk rawhides have been shipped from Western Canada. The materials support Indigenous communities. In the woods where Po grew up, huge elk wandered the land. Elk rawhide is Po’s prefered drum skin to paint.
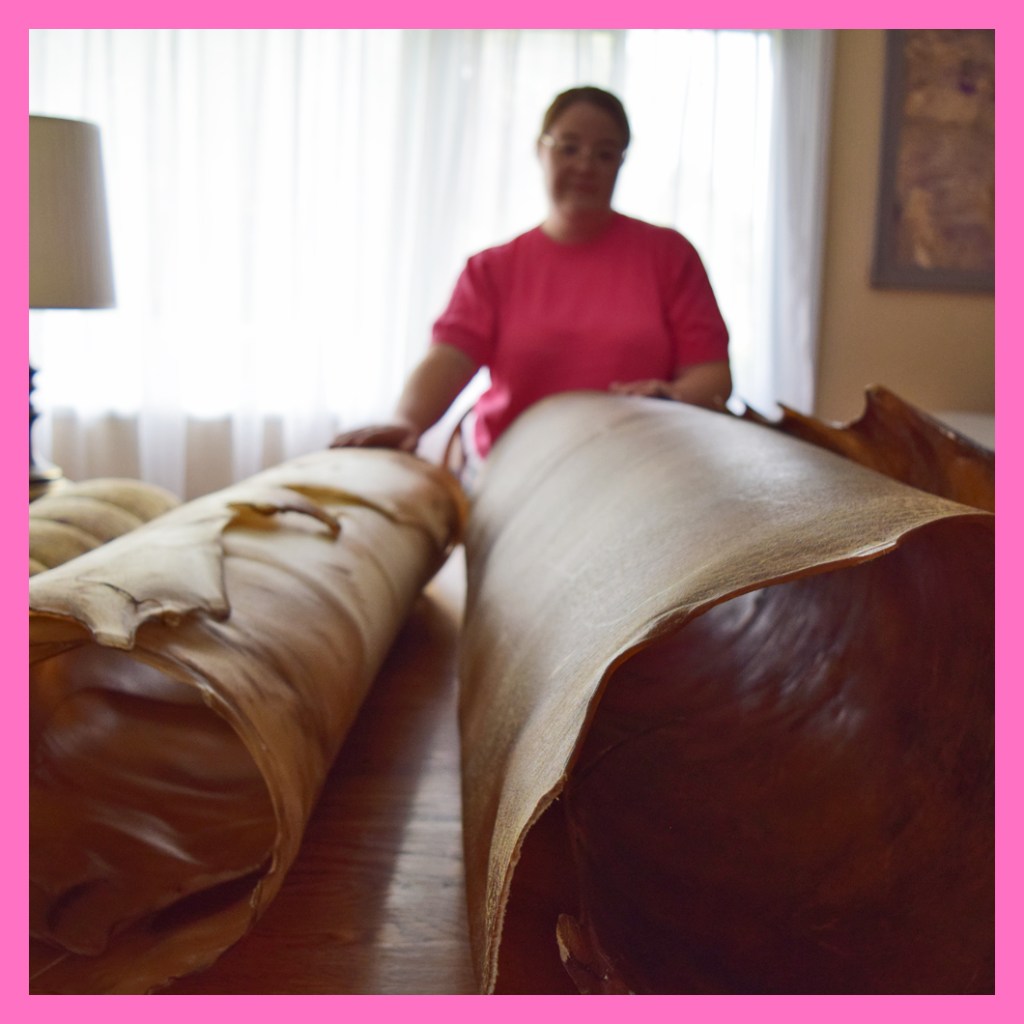
The hide is unrolled and the rough cutting pattern is taped to the hide. To do this, Po has at least one family member hold down the hide. As you can see, the hide is too big for her to do it alone without using clamps.
Although a drywall knife will generally cut through the elk rawhide, for the buffalo, a jigsaw was needed. Buffalo is very thick and fibrous.
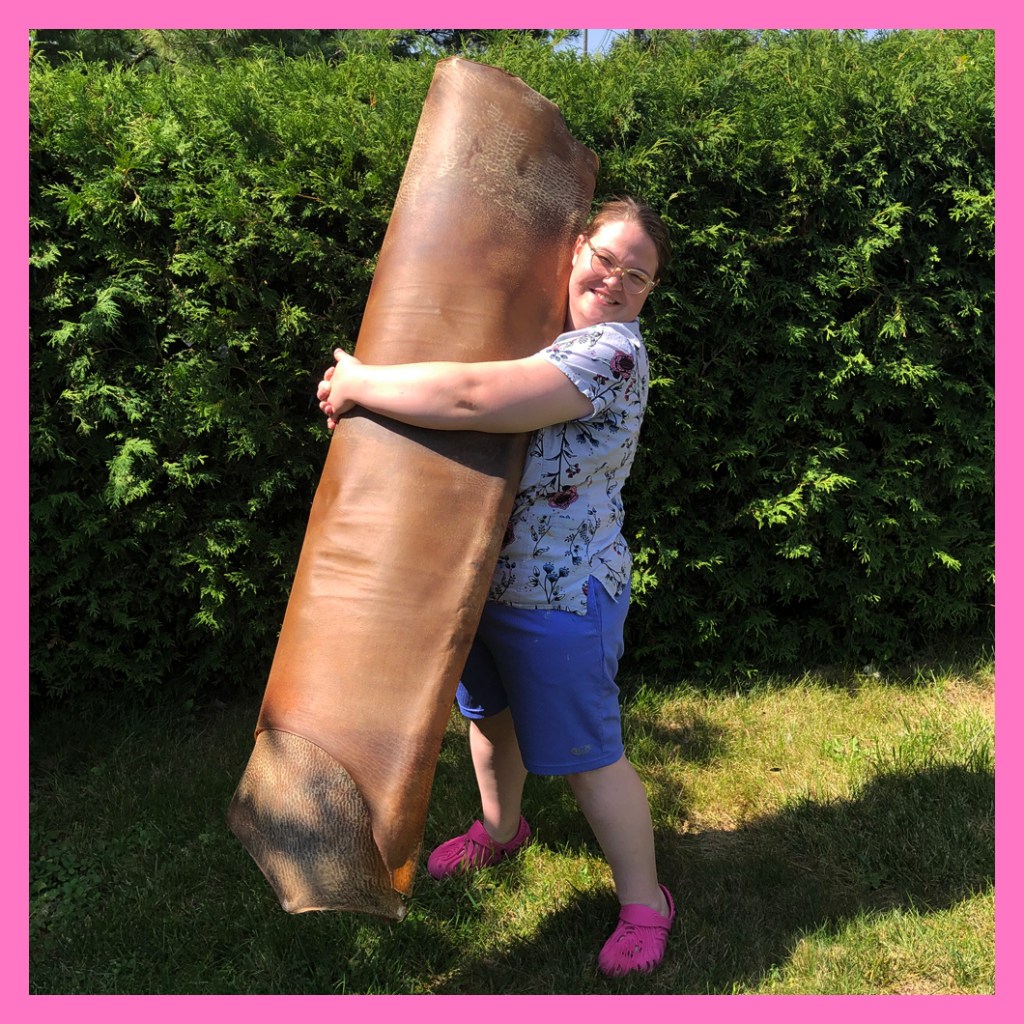
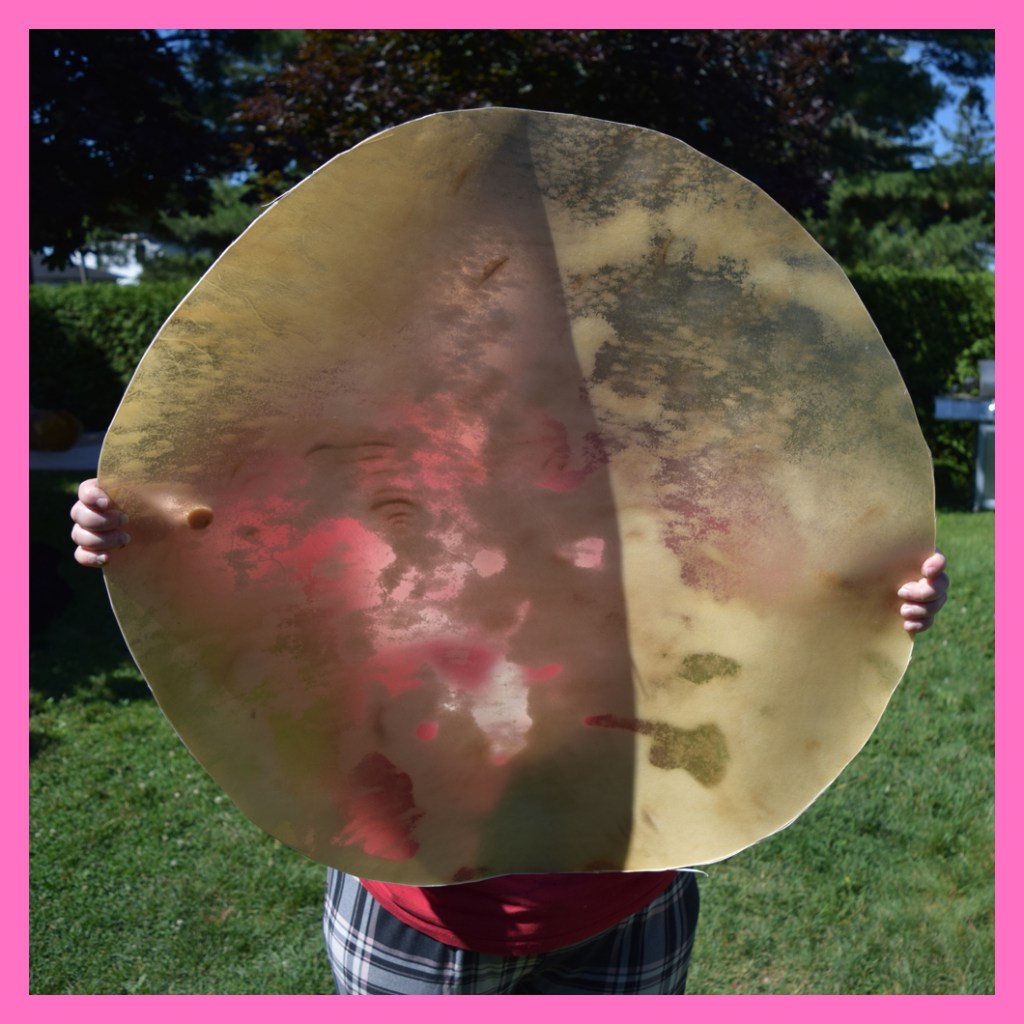
Below, Po is holding the elk rawhide that she rough cut for the 24″ drum: “Nature in Me.” Notice how the varying levels of transparency reveal animal and spirit faces in the rawhide.
Once the rawhides have been roughly cut, Po soaks them in spring water for about 24 hrs before stretching. In the photo below, three 10 inch drum skins have been put in together. After a couple of hours, they will naturally flatten out. For the above drum skin, Po used a kiddy pool and filled it with spring water. The skins are held down by rocks that she brought from the woods where she grew up. At least one rock will have quartz.
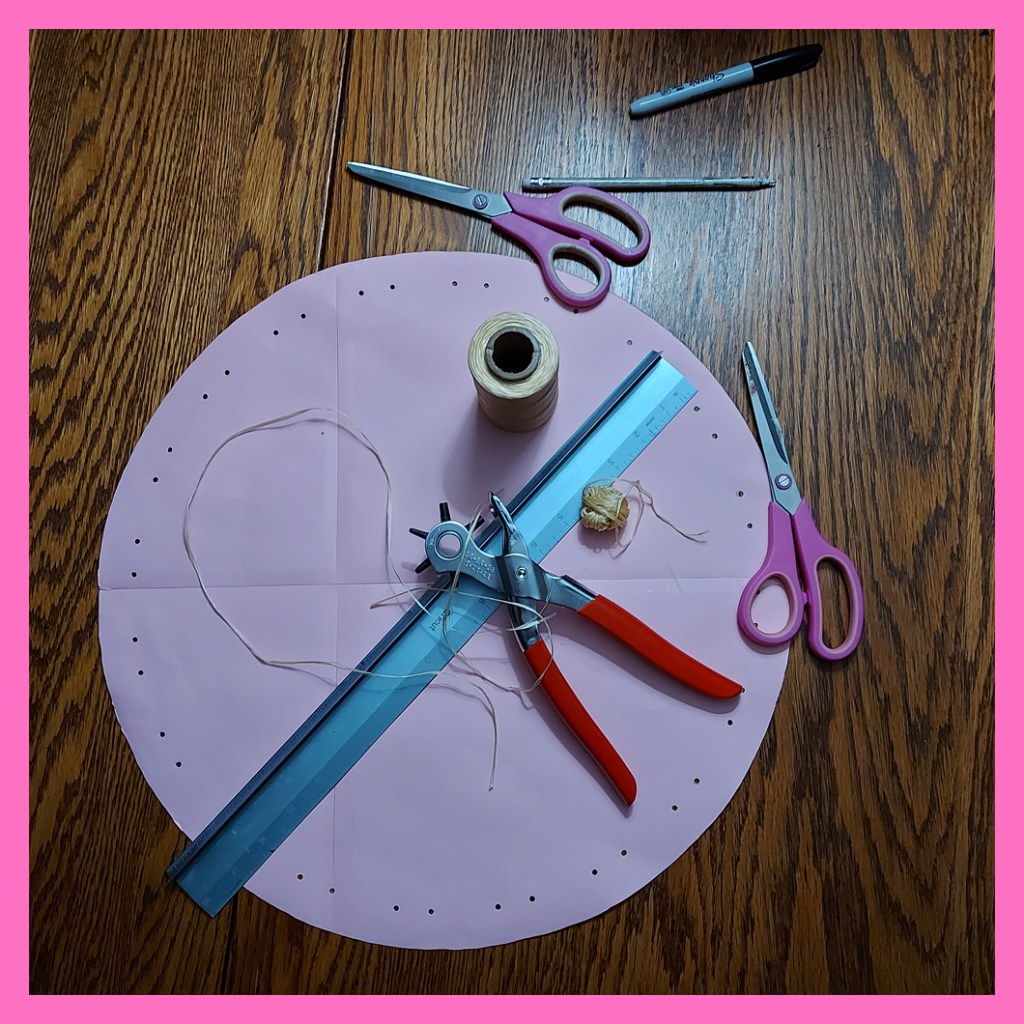
These are the tools that Po uses to prepare the rawhide for stretching. A different template is used depending on the size. Po’s drums have an average of 20 pleats. The 24 inch drum skin has 32 pleats. The more pleats in a hand drum, the tighter the skin forms to the frame and a more even pitch is achieved. Most drum makers use 12-16 pleats on average. 16 pleats and over (at least for 14 inch drums or larger) are considered “premium.”
After the template is drawn onto the wet and pliable rawhide, Po cuts the accurate shape and punches the string holes.
Before tightening the strings, Po measures the depth of the drum frame : drum skin ratio to best assure an even overlap. Some drums, however, dry and stretch differently. The rawhide is so strong while it shrinks and dries, that it can bend the frame and even pull the hide in its own direction. This gives each drum a one-of-a-kind hand made character.
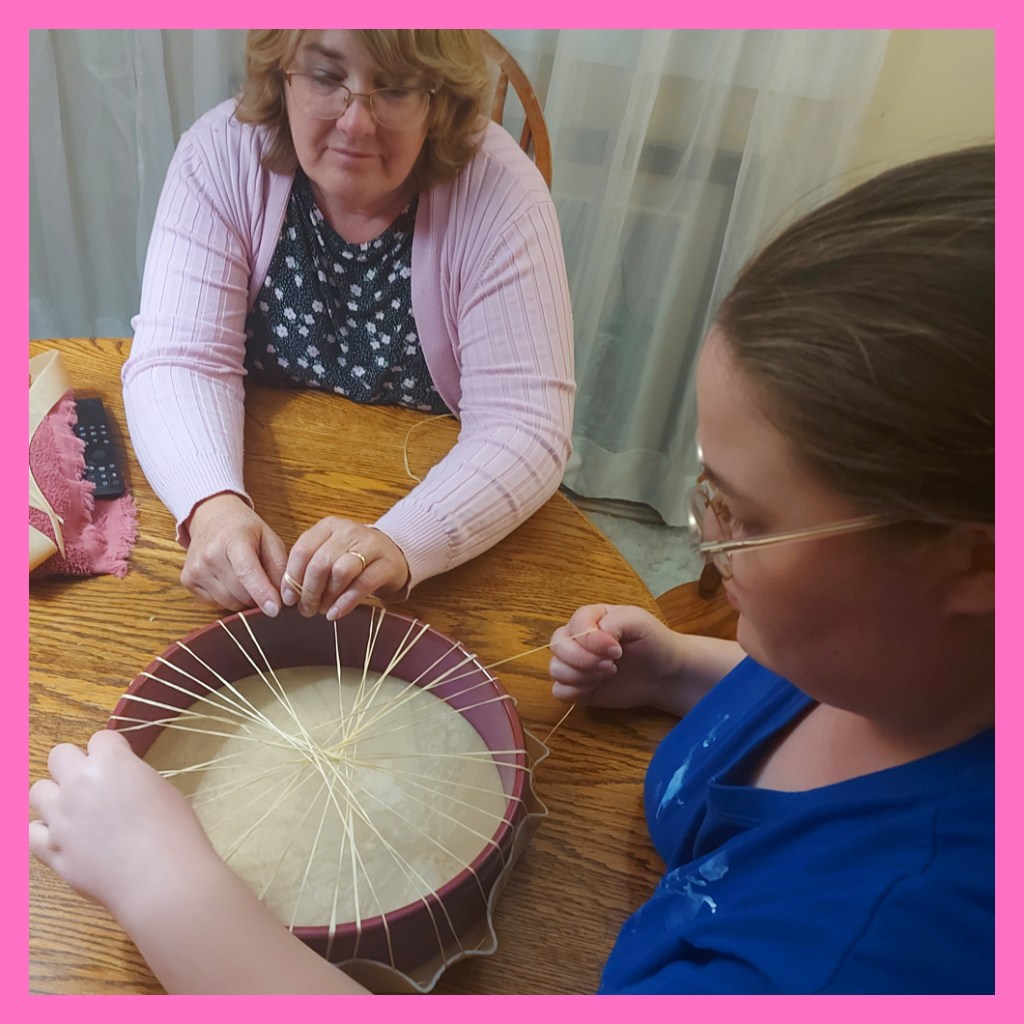
Po uses synthetic sinew that has been pre-waxed. It takes about 60+ feet of sinew to string a typical drum. As for the 24 inch drum in the collection, Po used about 100 feet of sinew. This is where Mom comes to the rescue as Po’s assistant. Her mom, Kim, does her best to prevent the sinew from tangling during the process of Po pulling the sinew through the rawhide.
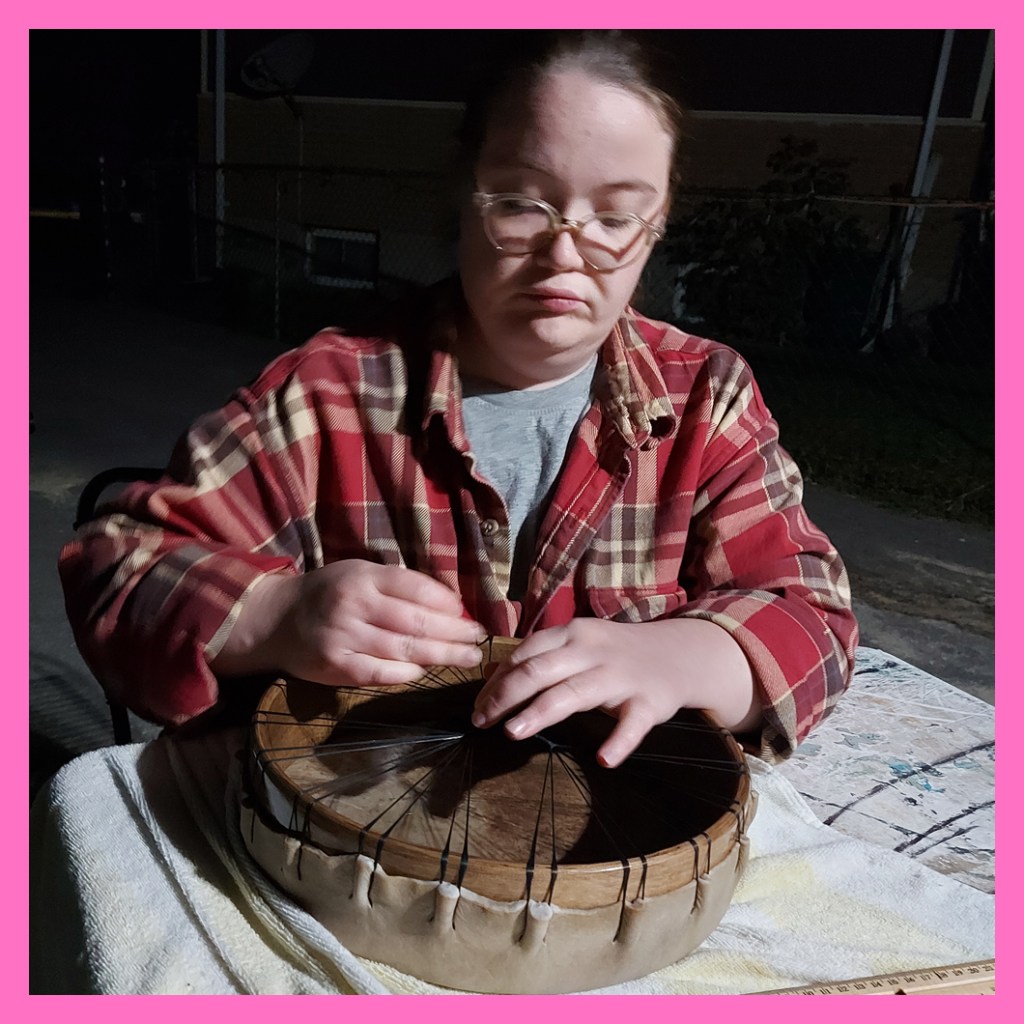
When the moon is full and bright, Po finds it peaceful to string drums outside.
The strings are then gathered in groupings and then decoratively strung with a nice wound finish. The drums in the exhibit have had the top of the centre tie waxed with beeswax. This is done to anchor the end of the sinew in the knot and to provide a personal connection between drummer and drum. The more the drummer holds it, the beeswax forms to the drummer’s hand, thus imprinting on the drum itself. This extension can last a lifetime – hand drums are that special.
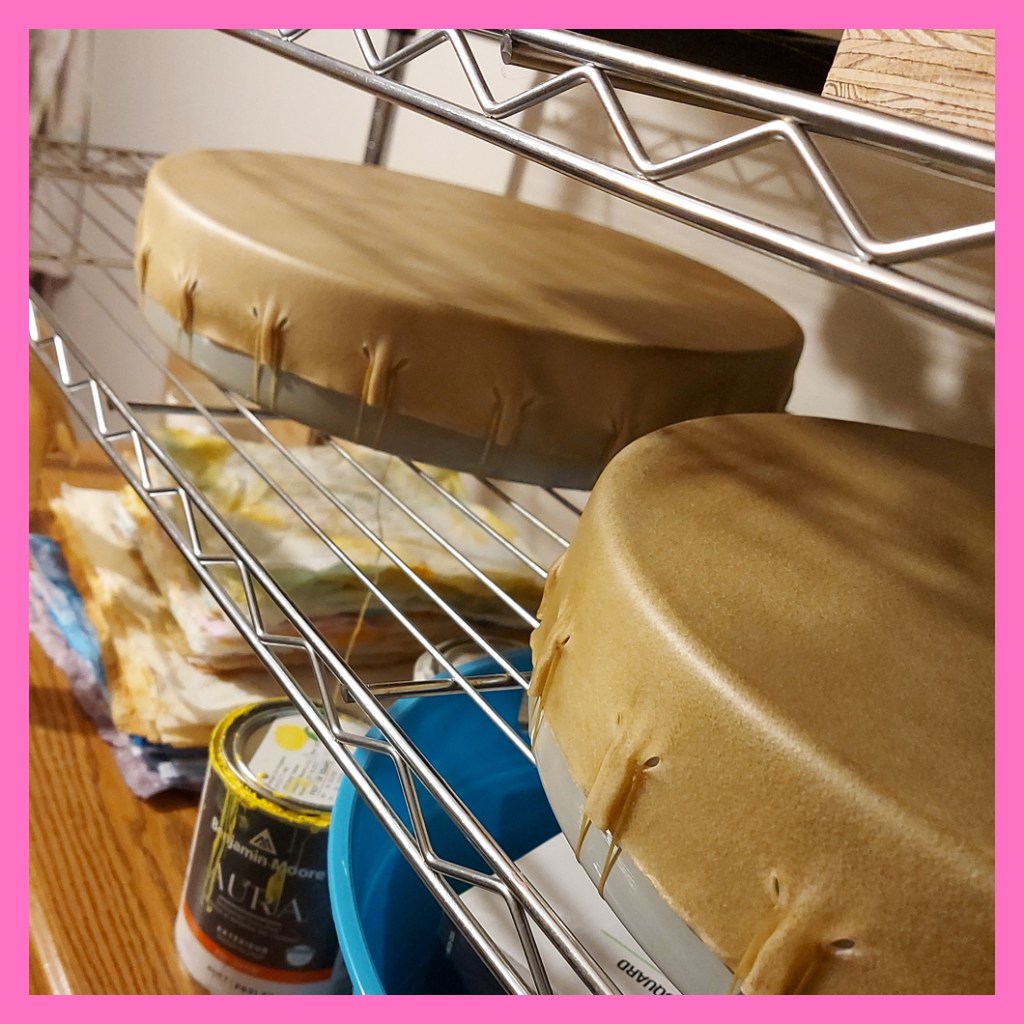
The drums are put on racks to dry. The drying process takes about 3 days. During, this time, the strings tighten and the drum will sound like it is drumming or fiddle strings are being plucked.
Image: Sketching, Printing, Stenciling & Painting
Image creation begins with inspiration memories and walks. Then sketches are made from day visions and night dreams received. The collection of images for this exhibit took about 4 months to surface. Not all drawings were used. They will be kept in a file until another collection is created.
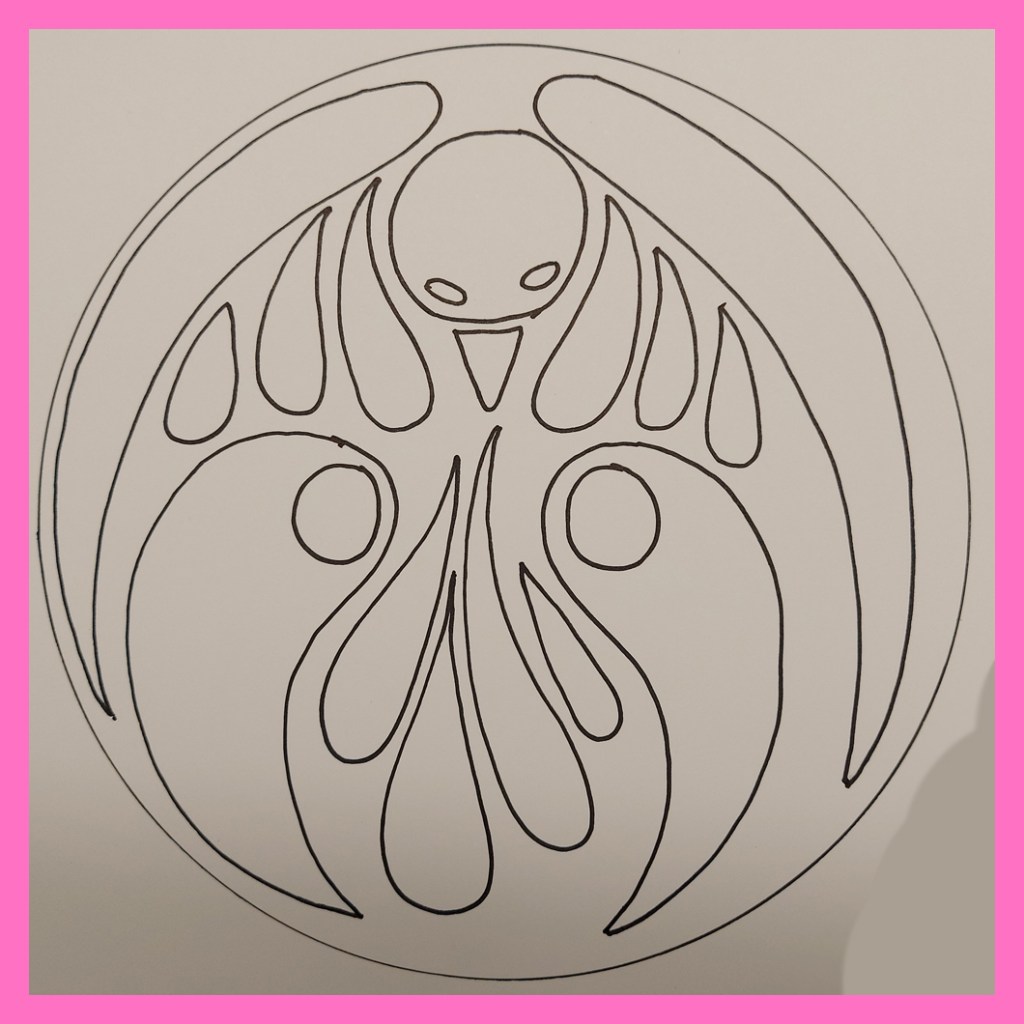
The images are then refined in such ways as to fit the collection or personality of the drum. This process is drawn by hand using a light table.
The drawn image is then digitally cleaned up to establish clean smooth lines.
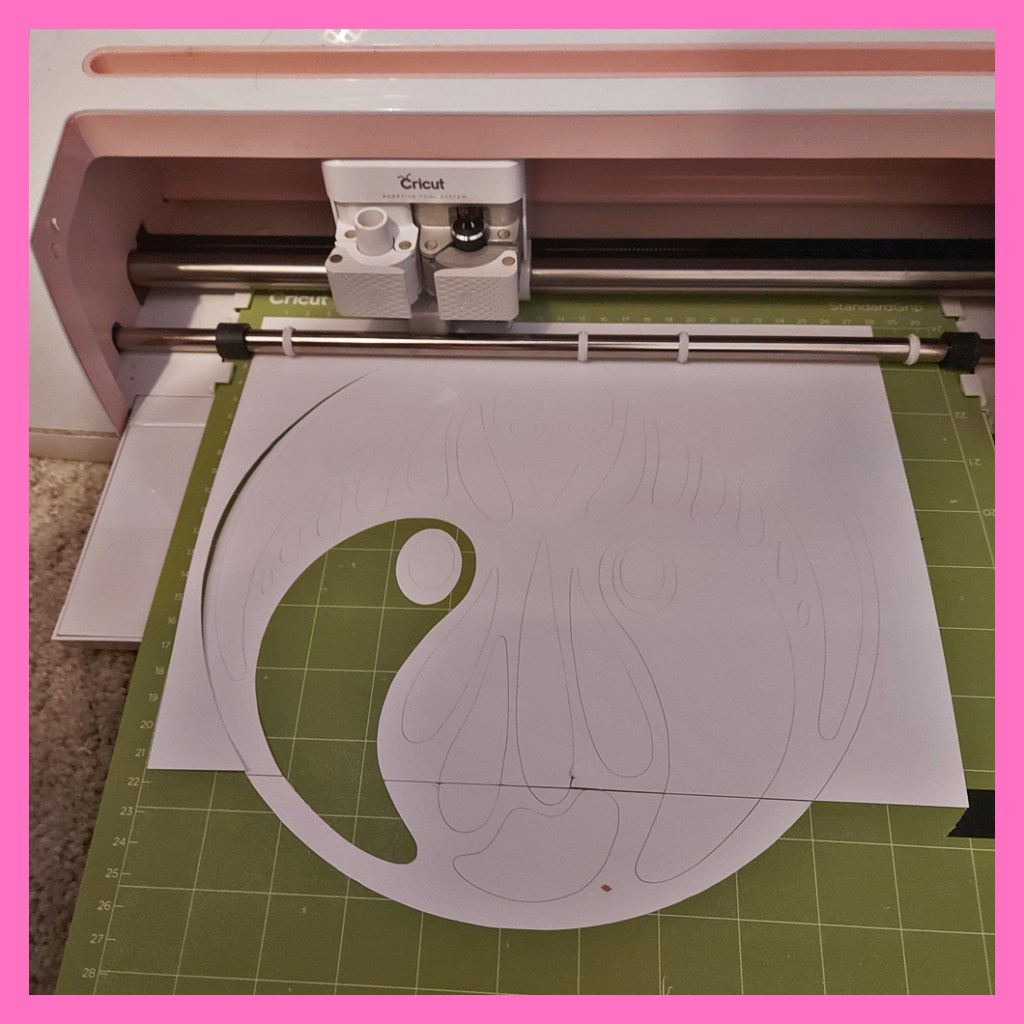
A template / stencil is then printed out using a Cricut Maker.
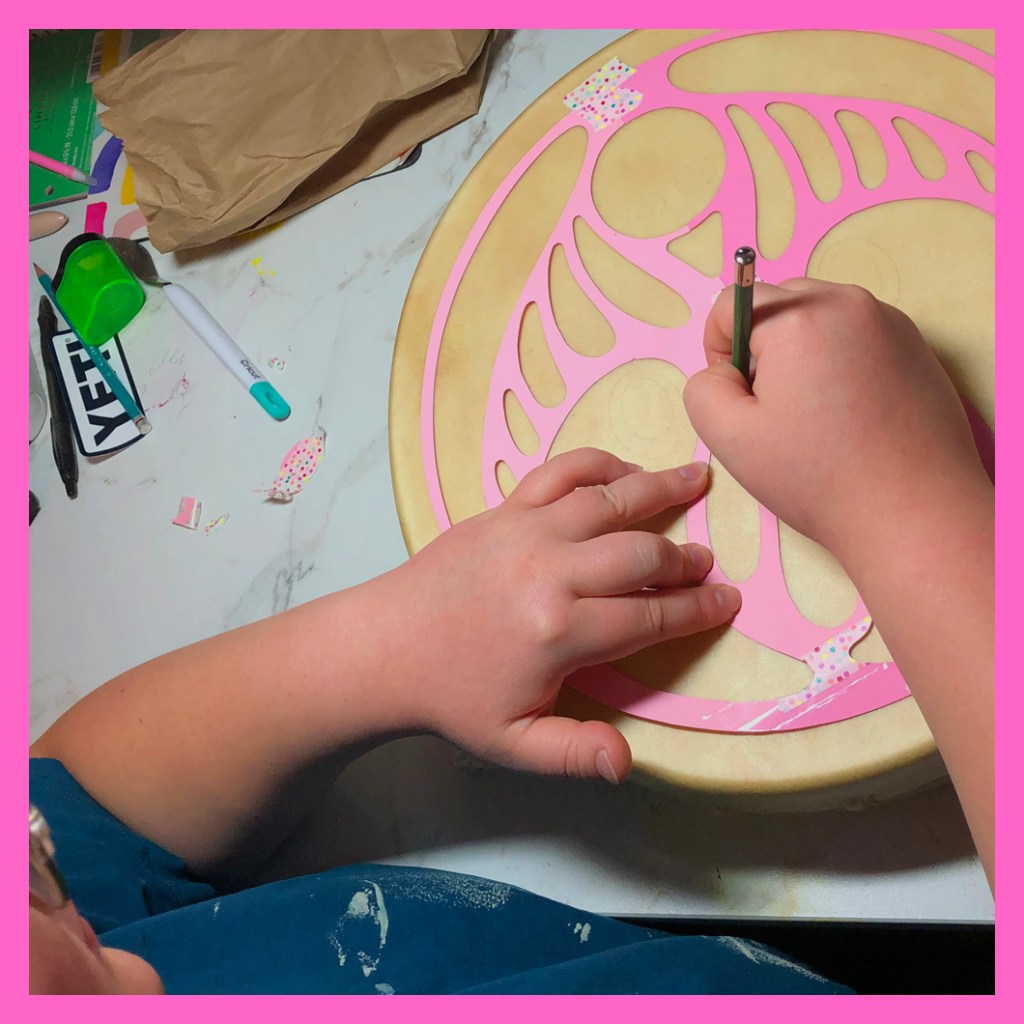
Once the image is cut out and weeded, Po traces the image onto the rawhide using a 2H pencil.
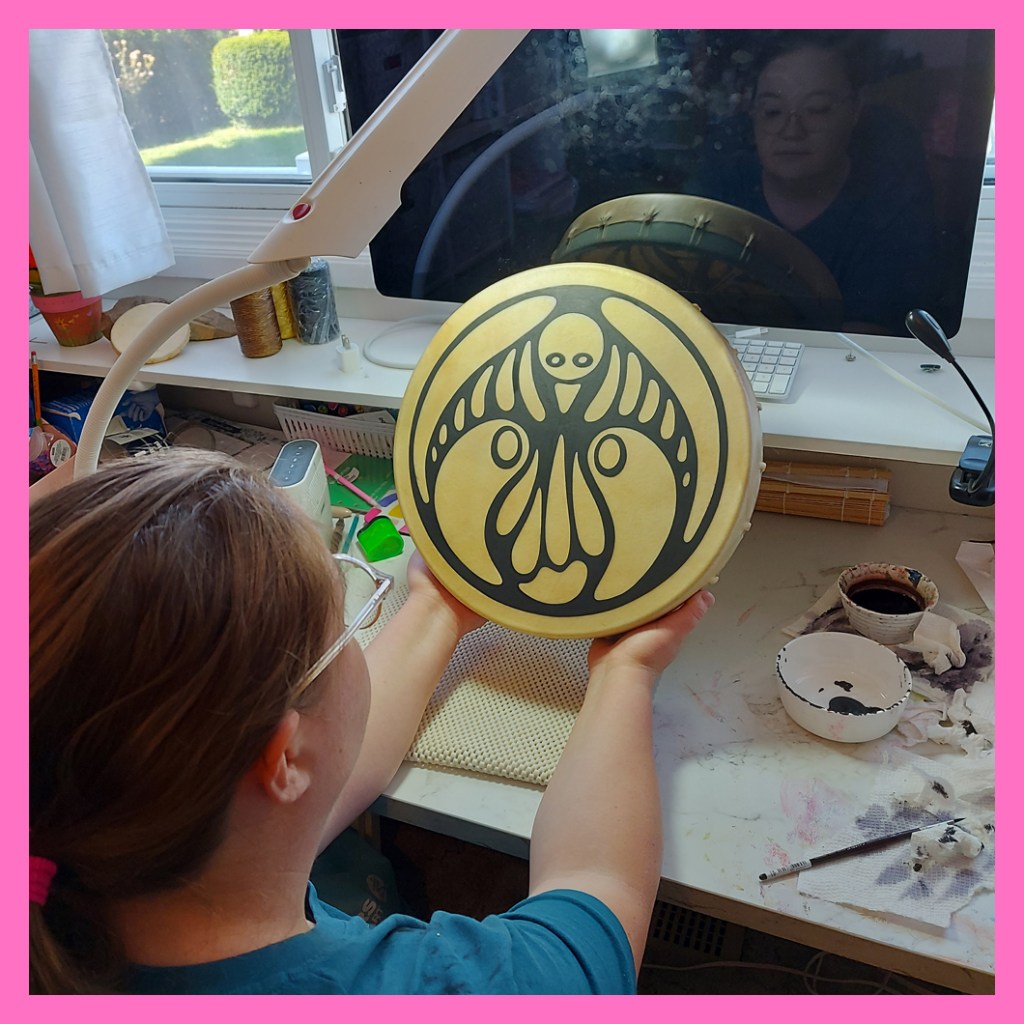
Using No.2 and No.3 professional watercolour brushes, Po paints the drums faces with hand mixed hues of Golden So Flat acrylic paint. This is how Po’s paint technique ends up being so crisp and flat.
After the paint dries for 24-72 hrs, the face is then preserved by spraying an oil based paint/hide-friendly varnish
Presenting Completed Hand Painted Hand Drums
The end result is both a beautiful piece of art that you can display and one that you can use. Some skins are more suitable for drumming and others more suitable for display. This depends on a variety of factors. Po recommends choosing the one you love. If you need further assistance choosing your drum, someone will be happy to assist you.
All drum sales are final and without exchange or refund.
Po presented an Artist Talk about this Collection and Greeted Guests Gallery on October 26, 2023 at 6:30pm-7:30pm
One Guest Commented: “It was a great pleasure to listen to Portia “Po” Chapman (@loveartbypo) talk about her art currently on display at Parrott Gallery. Po’s inspiration comes from her close relationship with nature and her beautiful family!”
Another Guest Commented: “It was such a wonderfully positive talk about a positive art collection. Very informative and truly enjoyable.”
How to Make a Painted Drum: Kingston Artist Portia Po Chapman’s Method of Painting a Drum Face
Portia Po Chapman Painting the Face of 14″ Elk Rawhide Drum: “Knowledge.”
Link to Phase 1: How Po Makes a Drum Frame Link to Phase 2: How Po Works with Rawhide – Stretching and Stringing Link to Painted Drum Page
Phase 3: How Po Paints the Face the Drums She Makes
Painting the face of a rawhide drum sounds much simpler than it is. The artist must keep in mind the nature of rawhide. Rawhide stretches and shrinks depending on humidity and temperature. Rawhide vibrates and flexes when it is drummed. Rawhide, is not smooth and sometimes has scars, hair, and wrinkles too. Most of all, each rawhide drum has its own sweet spots – where the drum sounds its best when drummed. Some drums even have multiple sweet spots and a couple locations whereby it makes a quiet sound when drummed. Therefore the paint needs to be thin, flat, translucent, and able to stretch. Po’s drums have addressed all of these issues in order to assure/improve longevity while enabling the drum to be drummed in both interior and exterior environments. When meeting the public at drum shows and art shows, Po is frequently told stories of paint cracking on drums made by other drum makers. Rest assured that Po drums every drum before selling them. Po also encourages clients to drum the drums before purchase as well. As far as the paint longevity – so far so good. Although many of the drums Po makes are sold to clients seeking works of art, Po still seeks to make beautiful drums that can be drummed. In short, whether you want to hang the drum on the wall or take the drum to a drum circle, the same amount of love and time is spent creating your masterpiece – and in so doing, every drum made by Po can be drummed. Po views drum making like this: “Why make a drum if you cannot drum it?!”
Po’s Phase 3 Drum Face Painting is as follows:
The image creation stage can happen overnight or as much as 3 months, it depends on the drum.
Usually Po will see an image in her mind while drumming the drum, but sometimes images visit her in her dreams.
Again, as strange as it sounds, Po says: “I just wait until I see what the drum wants me to see – and each rawhide is different.”
It is something like suddenly knowing what one will knit with the fleece that one has cleaned, carded, spun and dyed – each time is different – and so too is the sheep/goat that offered it in the first place.
Nature has a way of reaching through the noise and smiling upon us.
The image is sketched with a marker and then refined using a light table.
The flow of the lines begin to take over and the image you see appears.
The image is digitally cleaned up and a template is cut using a Cricut.
Upon the dry face of the rawhide drum, the template is traced using a 4H graphite pencil.
It is worthy to note that rawhide is a textile that varies widely in flexibility, texture, scarring marks and amount of hairs still present. This means that each drum is painted using a slightly different method.
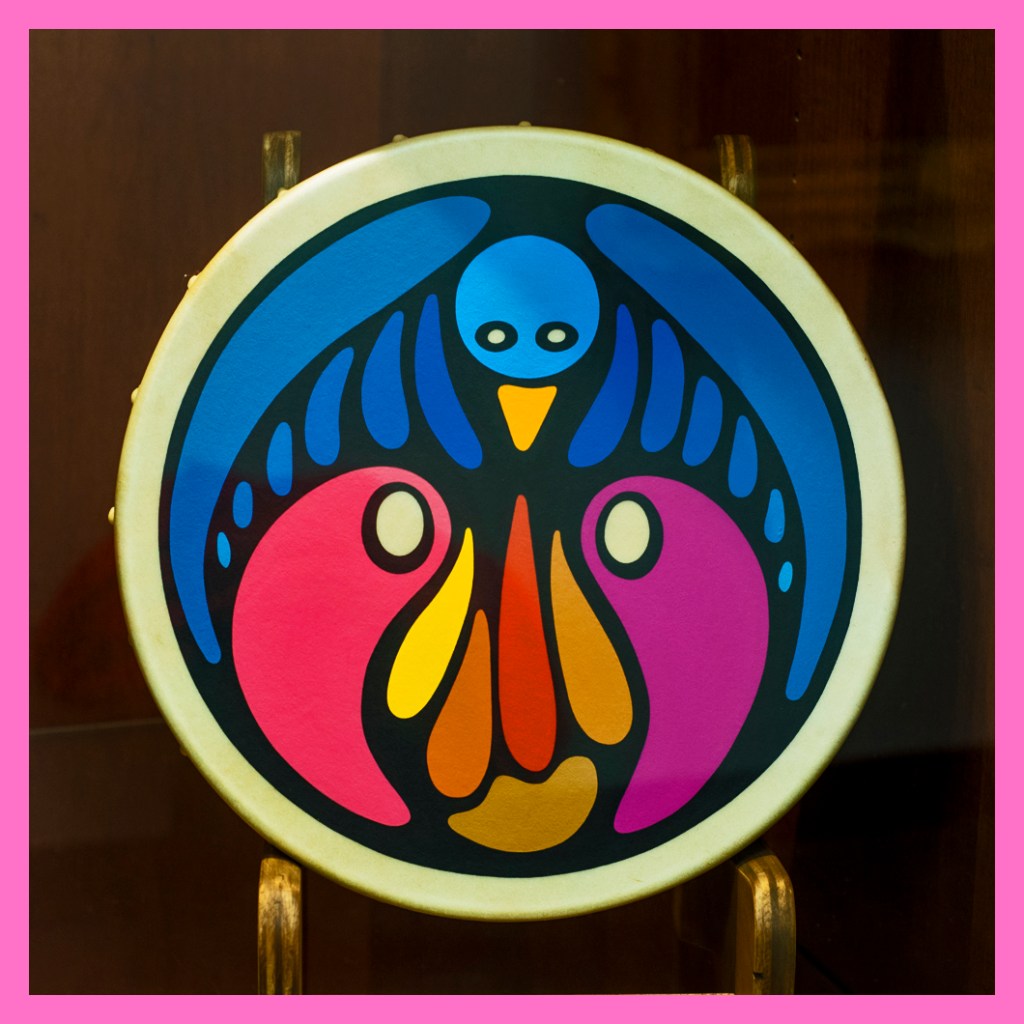
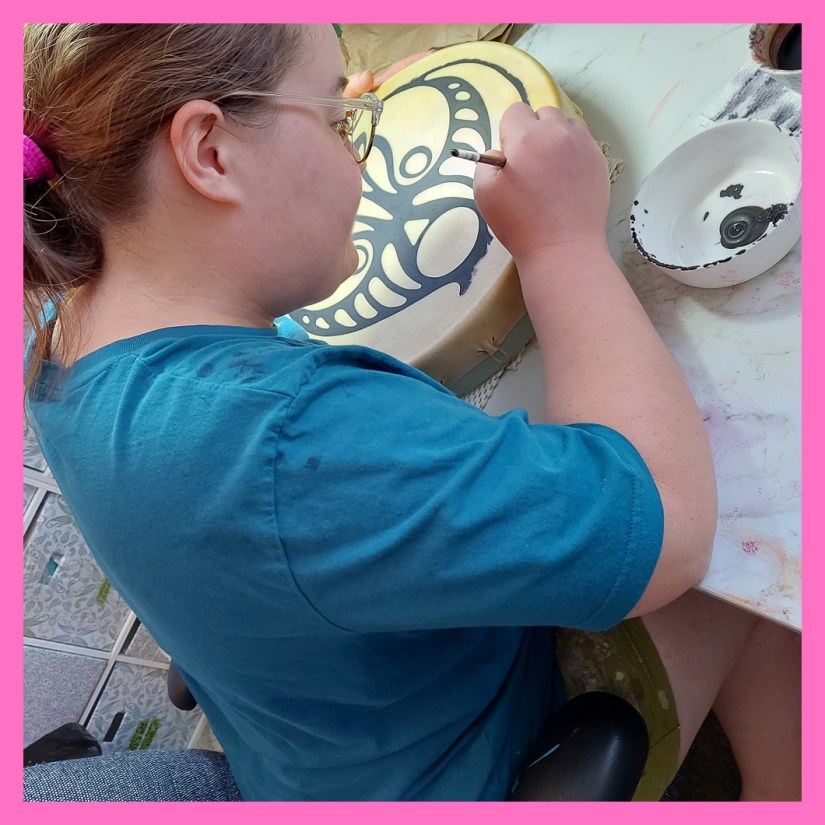
Using a very special, flexible acrylic paint the images are lined (free hand brush painted) with “black” (if at all). The “black” is usually a deep, earthy purple.
Po thinly paints the images using #1 to #3 professional grade round acrylic or equivalent watercolour brushes. The images are not stensilled, stamped, or air brushed. The images are not stickers, which some people think because the painted images can appear to float due to the depth of the rawhide’s transparency.
Using Po’s innovative colour-blocking style, Po pulls apart the shades and hues. The result is an unblended image that invites the mind to seam together the colours in its own way. The images shift in different lighting conditions and when drummed, the image appears to leap off the face of the drum.
The image is briefly held up to an intense studio light, enabling Po to see where a second or third coat of paint is preferred.
Once dry, the painted face is lightly sprayed with a mist of archival UV resistant varnish.
I exhibit and sell the drums I make. Please contact me to purchase a completed drum of to discuss a custom hand drum made just for you. I am happy to paint you a drum with the image you choose or one that I create just for you. Custom images are from $250. Drums, with painted and not-painted faces, range from $200-$2000.
I look forward to fitting you with your drum.
Po Standing with Drum Booth At the Gather in the County – Modern Textile Market – Picton, ON June 15, 2024
How to Stretch and String a Rawhide Hand Drum: Kingston Artist Portia Po Chapman’s Method
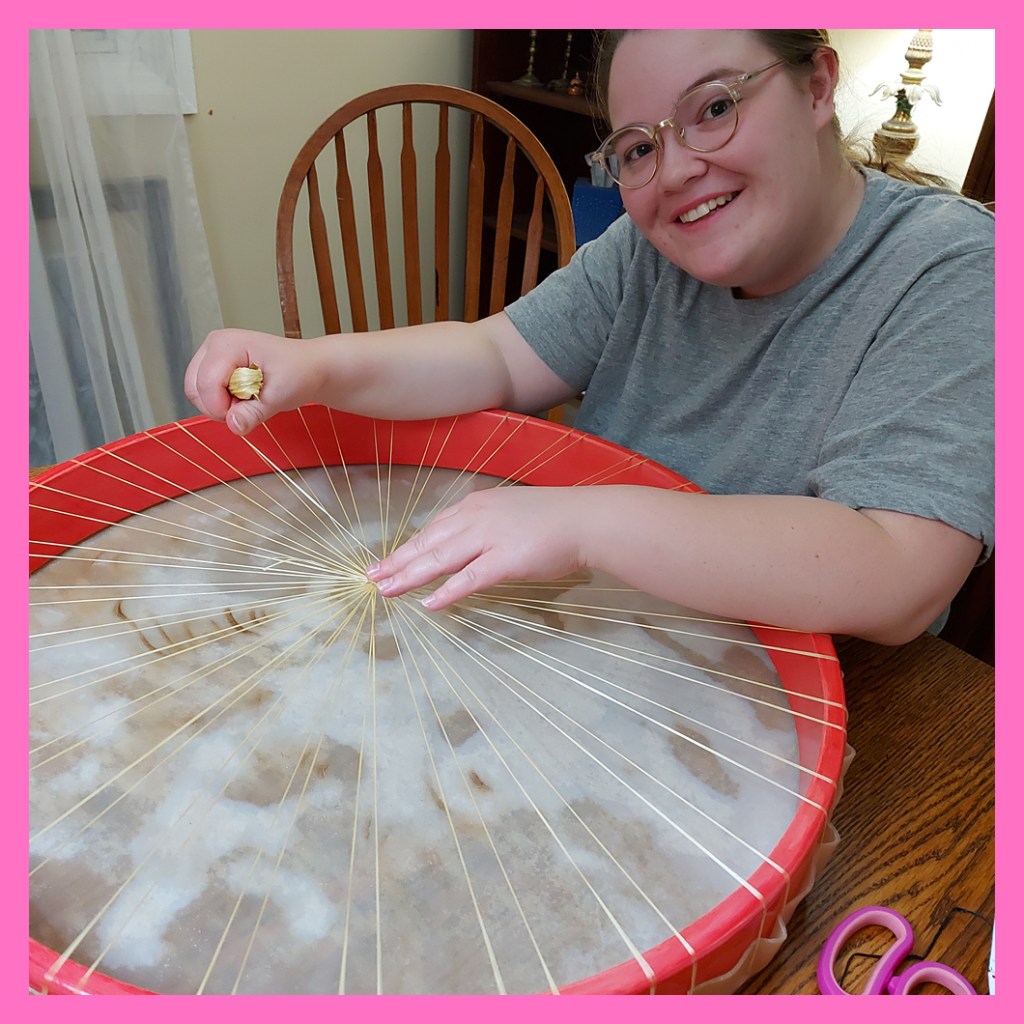
Po Stringing Her 24 Inch Elk Rawhide Drum Entitled: “Nature in Me.”
Link to: Phase 1 of Drum Making is Making the Drum Frame Link to: Phase 3 – Painting the Drum Face Link to: Painted Drums Page
Phase 2 of Drum Making is Working with Rawhide: Soaking, Stretching, Stringing
In order to make a drum, there are 3 basic stages of working with the rawhide: Soaking, Stretching and Stringing. Although these stages can be rushed, to achieve a premium drum that sings beautifully, it takes a lot of time, care and love. Hence, from receiving the rawhide to completing a playable tuned instrument, it takes about 1 month, sometimes longer. In my studio, I do all of the steps below. Please note that I do employ a shop hand to help detangle sinew when I am stringing large drums, like the one in the above image, because a 24 inch diameter drum requires a 100+ feet long continuous strand of sinew .
Phase 2 of Drum Making: Working with Raw Hide
Purchase sustainable rawhide that supports Indigenous communities across Canada.
Build relationship with the hide.
Humidity condition hide in the hide room.
Po waits for the hide to “speak” to her – it may sound strange but the hide will choose to make a drum or a drum will not be made. Working with rawhide requires patience and a lot of love.
Once the hide is ready to make a drum and make its voice once-again heard, Po introduces the hide to the frame options – this is a beautifully mystical step in Po’s drum making process whereby a holistic, earthy bond is made between wood, rawhide and drum maker.
With the marriage of drum frame and drum skin, Po designs a drum skin template with the number and placement of stringing pleats marked.
The rawhide is rough cut to match the shape of the template.
The rawhide is cleaned, scrubbed, pealed , rubbed and polished.
Sometimes the rawhide requires a sunshine bath or controlled UV bath.
Using a galvanized wash tub, Po soaks the rawhide for 24-48 hours in a rain water bath as the rawhide is kept submerged using special quartz and/or citrine rocks that she found while diving in her childhood lake.
Once the rawhide has become thick and pliable, it is removed from the water and rubbed with a soft terry towel. It is then cut to the shape of the pre-designed template.
String holes are punched (Po’s premium drums have between 16 and 30 pleats).
Of synthetic and waxed sinew, Po measures out about 5 feet per pleat – yes 80+ feet.
The frame is laid onto the underside of the rawhide and Po begins the lacing process.
As you can see in the above photo, generally, Po strings the drums by putting the string through two holes (to make pleat) on one side of the drum and then does the same on the exact opposite side of the drum. Po uses more decorative / ornate stringing patterns when stringing Po’s non-circular hand-bent drums.
Using a darning needle to string a drum, it takes Po between 2 hours and 8 hours of hand stitching, winding and wrapping the sinew as she pulls the rawhide into place. It can be tricky, when stringing large drums, because the hide begins to dry and become stiff within 30 minutes of being removed from the water. Aligning the timing of stitching and drying is possibly the most difficult thing for a drum maker must grow accustomed.
At this step, Po has found that the hide wins the tugging process. No matter how even the rawhide edge is originally made by Po, the rawhide will pull it to where it wants – resulting in a less uniform rawhide edge around the frame. Synthetic skin head drums do not present this challenge.
It is also worth noting that each animal and species’ rawhide pulls differently – and the spinal ridge pulls differently from the belly region. This takes a long time to get used to. In the case of working with rawhide as a textile, Po has had to relax and work with the rawhide, rather than demanding that it behave as she may want it to.
The drum is placed on the drum drying racks and is dried in a 50% humidity controlled space.
Once the drum is dry, it is taken out into the sunlight and drummed.
Po sings, chants and drums the new drum as they both rejoice. It is a seemingly miraculous happening.
Sometimes the general pitch of the drum is determined by drumming it beside a well tuned 1950’s Heinzman piano.
You cannot get use to the moment when the rawhide seems to come back to life and express its own voice and connection with the drummer.
The drum’s pulse throbs upon the breeze.
The ethers rejoice and the heart smiles with an air of wellness.
The central sinew knot at the back of the drum is then waxed. To try the drums, Po has people use nitrile gloves. When the drum is paid for and drummer is ready, the drummer’s glove is removed. At that time, the drummer & drum imprint. Their bond is marked by the drummer’s hand print pressed into the beeswax.
The drum is then cared for and sung with in the humidity controlled studio until it is to have a painted face (if it is ever painted – some drums refuse to be painted while other drums seek to be painted).
Another phenomenon then occurs – the drum picks the drummer at exactly the same time as when the drummer picks the drum. The moment of bonding is nothing short of magical.
Premium drums made by Po are very, very special – and premium special drums cannot be rushed.
I exhibit and sell the drums I make. Please contact me to purchase a completed drum or to discuss a custom hand drum made just for you. Drums range from $200-$2000.
I look forward to fitting you with your drum, Po
Po Standing with Drum Booth At the Gather in the County – Modern Textile Market – Picton, ON June 15, 2024
Phase 1 of Drum Making is Making / Preparing the Drum Frame
A drum frame takes me about weeks to make from start to finish. In my studio, I do all of the steps below. Please note that, I do employ a shop hand to help clamp and bend the steamed wood – this requires 2 sets of hands.
For coiled wood frames, the wood is planed very thinly and before gluing the coil is created by clamping and re-bending more tightly 3 times over a week’s time.
For both the hand bent in-studio frames and rough pre-coiled frames, the following steps are the same
Sand the frame to desired shape, thickness and smoothness
Paint, rub, dye or stain frame
Polish and finely sand frame
Varnish
I exhibit and sell the drums I make. Please contact me to purchase a completed drum of to discuss a custom hand drum made just for you. Drums range from $200-$2000.
Po Standing with Drum Booth At the Gather in the County – Modern Textile Market – Picton, ON June 15, 2024


Let Me Know What You Think! Start or Join the Convesation