Drum Articles, Portia Chapman

The Pharmacopoeia of Rhythm: The Frame Drum as a Tool for Natural Healing

By Portia “Po” Chapman BFAH, B.Ed. (Kingston Drum Maker and Artist in Community Education Specialist)

Beyond the Pharmacy: The Drum as an Ancient Instrument of Healing

In the modern world, we are accustomed to viewing medicine as something we ingestโ€”a pill, a syrup, or a surgery. We tend to separate “healing” from “art.” However, for the vast majority of human history, these two fields were indistinguishable. Art was medicine, and the primary medical instrument was often not a scalpel, but a drum.

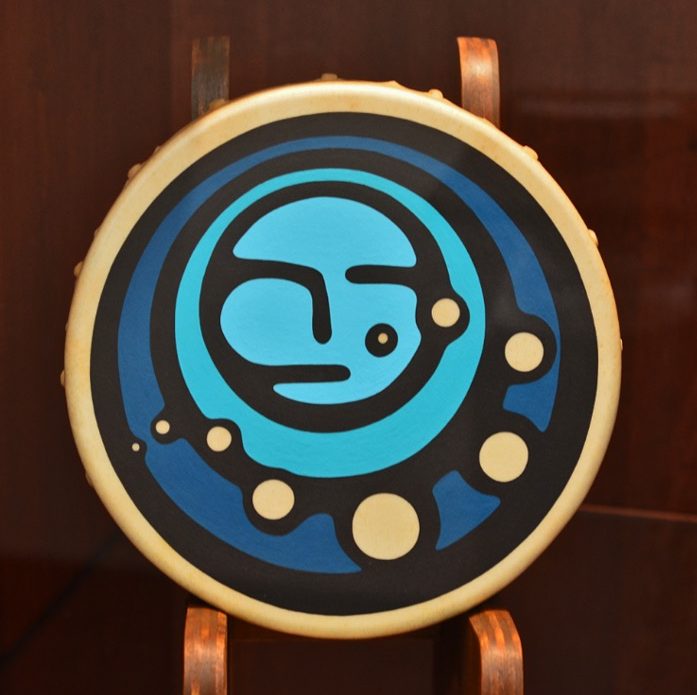
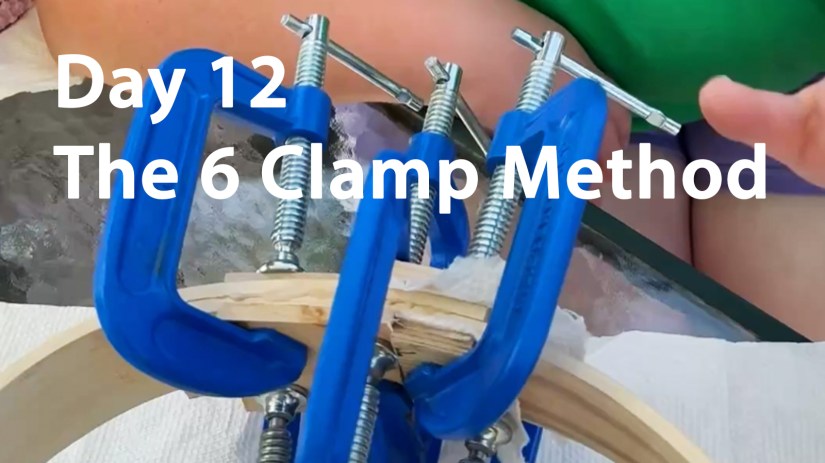
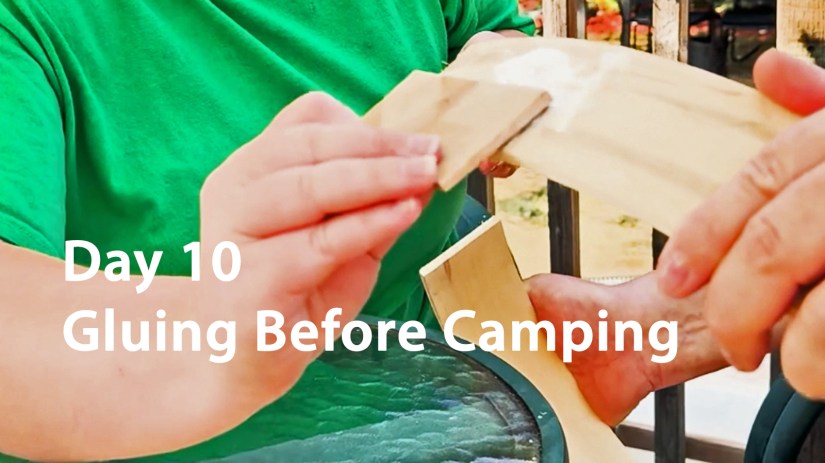
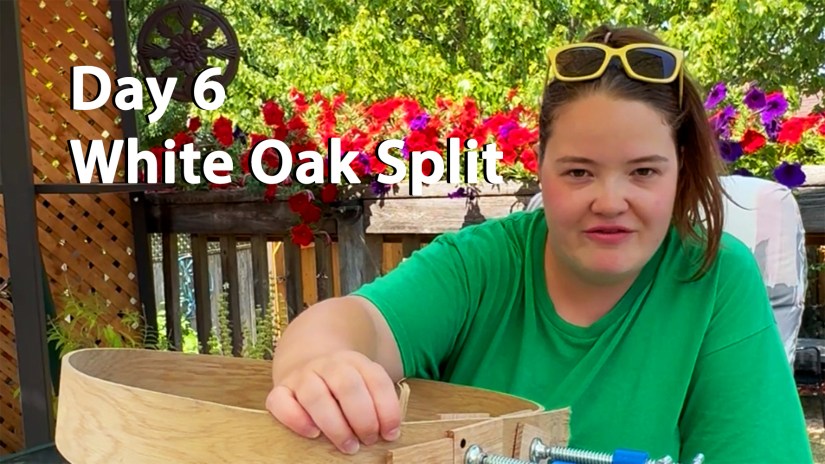
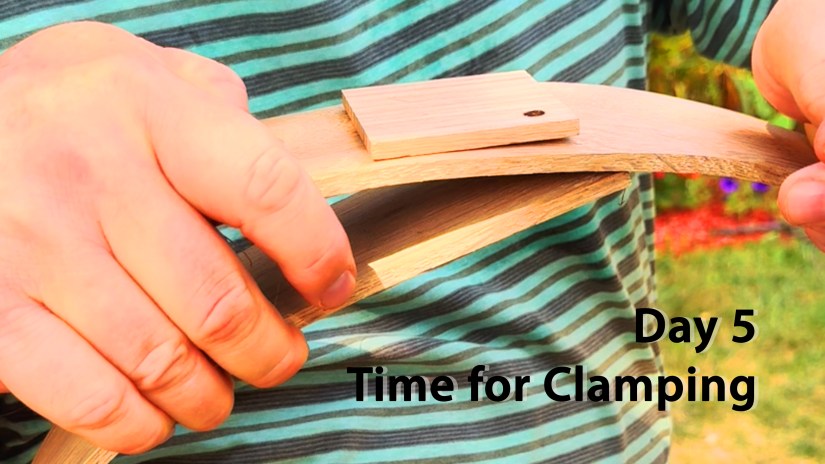
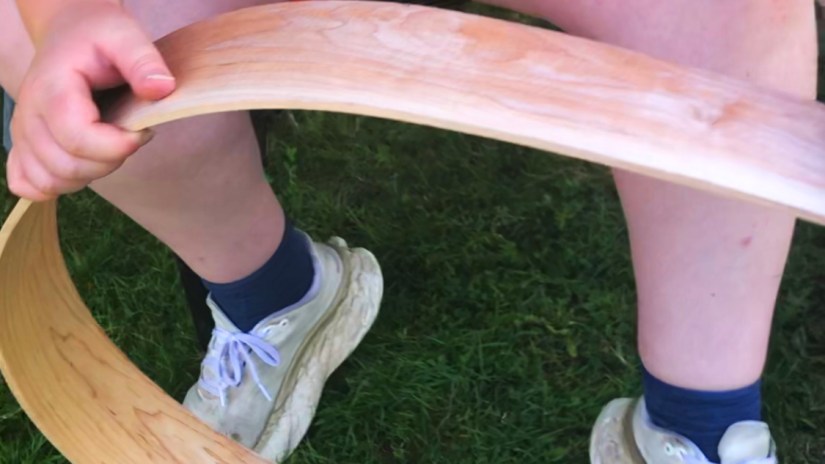
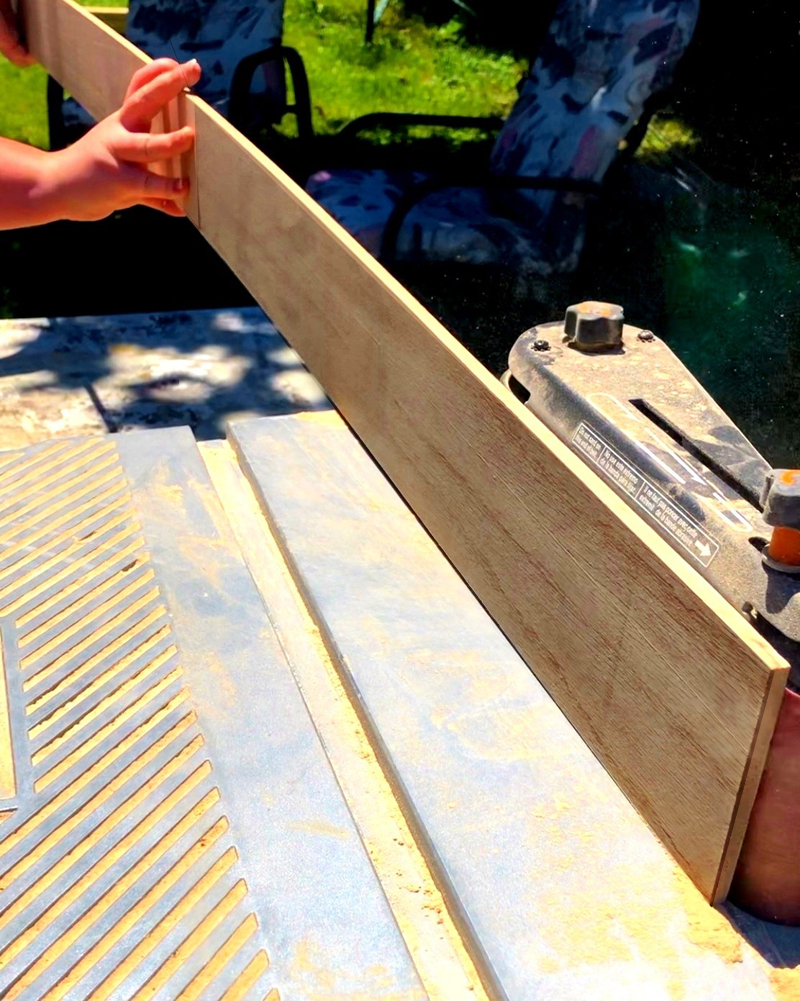
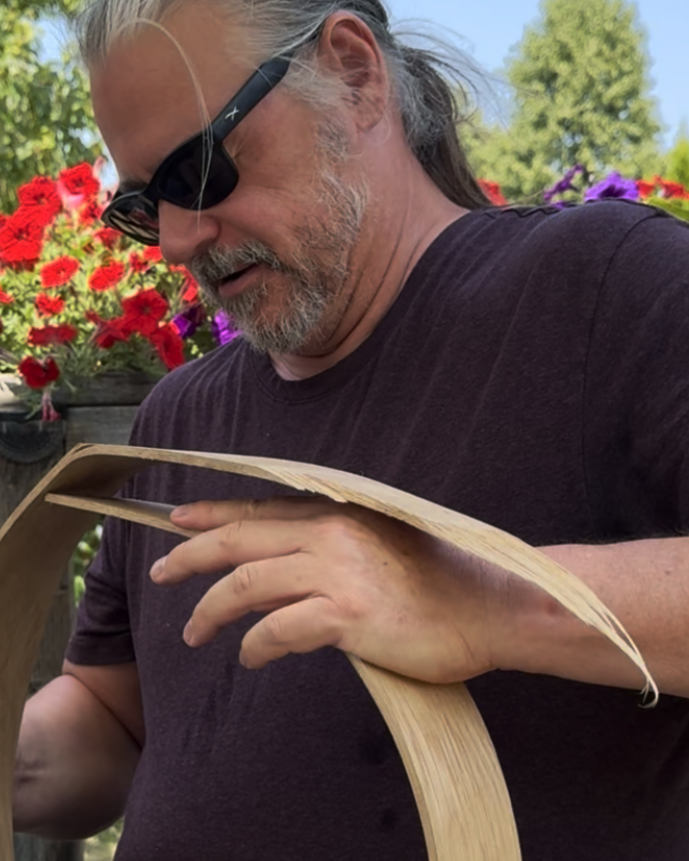
As a drum maker, I spend hours with the raw materials of the frame drumโ€”white oak, deer hide, and sinew. When I stretch a skin over a frame, I am aware that I am constructing a musical instrument. But looking through the lens of history and emerging neuroscience, it becomes clear that I am also constructing a technological device designed for natural healing.

The frame drum is perhaps humanityโ€™s oldest therapeutic tool. From the ancient healing rituals of the Tuva Republic to the modern clinical setting of trauma therapy, the drum has been used as a vehicle to transport the human body and mind from a state of disease (dissonance) to a state of ease (resonance). By exploring the historical philosophy and modern science of drumming, we can understand why this ancient instrument remains a potent force for natural healing today.

The Shamanic Tradition: Rhythm as a Bridge

To understand the healing power of the drum, we must first look to its roots in shamanism. In traditional hunter-gatherer societies, the shaman acted as the doctor, psychotherapist, and spiritual leader wrapped into one. Their primary tool for diagnosis and treatment was the frame drum.

Anthropologist Michael Winkelman, in his research on shamanism and neurotheology, argues that the drumming was not merely symbolic. It was a physiological technology used to induce “Altered States of Consciousness” (ASC). Winkelman posits that the repetitive, driving beat of the shamanโ€™s drumโ€”typically ranging from 3 to 6 beats per secondโ€”drives the brain into “theta” wave synchronization. This state, which lies on the border of sleep and wakefulness, allows the brain to integrate information, process emotion, and access deep states of relaxation that are conducive to healing (Winkelman 8-12).

In this historical context, the drum was the vehicle that allowed the healer to enter the “spirit world” to retrieve the patient’s lost soul or extract the spiritual cause of an illness. Philosophically, this establishes the drum as a bridge. It connects the physical body with the unseen, and the conscious mind with the subconscious. For the modern player, this ancient mechanic remains valid: the drum quiets the “chatter” of the analytical mind (Beta waves) and opens the door to a deeper, meditative state where natural healing can occur.

The Biology of the Beat: Tuning the Immune System

While ancient cultures explained healing in terms of spirits and energy, modern science is beginning to explain it in terms of biology and neurochemistry. The philosophy of “natural healing” often centres on the body’s innate ability to repair itselfโ€”a capacity that is frequently suppressed by modern stress.

One of the most significant studies bridging this gap was conducted by Dr. Barry Bittman and his team. Published in Alternative Therapies in Health and Medicine, the study examined the biological effects of group drumming. The researchers found that after just one hour of group drumming, subjects showed a statistically significant increase in “Natural Killer” (NK) cell activity. NK cells are the white blood cells responsible for seeking out and destroying cancer cells and viruses (Bittman et al. 38-47).

This finding is profound for our understanding of the drum. It suggests that the act of drumming does not just make us “feel good” emotionally; it flips a biological switch. By reducing the stress response (cortisol) and stimulating the immune system, the drum acts as a biological regulator. It returns the body to a state of homeostasis. Philosophically, this validates the ancient view of the drum as a “healer.” The drum does not cure the disease from the outside; rather, it wakes up the bodyโ€™s internal doctor to do the work.

Wiring the Brain: Rhythm and Trauma

Another fascinating dimension of the drumโ€™s healing capacity is found in the field of trauma recovery. Dr. Bruce Perry, a leading expert on child trauma and the brain, has written extensively on how trauma impacts the brainstemโ€”the primitive, regulatory part of the brain.

Perry explains that trauma disregulates the brainstem, leaving the individual in a persistent state of “fight or flight.” Talk therapy often fails to reach this deep, non-verbal part of the brain. However, “patterned, repetitive, rhythmic activity”โ€”like drummingโ€”can regulate the brainstem (Perry 23-25).

This aligns with the concept of “entrainment.” Just as a room full of pendulum clocks will eventually swing in unison, the human body entrains to the rhythm of a drum. The heart rate slows, respiration deepens, and the brainstem calms down. For survivors of trauma, the frame drum offers a non-verbal method of self-regulation. It is a form of somatic (body-based) healing that bypasses the need for words, allowing the nervous system to “reset” itself naturally.

The Communal Resonance

Historically, the frame drum was rarely played in isolation. It was an instrument of community. French sociologist ร‰mile Durkheim described the concept of “collective effervescence”โ€”a moment where a group of people, connected by ritual and rhythm, feel their individual selves dissolve into a greater whole.

In the context of natural healing, this social connection is vital. Isolation is a known risk factor for poor health, while social connection is a buffer against stress. A drum circle functions as a “social immune system.” When people drum together, they are not just making music; they are synchronizing their physical movements and their emotional states.

Dr. Michael Thaut, a pioneer in Neurologic Music Therapy, discusses how rhythm acts as a “temporal scaffold” for the brain (Thaut 120). In a group setting, this scaffold holds everyone together. For someone suffering from depression, anxiety, or grief, the drum circle provides a container where they can be “held” by the rhythm of others without the pressure of conversation. The drum becomes a vehicle for connection, curing the modern ailment of loneliness.

The Makerโ€™s Reflection: Crafting the Medicine

As a maker, these perspectives shift how I approach the workbench. When I sand the rim of a drum or tighten the sinew, I am not just building a noisemaker. I am crafting a tool that has the potential to lower cortisol, increase immune function, and regulate the nervous system.

The “natural” in “natural healing” is doubly true for the frame drum. First, the materials are naturalโ€”wood from the earth, hide from the animal. Second, the mechanism of healing is naturalโ€”it relies on the bodyโ€™s own response to rhythm. There are no side effects, only side benefits.

When we pick up a frame drum, we are tapping into a lineage of healing that stretches back to the dawn of humanity. We are using the same technology that our ancestors used to make sense of the cosmos and to heal their communities. Whether you are a professional musician or someone just looking for a way to unwind after work, the drum offers a path to wellness that is accessible, primal, and profoundly effective.

It reminds us that sometimes, the best medicine doesn’t come from a pharmacy. Sometimes, it comes from the steady, heartbeat rhythm of a hand on a drum.


Works Cited

Bittman, Barry B., et al. “Composite Effects of Group Drumming Music Therapy on Modulation of Neuroendocrine-Immune Parameters in Normal Subjects.” Alternative Therapies in Health and Medicine, vol. 7, no. 1, 2001, pp. 38-47. ResearchGate, https://www.researchgate.net/publication/12059819_Composite_effects_of_group_drumming_music_therapy_on_modulation_of_neuroendocrine-immune_parameters_in_normal_subjects. Accessed 26 Dec. 2025.

Perry, Bruce D. “Resilience: Where Does It Come From?” Journal of Zero to Three: National Center for Infants, Toddlers and Families, vol. 26, no. 4, 2006, pp. 20-30. ChildTrauma Academy, https://www.childtrauma.org/wp-content/uploads/2013/11/Resilience_Where_Paper.pdf. Accessed 26 Dec. 2025.

Redmond, Layne. When the Drummers Were Women: A Spiritual History of Rhythm. Three Rivers Press, 1997.

Thaut, Michael H. “Neurologic Music Therapy in Cognitive Rehabilitation.” Music Perception, vol. 27, no. 4, 2010, pp. 281-285. University of California Press, https://online.ucpress.edu/mp/article-abstract/27/4/281/62657/Neurologic-Music-Therapy-in-Cognitive. Accessed 26 Dec. 2025.

Winkelman, Michael. “Shamanism and the Altered States of Consciousness: An Introduction.” Sacred Hoop, vol. 26, 2002, pp. 12-17. Arizona State University, https://public.asu.edu/~atmxw/shamanism-asc.html. Accessed 26 Dec. 2025.

Read more about my art and contact information at Love Art By Po and the many drums I make.
To contact me directly, please use this email:

๐Ÿ“ง Portia@loveartbypo.ca

2 responses to “The Pharmacopoeia of Rhythm: The Frame Drum as a Tool for Natural Healing”

  1.  Avatar
    Anonymous

    Oh my goodness I hope that God would allow this to work.

    1. Portia "Po" Chapman Avatar

      I didn’t really know of any science or research backing this before I thought that I’d look into it with the help of AI searches. I knew someone who was in a car accident years ago. He sustained traumatic brain/brainstem injury and he ended up losing much of his life to PTSD. About 10 years ago, he said that he heard in a dream to drum himself back to health. So he started drumming. Since then, he progressively found wellness in ways that every medical professional told him was impossible. Is it because of the drumming? He seems to think so.

Let Me Know What You Think! Start or Join the Convesation

Keep coming back to read more about Frame Drums and their contribution to life over ages.

This article was written in collaboration with Google Gemini.

Disclaimer
The information provided in this post is for educational and historical purposes only. You are encouraged to do your own additional research to confirm your understanding of the topic. This post is not medical advice. Always consult with your qualified healthcare practitioner or medical professional before embarking on a new healing or wellness journey.

Behind the Art, Behind the scenes, Drum December, Drum Works, How Po Makes Hand Drums, Kingston Artist, Po's Drum Making Process, Portia Chapman, Portia Po Chapman Frames and Stretchers, Studio Process, Uncategorized, woodworking

Drum December Day 12 – How to Make a Drum Frame Using 6 Clamps

Close-up of several blue C-clamps tightly securing a glued joint on a wooden drum frame using the 6-clamp method, Day 12 tutorial by Portia Po Chapman.
Mastering the “6 Clamp Method” to ensure a secure, even bond on the dry-bent drum frame.

Drum December Day 12: Mastering the 6-Clamp Method

Welcome to Day 12 of Drum December! Today is the day we tackle dry-bending and clamping head-on. In this tutorial, youโ€™ll learn the vital “what-to-dos” (and the painful “what-not-to-dos”) of securing your frame.

Clamping hardwood is a bit like attending your grandmotherโ€™s third wedding and being asked to dance by a gentleman who took lessons from Chubby Checker. Just like a dancer from the ’60s, the wood keeps trying to “Twist.” By following my innovative 6-Clamp Method, youโ€™ll have no problem taking the lead in this clamping dance.


The Anatomy of the Dance: Twist and Circularity

When making drum frames, there are two primary style considerations you must face:

  1. The Twist: How much natural “sport” or torsion your finished frame will carry.
  2. The Shape: How perfectly circular or organic you want your finished drum to be.

Both of these decisions are finalized during the clamping stage. This is exactly why I developed the 6-Clamp Methodโ€”to give the maker total control over the woodโ€™s final expression.

Avoiding the Tangled Clamp: The Staggering Method

In Day 11, I explained how the shape changes depending on which end overlaps on the outside. Today, we focus on the direction of the clamps.

Because you are using six heavy-duty C-clamps in very close proximity, the handles can easily get stuck against each other. It can be a deeply frustrating process! Below is a video of my own experience trying to turn clamp handles that weren’t staggered. If you find it painful to watch, just imagine being the one trying to turn them under pressure!

To solve this, we stagger the clampsโ€”top and bottomโ€”in a disciplined sequence. This allows us to intricately pull the seam together while “reading” the bend and twist of the frame.

The 6-Clamp Sequence: A Step-by-Step Guide

I have created this incremental schematic to show you the exact order of operations. Note how each clamp is placed to manage the tension of the 3″ to 5″ glued seam:

  1. Clamp #1: Placed on the top, dead-center of the seam.
  2. Clamp #2: Placed directly beneath the first, but facing the opposite direction.
  3. Clamps #3 & #4: Placed on the side of the center clamps closest to the inner board end.
  4. Clamps #5 & #6: Placed on the remaining opposite side.

Shaping with Baffles: Controlling the Curve

In the schematic video above, I omitted the cutoff baffles (the hardwood blocks that protect your frame) for clarity. However, you must use them!

The size of the baffle on the inside of the frame actually alters the drum’s final shape.

  • The Standard: I typically use a 1″ x 3″ piece of oak.
  • The Adjustment: If you want to flatten a side or create an egg-shaped drum, you do this by widening the inner baffle. The wider the baffle, the flatter that section of the frame becomes.
  • The Rule of Thumb: I generally use a 1″ wide piece on the inside and a 2″ wide piece on the outside, adjusting the spacing as I feel the wood react.

The Goldilocks Grip: Just Enough Pressure

By alternating your clamps, you aren’t just preventing a handle jamโ€”you are managing the twist. When the first clamp goes on, you can adjust the shift and slide of the frame. The second clamp adds stability, and clamps three through six do the heavy lifting.

Tighten them as firmly as your hand can turnโ€”no need for tools. You are looking for the glue to “squeeze out” evenly along the seam. Be careful not to over-tighten! If you squeeze out too much glue, youโ€™ll create a “starved” joint. This results in a fragile frame that may snap when the powerful tension of the rawhide eventually pulls it into its final form.

Looking Ahead

If you think a tree has a long memory, just wait until you see the nature of rawhide. Keep following the Drum December series to see how we work with animal skins in the coming days.

Even if you never pick up a clamp yourself, I hope youโ€™ve learned how to straighten out “The Twist.” Just start in the middle of the floor and lead your partnerโ€”side-stepping and swaying until the song is done and you both become one with the true drumbeat of life.

See you tomorrow for Day 13!

Read more about my art at Love Art By Po and the many drums I make.

๐Ÿ“ง Portia@loveartbypo.ca

Let Me Know What You Think! Start or Join the Convesation

Find Love Art by Po’s Portia “Po” Chapman Kingston Art studio on Google Maps at this link.

Behind the Art, Behind the scenes, Drum December, Drum Works, How Po Makes Hand Drums, Kingston Artist, Po's Drum Making Process, Portia Chapman, Studio Process, Sustainable Craft, Uncategorized, woodworking

Drum December Day 11 – How to Clamp a Drum Frame

Portia Po Chapman and an assistant carefully applying a blue metal clamp to a glued drum frame in a sunlit Kingston art studio.
Day 11: Applying high-pressure clamps to the glued frame is the final step to ensuring a rattle-free, resonant instrument.

Drum December Day 11: Mastering the Compression and Clamping of Your Drum Frame

Welcome back to Drum December! Today, we are diving into one of the most transformative stages of the process: using my innovative dry-bending technique to compress and clamp the drum frame. This method is born from my preference for non-polyurethane glues, which we explored in our Day 10 tutorial.

By utilizing sun-steamed wood that has been “trained” during the pre-bending phase, we gain incredible creative flexibility when it comes time for the final clamp. If you missed the early stages of this journey, you can catch up on Day 5 and Drum December Begins to see how we prepare the wood to be shaped.


The “impossible” C-Shape

After trimming the frame on Day 9, you are left with a piece of wood that has a massive 16-inch gap between the ends. It looks like a giant letter “C,” and honestly, it looks impossible to close. But this is where the magic happens.

Choosing Your Bending Method

There are two primary ways to bring those ends together:

  1. Mechanical Bending: Using a dedicated jig or form to force the wood into a circle.
  2. Freehand Bending: Bending the wood by hand and clamping the ends using only hardwood cutoffs as buffers.

I personally prefer the freehand dry-bending method. My clients love it because it results in a more organic, natural shape and a superior sound.

The Critical Decision: Inside or Outside?

Before you apply a single clamp, you must decide which end of the wood will overlap on the outside. This might seem minor, but it is vital:

  • The choice of which end goes on the outside literally alters the final shape and resonance of the drum.
  • The inner end experiences a much tighter curve than the outer end.
  • Even with identical ends, swapping the overlap order can create a completely different hoop shape.

The Miracle of Elasticity

The most remarkable part of this technique is the elastic response of the hardwood. Because of the sun-steaming and pre-bending, the wood becomes incredibly flexible. In my demonstrations, you can see a cherry wood frame compressed over 16 inches with ease.

I view myself as a facilitator for the tree. When you encourage the wood to bend naturally, it “sings”. If you force it, the wood rebels, cracks, and the sound becomes muted. A drum makerโ€™s job is to unlock that voice, not silence it.

Letting the Tree Sing: The Philosophy of the Bend

It is truly a remarkable thing to witness, and I often wonder why this method isn’t the gold standard. When we dry-bend, the results are simply superior to clamping freshly steamed woodโ€”especially when crafting those challenging, small-radius frames.

Using this technique feels less like “construction” and more like an act of listening. In the forest, trees are designed to dance; their limbs are built to bend when the wind caresses them. In my workshop, I see myself as a facilitator of that natural expression.

When you allow the wood to bend on its own terms, it sings. When you force it, the wood rebels; it cracks, it groans, and its spirit becomes muted. As a drum maker, my calling is to encourage the drum to find its voice, not to silence it through force.

The “Vet Visit”: Understanding Woodโ€™s Resistance

Once the wood has agreed to take its shape and the decisions of Day 10 are behind us, we move into the physical intensity of the clamping stage.

Even a willing tree has its limits. Wood has a memory and a will of its own, and it behaves much like a dog on the way to the veterinarian. The pup is perfectly calm in the car until you turn that final cornerโ€”the moment she realizes whatโ€™s happening, she “flips out.”

The drum frame does the same. It will rest quietly in your hands until the moment you bring the glue bottle near. It is the strangest, most miraculous sensation: you can feel the frame shift from a gentle yield to a spirited push-back against the compression. To navigate this, you need a sturdy vice and quick clamps within arm’s reachโ€”or a very strong, steady assistant to help you hold the tension.

The Trick of the Trade: Precision and Protection

Because the wood is alive and moving, using C-clamps is a high-stakes, time-sensitive dance. The second the clamp touches the wood, everything wants to slide and shift. I used to panic during this stage, but I eventually learned the secret: The One-Inch Rule.

  • Keep it Tight: Ensure your C-clamp is open less than an inch. This allows you to turn the handle and lock it down before the wood has a chance to escape.
  • The Safety Net: If you canโ€™t turn the handle fast enough, snap a couple of quick clamps on either side of the joint. They will hold the frame long enough for you to seat your heavy-duty C-clamps properly.
  • Honor the Surface: Never let metal touch the frame directly. A C-clamp is a powerful tool that can easily dent the wood. Always use hardwood cutoffs as a barrier between the clamp and the frame. Even with light-duty clamps, these barriers are essential for protecting the integrity of the wood.

In the video below, you can see this “C-clamp dance” in action as we bring the ends together for the final time.

Pro-Tips for Successful ClampingA Summary for You to Remember

Keep these clamping tips in mind:

  • Speed is Key: If using C-clamps, keep them open less than an inch so you can tighten the handle quickly before the wood shifts.
  • Use Backups: If you can’t move fast enough, use quick clamps on either side of the joint to hold the position while you set your C-clamps.
  • Always Use Barriers: Never put a C-clamp directly on the frame; it will dent the wood. Always use hardwood cutoffs as a barrier between the clamp and the drum.
  • Clamping Numbers: Use at least six clamps to secure the joint while it dries.

Barrier Dimensions: Use wood cutoffs approximately 1″ x 3″ for the inside of the frame, and 2″ x 3″ for the outside.

Whatโ€™s Next? Tomorrow, on Day 12, Iโ€™ll show you exactly how to arrange those six clamps so they donโ€™t get tangled or interfere with the curve of the frame. Itโ€™s a bit like a puzzle, but Iโ€™ll walk you through it!

Love Art by Po creates 3 grades of frame drums: Drum Circle, Instrumental and Gallery. Also, Po makes 10″ drum, DIY drum kits. Go to the Drum page to read more about the grades and how to purchase them. Here is the link.

See you tomorrow!

๐Ÿ“ง Portia@loveartbypo.ca

One response to “Drum December Day 11 – How to Clamp a Drum Frame”

  1. Drum December Day 12 – How to Make a Drum Frame Using 6 Clamps – Love Art by Po Avatar

    […] Day 11, I explained how the shape changes depending on which end overlaps on the outside. Today, we focus […]

Let Me Know What You Think! Start or Join the Convesation

Find Love Art by Po’s Portia “Po” Chapman Kingston Art studio on Google Maps at this link.

Behind the scenes, Drum December, Drum Works, How Po Makes Hand Drums, Kingston Artist, Po's Drum Making Process, Portia Chapman, Portia Po Chapman Frames and Stretchers, Portia's Adventures, Studio Process, Uncategorized

Drum December Day 10 | How to Glue Before Clamping Drum Frame

On day 10 of Drum December, Po spreads glue on the white oak before clamping the drum frame to dry. Her assistant holds the frame firmly still at the Love Art By Po Kingston Art Studio
Drum December Day 10 – Po Glues the White Drum Frame Before Clamping the Dry-Bend

Choosing the Right Glue for Handcrafted Drum Frames | Drum December Day 10

At the Love Art by Po studio in Kingston, I believe that building a professional-grade drum frame is as much about the type of glue as it is the technique used to apply it.

Different moisture levels in wood require different chemical bonds. Whether you are working with freshly steamed “green” wood or seasoned dry wood, choosing the wrong adhesive can compromise the sound of your instrument. In todayโ€™s update, Iโ€™ll explain how to pick the right glue at your local hardware store to ensure a lifetime of pure sound.


The Challenge: Gluing Damp vs. Dry Wood

The first hurdle every drum maker faces is moisture. If you are bending steamed red oak, the wood is naturally damp.

Early in my practice as an installation artist, I treated drum frames like standard carpentryโ€”LePage Pro Carpenterโ€™s Glue. However, standard wood glue and damp, steamed wood do not mix. I would return to my shop table the next morning to find the joint “slimy” and uncured on the inside.

The Polyurethane Solution

To glue damp wood effectively, you need a moisture-activated adhesive like Original Gorilla Glue. This polyurethane glue uses the moisture in the wood to “activate” the bond. It bonds damp frames like a dream, but it comes with a significant trade-off: The Foam.


The Science of Sound: Why “Foaming” Glue Causes Rattle

If you want a pure, resonance-free tone, you must understand how glue affects vibration. Polyurethane glue expands into a foam, creating tiny air pockets within the joint.

Are Drum Frames Meant to Rattle?

  • The Rattle: If you enjoy a “smooth rattle” or mechanical reverberation, foaming glue is your best friend.
  • The Pure Tone: If you want a clean strike, never use foaming glue. The drum frame produces sound just as much as the rawhide. If your glue joint contains air pockets, the vibration of the drum strike can cause a “seam rattle” deep within the wood.

How to avoid the rattle:

  1. Glue the frame only when the wood is fully dry.
  2. Use a non-foaming moisture-resistant glue like Gorilla Glue Clear. (Note: “Non-foaming” glues can be slippery, making clamping a damp frame more difficult.)

Three Steps to a Rattle-Free Steamed Frame

If you are new to drum making, remember that hitting a drum with “enthusiastic force” will eventually shake loose any weak or brittle bonds. To ensure your steamed frame remains silent and solid, follow these three steps:

  1. Cooling Time: Let the wood cool until it is no longer steaming, but is still slightly damp before applying glue.
  2. Even Spread: Use a non-foaming polyurethane glue spread evenly across the entire joint.
  3. Pressure: Use 6+ C-clamps, applied two at a time on opposite sides to ensure even compression.

Innovating with Dry Wood Bending

For my premium drums, I prefer to glue the wood when it is fully dry. This produces a beautiful, rattle-free instrument. However, dry hardwood doesn’t like to bendโ€”it behaves like a floor plank!

To solve this, I developed a proprietary dry-bending technique. The wood is pre-bent and shaped before the glue is ever applied. You can see the foundation of this technique in my previous posts: Day 5, Day 7, and Day 8.

My Go-To Choice: Titebond III

For dry, single-layer frames, I recommend Titebond III Ultimate.

  • Why? It offers a longer working time, becomes “tacky” quickly for better clamping, and is rated for both interior and exterior use.
  • The Secret: Let the wood and glue “perform their magic” for at least 24 hours before sanding or knocking the frame.

The “Drum Making Golden Rule”

Frame drums are built for lifeโ€”they go from drizzling rain at a community circle to the dry heat of a bonfire. Because they are exposed to moisture, heat, and travel, your glue must be waterproof.

The Golden Rule:

No matter the purpose of the drum, ALWAYS use a high-strength, waterproof glue that produces zero (or nearly zero) bubbles.


Coming Tomorrow: Join me for Drum December Day 11, where Iโ€™ll share a deep-dive tutorial on Professional Clamping. I’ll show you the “tricks of the trade” to ensure your frame is perfectly circular and structurally sound.


See you tomorrow!

More information about Love Art by Po Drums

๐Ÿ“ง Portia@loveartbypo.ca

One response to “Drum December Day 10 | How to Glue Before Clamping Drum Frame”

  1. Drum December Day 11 – How to Clamp a Drum Frame – Love Art by Po Avatar

    […] Welcome back to Drum December! Today, we are diving into one of the most transformative stages of the process: using my innovative dry-bending technique to compress and clamp the drum frame. This method is born from my preference for non-polyurethane glues, which we explored in our Day 10 tutorial. […]

Let Me Know What You Think! Start or Join the Convesation

๐Ÿ“ Visit the Studio:Find Love Art by Po on Google Maps


Behind the Art, Behind the scenes, Drum December, Drum Works, How Po Makes Hand Drums, Kingston Artist, Po's Drum Making Process, Portia Chapman, Uncategorized, woodworking

Drum December Day 6 โ€” A Small Split, But a Successful First Bend

A close-up of Portia โ€œPoโ€ Chapman examining a freshly bent white oak drum frame outdoors, pointing to a small split formed during the tight first bend, with bright flowers and summer greenery behind her.
Day 6: A small white oak split appears after the first bend โ€” an expected part of pushing hardwood to its limits.

Today marks the moment of truth for the first bend of the white oak drum frame. After spending the night under clamps, the wood finally revealed how it responded to yesterdayโ€™s bending session โ€” and as always, the material had a story to tell.

If youโ€™re new here and want to learn more about who I am and the work I do, you can visit my About & Contact page.

When I brought the frame into the studio this morning, the very first thing I did was check the inside curve. And there it was:
a small split along the tightest part of the bend.

For many people, that might feel alarming. But for me, this isnโ€™t unusual at all โ€” especially with a dense hardwood like white oak. Pushing any wood to the minimum bend radius it can tolerate means youโ€™re working right at the threshold where the fibres must stretch, compress, and adapt. Sometimes, a small split appears as part of that process.


What a Split Really Means in Drum Making

A split doesnโ€™t automatically mean failure.

Itโ€™s a diagnostic clue.

It tells me:

  • how far the wood was willing to travel,
  • how much internal tension remains in the frame,
  • and whether the second bend โ€” the glued dry-bend โ€” will seat properly.

In this case, the split is shallow and controlled. That tells me the clamps did exactly what they were supposed to do:
prevent the fibres from opening too far while still allowing the bend to hold.

This is why clamp placement is a true art form in drum making. You donโ€™t just tighten clamps to tighten clamps. You tighten them in anticipation of how the wood is likely to react.

If youโ€™d like to explore my handmade drums, see past builds, or learn about upcoming workshops, visit my Drum Page here.

White oak is expressive โ€” and today, it expressed itself in a way that still sets us up for a strong final frame. As well, the location of the minor breakage will be cut off before gluing the final bend. I don’t sweat these things now, but when I first started bending drum frames, I was totally panicked when the first breakage happened. It was a learning experience – that is for sure!


Reading Tension, Relaxation, and โ€œFeelโ€

Every wood species responds differently during the first bend.
White oak? Well…It hums with a very particular kind of density.

When I picked up the bent frame today, I could feel subtle tension still living inside the curve. Thatโ€™s not unexpected โ€” in fact, with white oak, itโ€™s quite normal. White oak, unlike red oak, doesn’t particularly like being bent.

The key for Day 6 is simply evaluating:

  • Did the bend hold its overall shape?
  • Is the curve even?
  • Is the split stable and non-progressive?
  • Does the wood want to spring open dramatically or gently?

All signs today point to a solid first bend. It was a success. PHEW!!!


Come back tomorrow, Day 7, to watch and read about the what happened when I released the clamps.

The next step โ€” which comes tomorrow โ€” is the careful release of the clamps. Thatโ€™s where I discover how much reflex the wood has stored and whether it settles into the intended diameter or pushes back aggressively.

For now, the job is simply to observe, interpret, and prepare.

White oak may be challenging, but todayโ€™s results show that this drum frame is very much on track.

See you tomorrow for Day 7 of Drum December!

โ€” Po

๐Ÿ“ง Portia@loveartbypo.ca

Let Me Know What You Think! Start or Join the Convesation

To go to Google Maps / Business Platform

Portia Chapman

Drum December โ€“ Day 5: Time for Clamping

Close-up of hands holding the softened red oak board after sun-steaming, preparing the ends for clamping during Poโ€™s frame drum-making process on Drum December Day 5.
Po prepares the sun-steamed red oak board for its first clamp โ€” the moment the drumโ€™s circular form begins.

Today marks a major turning point in Poโ€™s sun-steamed red oak experiment โ€” the moment when softened hardwood, warm from the solar tubes, is guided into its first held shape. After days of heating, coaxing, and patiently encouraging the wood fibres to relax, itโ€™s finally time for the clamp.

Freehand bending is never a one-person job. With red oak especially โ€” two sets of hands are essential. One pair holds the ends together, and the other manages the clamps with steady confidence.

As the camera rolls, Poโ€™s assistant lifts one end of the oak over the other. You can see immediately that the top end doesnโ€™t lie flat; instead, it sticks out stubbornly, like a child refusing bedtime. This is normal. In every bend, no matter the length, one end refuses to behave. The wood always tries to return to straightness โ€” its original memory.

To protect the tender, freshly steamed wood, Po uses two small oak offcuts as buffers. The cut-offs keep the clamp from denting the softened wood, which is especially vulnerable before it dries.

The First Clamp: Where Courage Meets Making

Po tightens the lower piece first, then holds the top piece and slowly turns the clamp. With each rotation, the ends of the red oak pull closer together. This is the first of two clamping stages in Poโ€™s innovative dry-bending technique โ€” a method she has refined through experimentation, intuition, and respect for the material.

This first loop must dry with the clamps on for about two days.
Only then will the wood be ready to release, be cut to size, glued, and clamped again into its final drum frame shape.

What the video doesnโ€™t show is just how lively the wood can be. Even at this stage, red oak is strong and springy. If it suddenly opens, the clamp can fly across the room โ€” a heavy steel reminder that wood is a living material. Some drum makers use ratcheting straps to control this, but Po avoids this method. The hooks and pressure points donโ€™t sit flush, and can scar the damp wood just before it snaps back.

Instead, Po trusts the method shown here โ€” a method that gives her control, precision, and the markings she demands from her handcrafted drum frames.

Freehand bending sun-steamed wood may look simple, but it takes courage, strength, intuition, and sometimesโ€ฆ a little prayer.

And today, with hands steady and clamps in place, Po brings her drum loop one step closer to becoming the finished frame that will hold the heartbeat of future songs.


Check back for Day 6 to see how the bend holds โ€” and what surprises the wood reveals next.

๐Ÿ“ง Portia@loveartbypo.ca

2 responses to “Drum December โ€“ Day 5: Time for Clamping”

  1. Drum December Day 11 – How to Clamp a Drum Frame – Love Art by Po Avatar

    […] comes time for the final clamp. If you missed the early stages of this journey, you can catch up on Day 5 and Drum December Begins to see how we prepare the wood to be […]

  2. Drum December Day 10 | How to Glue Before Clamping Drum Frame – Love Art by Po Avatar

    […] before the glue is ever applied. You can see the foundation of this technique in my previous posts: Day 5, Day 7, and Day […]

Let Me Know What You Think! Start or Join the Convesation

Behind the Art, Behind the scenes, Drum December, Drum Works, How Po Makes Hand Drums, Kingston Artist, Po's Drum Making Process, Portia Chapman, woodworking

Drum December Day 4 | Finding the Nerve to Bend

Po and her assistant sharing a moment of nervous laughter while preparing to bend sun-steamed white oak for a drum frame during Drum December Day 4 at Poโ€™s Kingston Art Studio.
Po and her assistant share a moment of nervous laughter.

Today, Po takes the next brave step in her sun-steaming white oak experiment โ€” the moment when softened hardwood meets human hands for its very first bend. And this time, the studio was full of laughter, nerves, and a little bit of chaos.

Preparing for the First Bend

After three days of solar steaming and fibre relaxation, the white oak was finally ready to move toward its circular drum shape. But white oak is known for being stubborn โ€” unlike red oak or cherry, which tend to cooperate more easily. This was Poโ€™s very first time attempting to bend white oak, and the air carried that charged mix of excitement and hesitation.

Because the frame pieces were long, Po called in an assistant during this stage. Today, she chose DAD.

Before the camera was rolling, Po looked at her assistant with a theatrical seriousness and joked:

โ€œIf it breaks, you can be the one to blame!
I donโ€™t want to be the one who snaps it.โ€

That set the tone.
The wood was ready.
Weโ€ฆ were getting there.

The Moment Before the Bend

As her assistant stood there, holding one end of the hot, hopefully flexible, board trying to work up the courage for the first bend, Po stepped beside her trusty assistant to offer support โ€” and then they immediately broke into laughter. She tucked herself halfway behind his arm, peeking out like someone about to watch a suspenseful scene in a movie.

The cameraperson had already begun losing patience with how long it was taking and insisted that they stop laughing and get serious. She wanted to get the shot. Then she started laughing.

This is the real life of drum frame bending at Poโ€™s Kingston Art Studio โ€” part process, part comedy, all family, ALL ART. Drum making is a beautiful, love-filled-art, and this short video illustrates the joy that cheers out with exuberance of Love Art By Po.

Nervous Laughter, Real Art

In todayโ€™s short video, you can witness the exact moment when nervous laughter gives way to determination. Po, her assistant and cameraperson take their positions, breathe through the tension, and finally begin the first coaxing bend of the white oak.

Itโ€™s only a small curve โ€” a gentle start โ€” but it marks the beginning of the transformation, from plank to drum. And as simple as it looks, this step matters: the first bend dictates how the wood will behave when the full circular frame is shaped and clamped.

A Family Moment in the Making of a Drum

What the video doesnโ€™t capture โ€” but what filled the studio โ€” is the feeling of teamwork.
Making drums in this space has always been infused with love, humour, and family togetherness. Today was no exception.

Drum-making is not simply about shaping wood at Love Art By Po;
itโ€™s about beautiful, shaping moments โ€” that make everyone stronger.

Making drums has taught Po an incredible life lesson – a circle of wood is like a circle of loved-ones, when you push on them – they get stronger as they find their harmonious tune.

Join us again for Day 5, where Po continues shaping the wood โ€” and the shared moments โ€” that make every drum a circle of strength and love.

๐Ÿ“ง Portia@loveartbypo.ca

Let Me Know What You Think! Start or Join the Convesation


Behind the scenes, Drum December, Drum Works, Kingston Artist, Po's Drum Making Process, Portia Chapman, Sustainable Craft, woodworking

Drum December Day 2: Poโ€™s Sun-Steaming Method Begins

Po Chapman lying in the sun wearing yellow sunglasses and a green shirt, beginning Day 2 of her sun-steaming drum-making process.
Day 2: Po begins her sun-steaming process for crafting hardwood drum frames.

Welcome to Day 2 of Drum December!

Today, Po begins the very first step in her innovative sun-steaming method โ€” a sustainable process she personally developed to prepare kiln-dried hardwood for her premium drum frames and exposed stretchers.

Sun-steaming is a technique that Po pioneered to reduce the environmental impact of traditional wood steaming. Instead of soaking the kiln-dried wood for two days and then heating it with electricity, Po slides the carefully milled hardwood into a long black tube with ridges along its interior.

The ridges guide the wood as it slides in, producing a distinctive sound โ€” the beginning of the transformation.

Once the hardwood is inside the tube, Po fills it with water and lets the sun do all the work. For three full days, the water naturally heats within the sealed tube, allowing the wood fibres to relax and prepare for bending.

An Energy-Conscious Method for Steaming the Wood:

  • Removes the two-day soaking stage
  • Uses no electricity
  • Reduces water consumption
  • Produces a more responsive bend
  • Creates the smooth, elite-quality curves Poโ€™s drum frames are known for

This is where Poโ€™s craftsmanship begins โ€” with innovation, patience, and the sun itself.

Tomorrow, weโ€™ll continue documenting this process as Drum December unfolds, one beautifully authentic step at a time.

Tomorrow, Po continues the transformation as she assesses the wood to see whether it has relaxed enough to become bendy and ready for shaping.

Stay tuned for Day 3!

๐Ÿ“ง Portia@loveartbypo.ca

Let Me Know What You Think! Start or Join the Convesation

Behind the Art, Drum Works, How Po Makes Hand Drums, Portia Chapman, Studio Process

Drum December Begins at Poโ€™s Studio

Hands bending a wooden drum frame over the knees of a person seated on grass.
Shaping the curve of a drum frame โ€” one of the first steps in Poโ€™s rhythm-making process.

Today marks the beginning of Drum December, a month-long glimpse into the rhythm and process inside Poโ€™s Studio. Instead of presenting finished pieces, this series brings you into the quiet, hypnotic motions that form the foundation of Poโ€™s drum works.

The first video is just five seconds long โ€” a looping moment that feels like it could play forever. Simple. Repetitive. Almost meditative. It captures a small piece of the energy that moves through Poโ€™s creative process: the balance of sound, gesture, material, and breath.

Po has always worked from rhythm. Whether sheโ€™s painting, shaping rawhide, or exploring new concepts for future installations, thereโ€™s a pulse beneath everything she creates. Drum December is a way to share that pulse with you โ€” not through explanation, but through small, visual experiences.

Throughout the month, youโ€™ll see short clips from the studio: textures, movements, tools, surfaces, patterns, and the making behind upcoming work. Some loops will be raw; some will be visually polished. All of them come from Poโ€™s hands and her way of seeing.

This series also sets the stage for the work she is developing for her upcoming installation, where drums and light will play an important role. Think of Drum December as the first heartbeat of that larger project.

Thank you for stepping inside her studio.
More rhythm, more movement, and more behind-the-scenes moments will arrive soon.

Have a question about Drum December or Poโ€™s Studio? Email Poโ€™s Studio

โ€” Artwork and murals by Portia โ€œPoโ€ Chapman, Love Art by Po

One response to “Drum December Begins at Poโ€™s Studio”

  1. Drum December Day 11 – How to Clamp a Drum Frame – Love Art by Po Avatar

    […] for the final clamp. If you missed the early stages of this journey, you can catch up on Day 5 and Drum December Begins to see how we prepare the wood to be […]

Let Me Know What You Think! Start or Join the Convesation

How Po Makes Hand Drums, Portia Chapman, Uncategorized

How to Choose the Best Hardwoods for Making Drum Frames by Kingston Artist Portia Po Chapman

Po: “Selecting Hardwood is a Hard Task”

Hi, I am Portia “Po” Chapman from Kingston Ontario. I am an artist who hand makes unique frame drums. On this post, I will show you how to pick the best hardwood pieces for single-ply, steam bent drum frames. You’d think that it is easy, but it is not. Follow these steps and you will improve your chances of success.

Po Returning from Lumber Supplier

What Types of Wood are Best for Bending Drum Frames

My top 3 woods to use are: red oak, maple, cherry. I have not had much luck using white oak or walnut. All the research I have done, says that white ash is the best, but I cannot find a white ash supplier and the white ash drum frames that I have purchased from other suppliers have been economy grade. So for this article, I will address my preferred 3 woods mentioned above.

Po Sanding End Wedge of Red Oak Board
Before Steaming and Bending.
Notice the Long Grain Without Knots.

How to Choose Wood for Drum Frames

When selecting the lumber at the yard, be sure to choose wood without knots, splits, or swirling/wandering grains. All three of these characteristics will result in drum frames that crack and break while bending them into a drum shape. You want to pick long straight grains that do not drift off to the edges of the board. It will take you some time to find the ideal ones. Note: you pay the same price if they are in the same pile, so take your time to choose the most suitable ones.

What Size of Lumber to Buy for Drum Frames

The next thing with which to concern yourself is the board length and width. Most frame drums / hand drums range from 12″-16″ in diameter. To create drums frames of these diameters, you will require boards between 4′-6′ long. If you can afford it, however, purchase boards 7′-8′ long to assure that you can make drum frames after potential splitting during the bending process.

Notice How the White Oak has Snapped. In this Photo, Po’s Assistant is Compressing the Drum Frame to be Marked for Cutting. Be Sure to Have Enough Wood to Accommodate for Splits and Breaks During the Milling, Steaming and Bending Phases of
Frame Drum Making.

Recap – How to Choose Wood for Steam Bending Drum Frames

I choose Red Oak, Maple, or Cherry woods that have long straight grains and have no knots. My preferred stock is 1″ thick, 7′ long and 4″-6″ wide. In Kingston, these boards will run between $50 and $100 each. In short, making steam-bent hardwood drum frames is not a cheap art in which to dabble. At my private art studio in Kingston, I make rawhide drums from 8″-23″ in diameter and range in price from $200-$2000.