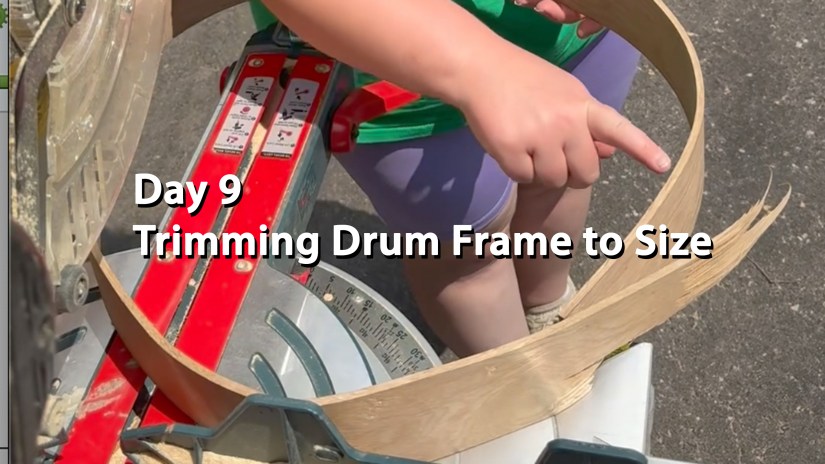
Po trims the white oak to the desired drum frame size at her Kingston Art Studio
Kingston Artist, Portia “Po” Chapman trims the white oak drum frame to size at her studio.
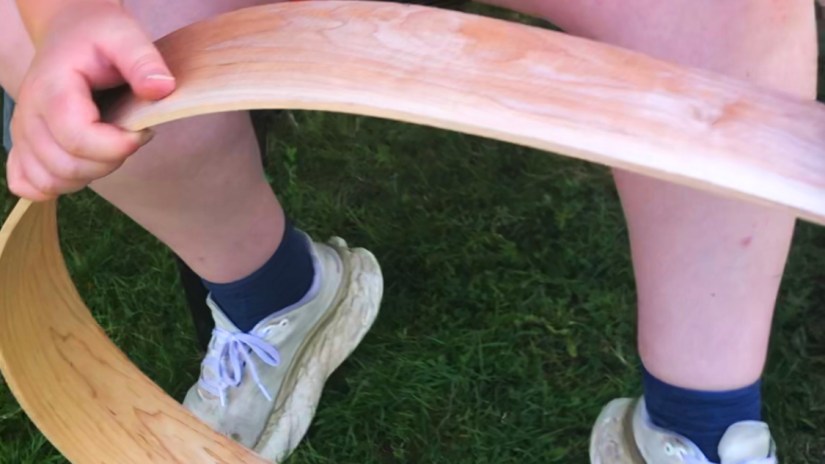
On day 8, my trusty assistant compressed the dry bent oak to the size that I wanted for the finished drum to become. As he held it in place, I marked the board with a pencil. Day 9, also marks the mid stage of drum frame creation.
Once we cut off the white oak at yesterday’s pencil markings, we will see the drum frame coming into its drum shape for the first time. I have a smaller trim miter saw, but I prefer using my 12″ chop saw with a trimming tooth blade installed. The larger blade alleviates the fiddliness of cutting the large hoop with a small blade.
Oh, and this trim will remove the breakage that we found on day 6. Phew!
Come back tomorrow, Day 10, when we move on to our next stage of drum frame creation: gluing and dry-bending. The next couple days are going to be exciting; we are on the homeward stretch now.
Come back tomorrow for Day 10 – when we apply the glue. There are 4 types of glue that we can use, I will explain the options on Day 10.
New to the blog? Read more about Po and her art here.
On Day 8 of Drum December, Po’s assistant compresses the bent oak while Po marks the board where she will cut it on Day 9.
Thank you for watching along as we engage on this drum making adventure. This is the first time that I have made a white oak drum frame and as you can see, it has been an adventure.
On Day 8 of Drum December, my assistant and I prepare the steam-bent white oak which is to be cut off in order to create my preferred drum diameter. The reason I mark the wood this way is because the best sounding drums have the least glue. So by marking it with both ends overlapping, I can judge how large the completed joint will become. I aim for a 2″ drum frame joint when the drum is complete.
For more information about Love Art by Po drumssee here.
The Art of Compression Without Snapping the Frame
The process of compression without snapping the frame is exceptionally nuanced and requires much attention. This is the reason why I prefer dry-bending the final bend. The stunning personality of every piece of milled and bent timbre is felt as the compression reaches its limit. I have tried mechanical bending methods but those methods remove the connection with the fibres, and this process needs to be gentle and understanding.
Hugging Drums is Like Hugging Trees
Just because a tree is cut down and made into lumber, it never stops being a tree. I grew up listening to trees. For 18 years of my life, they sheltered me, comforted me, and taught me ancient lessons of beauty and strength. I met my ancestors as they stooped down, inviting me to sing as their branches drummed a beat for me to follow. In my second year of my BFA, the apple tree, that I used to climb as a child, died and began falling to the ground. In a way, I felt to blame for its loss of health.
You see, I left it in the field when I went away to University. So for my first large sculpture installation, I gave it back its voice by sculpting it back to its life giving form – even with birds nests and robin eggs. I could once agin hear it whisper. In the spring, when I returned to the field, the apple tree, at the very top, was growing leaves reaching to the sky. Today, as I make frame drums, it is my way of giving back to the trees – to hear their voices sing again. For me, I feel blessed to be a drum maker. It is a calling. It is LIFE! When shaping drum frames, I hug them just like I hug trees still able to stand. Every drum frame is realized out of love and respect. To read more about Indigenous relationships with trees, follow this link. But please come back.
Gentleness Guided the Bend
For the compression, you will notice in the video, my assistant has rested the white oak on his lap. By doing so, he makes full contact with both sides of the new drum frame shape. He can feel the oak tighten and relax. He makes it look so easy after many years of woodworking, but this critical step truly requires inner stillness. After all, I learned to hug trees because of him. As he bends it, he can hear the oak say when it has coiled enough. Just as it reaches its chosen limit, I can sense it too.
This white oak, has required understanding more than the other hardwoods. But, when it reached its bend limit, instead of screaming out, it gave a relaxed sigh of relief, like it said: “Finally back home.”
Marking the Board
Due to the length of the video, it is unclear where I marked the piece. In this case, I marked it in two locations. Often, I do one continuous mark across both edges. Again, this is not a science. I wish that I could give a clear instruction, but it really is again about… Knowing the right spot(s).
When I set out to write this post about this seemingly simple bend and mark, it was not my intention to share the spiritual, soulful relationship of bending drum frames. I guess, the ancestors thought that it was a good time to remind us that drum frames and drums are just as much part of this life as they were as trees. Please know that when you buy (adopt) one of the drums that I make, your drum has been nurtured into existence with care.
Come back tomorrow for Day 9 – the painful moment of cutting the frame to size.
[…] To solve this, I developed a proprietary dry-bending technique. The wood is pre-bent and shaped before the glue is ever applied. You can see the foundation of this technique in my previous posts: Day 5, Day 7, and Day 8. […]
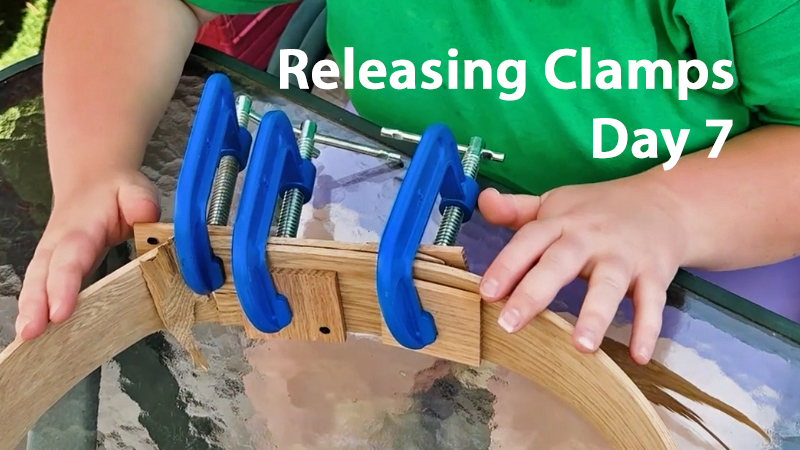
Day 7: Po releases the clamps on the white oak drum frame — the moment of truth in the Drum December bending sequence.
Drum December, Day 7’s update brings you right into one of my favourite moments in the drum-making process — releasing the clamps after a full overnight bend (in this case, it took 48 hours to dry). There’s always a little suspense in the air: did the frame hold its curve? Did yesterday’s small white oak split stay contained? OR… Would I just get slapped in the face?
If you’re new to Drum December, I’m Portia “Po” Chapman — the artist behind these handmade drum frames. You can learn more about my artwork and workshops on my About & Contact page.
Checking the Strength and Integrity of the First Bend
With slow hands and hopeful curiosity, I began removing the clamps one by one. The wood felt settled and responsive, and despite yesterday’s unfortunate split, the frame held together beautifully. The bend set cleanly and the character of the wood showed itself the way only white oak could; it was strong and unpredictable.
This is one of the reasons I love teaching you about the process of drum-making. Every piece of wood has its own story; some bend effortlessly, while others challenge you and reveal their limits as you work. Day 7 reminds me that, some days, drum frame making is as much about bravery as it is about skill.
Come back tomorrow when we will compress the white oak to the size of drum that I want and proceed to draw the cut marks for length.
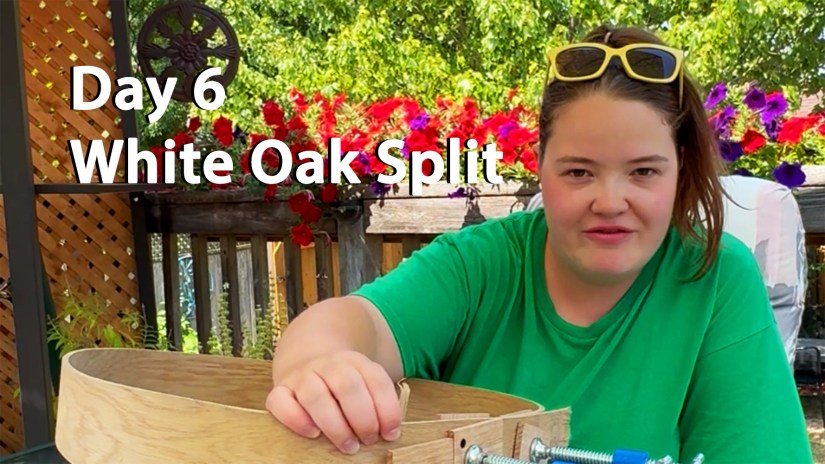
Day 6: A small white oak split appears after the first bend — an expected part of pushing hardwood to its limits.
Today marks the moment of truth for the first bend of the white oak drum frame. After spending the night under clamps, the wood finally revealed how it responded to yesterday’s bending session — and as always, the material had a story to tell.
If you’re new here and want to learn more about who I am and the work I do, you can visit my About & Contact page.
When I brought the frame into the studio this morning, the very first thing I did was check the inside curve. And there it was: a small split along the tightest part of the bend.
For many people, that might feel alarming. But for me, this isn’t unusual at all — especially with a dense hardwood like white oak. Pushing any wood to the minimum bend radius it can tolerate means you’re working right at the threshold where the fibres must stretch, compress, and adapt. Sometimes, a small split appears as part of that process.
What a Split Really Means in Drum Making
A split doesn’t automatically mean failure.
It’s a diagnostic clue.
It tells me:
how far the wood was willing to travel,
how much internal tension remains in the frame,
and whether the second bend — the glued dry-bend — will seat properly.
In this case, the split is shallow and controlled. That tells me the clamps did exactly what they were supposed to do: prevent the fibres from opening too far while still allowing the bend to hold.
This is why clamp placement is a true art form in drum making. You don’t just tighten clamps to tighten clamps. You tighten them in anticipation of how the wood is likely to react.
If you’d like to explore my handmade drums, see past builds, or learn about upcoming workshops, visit my Drum Page here.
White oak is expressive — and today, it expressed itself in a way that still sets us up for a strong final frame. As well, the location of the minor breakage will be cut off before gluing the final bend. I don’t sweat these things now, but when I first started bending drum frames, I was totally panicked when the first breakage happened. It was a learning experience – that is for sure!
Reading Tension, Relaxation, and “Feel”
Every wood species responds differently during the first bend. White oak? Well…It hums with a very particular kind of density.
When I picked up the bent frame today, I could feel subtle tension still living inside the curve. That’s not unexpected — in fact, with white oak, it’s quite normal. White oak, unlike red oak, doesn’t particularly like being bent.
The key for Day 6 is simply evaluating:
Did the bend hold its overall shape?
Is the curve even?
Is the split stable and non-progressive?
Does the wood want to spring open dramatically or gently?
All signs today point to a solid first bend. It was a success. PHEW!!!
Come back tomorrow, Day 7, to watch and read about the what happened when I released the clamps.
The next step — which comes tomorrow — is the careful release of the clamps. That’s where I discover how much reflex the wood has stored and whether it settles into the intended diameter or pushes back aggressively.
For now, the job is simply to observe, interpret, and prepare.
White oak may be challenging, but today’s results show that this drum frame is very much on track.
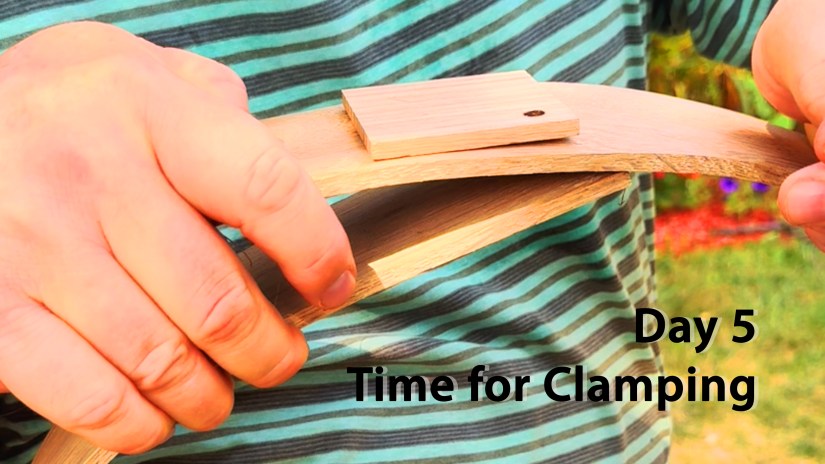
Po prepares the sun-steamed red oak board for its first clamp — the moment the drum’s circular form begins.
Today marks a major turning point in Po’s sun-steamed red oak experiment — the moment when softened hardwood, warm from the solar tubes, is guided into its first held shape. After days of heating, coaxing, and patiently encouraging the wood fibres to relax, it’s finally time for the clamp.
Freehand bending is never a one-person job. With red oak especially — two sets of hands are essential. One pair holds the ends together, and the other manages the clamps with steady confidence.
As the camera rolls, Po’s assistant lifts one end of the oak over the other. You can see immediately that the top end doesn’t lie flat; instead, it sticks out stubbornly, like a child refusing bedtime. This is normal. In every bend, no matter the length, one end refuses to behave. The wood always tries to return to straightness — its original memory.
To protect the tender, freshly steamed wood, Po uses two small oak offcuts as buffers. The cut-offs keep the clamp from denting the softened wood, which is especially vulnerable before it dries.
The First Clamp: Where Courage Meets Making
Po tightens the lower piece first, then holds the top piece and slowly turns the clamp. With each rotation, the ends of the red oak pull closer together. This is the first of two clamping stages in Po’s innovative dry-bending technique — a method she has refined through experimentation, intuition, and respect for the material.
This first loop must dry with the clamps on for about two days. Only then will the wood be ready to release, be cut to size, glued, and clamped again into its final drum frame shape.
What the video doesn’t show is just how lively the wood can be. Even at this stage, red oak is strong and springy. If it suddenly opens, the clamp can fly across the room — a heavy steel reminder that wood is a living material. Some drum makers use ratcheting straps to control this, but Po avoids this method. The hooks and pressure points don’t sit flush, and can scar the damp wood just before it snaps back.
Instead, Po trusts the method shown here — a method that gives her control, precision, and the markings she demands from her handcrafted drum frames.
Freehand bending sun-steamed wood may look simple, but it takes courage, strength, intuition, and sometimes… a little prayer.
And today, with hands steady and clamps in place, Po brings her drum loop one step closer to becoming the finished frame that will hold the heartbeat of future songs.
Check back for Day 6 to see how the bend holds — and what surprises the wood reveals next.
[…] comes time for the final clamp. If you missed the early stages of this journey, you can catch up on Day 5 and Drum December Begins to see how we prepare the wood to be […]
Po and her assistant share a moment of nervous laughter.
Today, Po takes the next brave step in her sun-steaming white oak experiment — the moment when softened hardwood meets human hands for its very first bend. And this time, the studio was full of laughter, nerves, and a little bit of chaos.
Preparing for the First Bend
After three days of solar steaming and fibre relaxation, the white oak was finally ready to move toward its circular drum shape. But white oak is known for being stubborn — unlike red oak or cherry, which tend to cooperate more easily. This was Po’s very first time attempting to bend white oak, and the air carried that charged mix of excitement and hesitation.
Because the frame pieces were long, Po called in an assistant during this stage. Today, she chose DAD.
Before the camera was rolling, Po looked at her assistant with a theatrical seriousness and joked:
“If it breaks, you can be the one to blame! I don’t want to be the one who snaps it.”
That set the tone. The wood was ready. We… were getting there.
The Moment Before the Bend
As her assistant stood there, holding one end of the hot, hopefully flexible, board trying to work up the courage for the first bend, Po stepped beside her trusty assistant to offer support — and then they immediately broke into laughter. She tucked herself halfway behind his arm, peeking out like someone about to watch a suspenseful scene in a movie.
The cameraperson had already begun losing patience with how long it was taking and insisted that they stop laughing and get serious. She wanted to get the shot. Then she started laughing.
This is the real life of drum frame bending at Po’s Kingston Art Studio — part process, part comedy, all family, ALL ART. Drum making is a beautiful, love-filled-art, and this short video illustrates the joy that cheers out with exuberance of Love Art By Po.
Nervous Laughter, Real Art
In today’s short video, you can witness the exact moment when nervous laughter gives way to determination. Po, her assistant and cameraperson take their positions, breathe through the tension, and finally begin the first coaxing bend of the white oak.
It’s only a small curve — a gentle start — but it marks the beginning of the transformation, from plank to drum. And as simple as it looks, this step matters: the first bend dictates how the wood will behave when the full circular frame is shaped and clamped.
A Family Moment in the Making of a Drum
What the video doesn’t capture — but what filled the studio — is the feeling of teamwork. Making drums in this space has always been infused with love, humour, and family togetherness. Today was no exception.
Drum-making is not simply about shaping wood at Love Art By Po; it’s about beautiful, shaping moments — that make everyone stronger.
Making drums has taught Po an incredible life lesson – a circle of wood is like a circle of loved-ones, when you push on them – they get stronger as they find their harmonious tune.
Join us again for Day 5, where Po continues shaping the wood — and the shared moments — that make every drum a circle of strength and love.
The Bendy Test — Po checks the flexibility of her sun-steamed hardwood before shaping it into a drum frame.
Today, Po reveals the next step in her innovative sun-steaming process — the moment when three days of sunlight, water, and patient preparation finally transform kiln-dried hardwood into a material that is ready to bend.
Testing the Wood After Three Days of Sun-Steaming
Today marks the moment when Po checks the results of the full three-day sun-steaming cycle. In yesterday’s post, we watched her begin this method by sliding the hardwood into the long ridged tube and filling it with water to let the sun do the work. By this morning, the fibres within the wood had warmed, expanded, and begun to relax. Now it was time to see whether the wood had softened enough to become flexible — or whether it needed more time in the sun.
After pouring out the steaming water, Po slid the hardwood out of the tube and laid it gently on the grass. The board emerges from the tube hot, ridged, and stiff — the opposite of what you might expect from a piece of wood that will soon become a circular drum frame. But this is where Po’s ingenuity comes in.
Still too hot to handle with bare hands, Po begins a technique she discovered through experimentation: walking on the wood. Wearing proper shoes, she carefully steps along the length of the board, back and forth, allowing her weight to massage the fibres into motion. The grass protects the surface from dents and provides the perfect soft foundation for the wood to ease into its new flexibility.
For about five minutes, she continues this rhythmic movement — a sculptor’s touch expressed through her feet rather than her hands. And then comes the test.
With one foot still grounding the board, Po gently lifts the opposite end.
In today’s video, you can see the moment the wood answers.
It bends — cleanly, smoothly, willingly.
This once rigid hardwood is now supple enough to be shaped into the elegant circular frame of a drum. What seemed impossible only days before becomes possible through Po’s blend of patience, innovation, and the natural power of the sun.
Tomorrow, Po will continue the transformation as she prepares the wood for its first bends toward the circle it is destined to become.
Drum December unfolds one authentic, beautiful step at a time.
[…] how beautiful the Drum December drum turned out. This where we started with Drum December. You can learn exactly how we crafted this instrument by visiting the previous 20 days of the […]
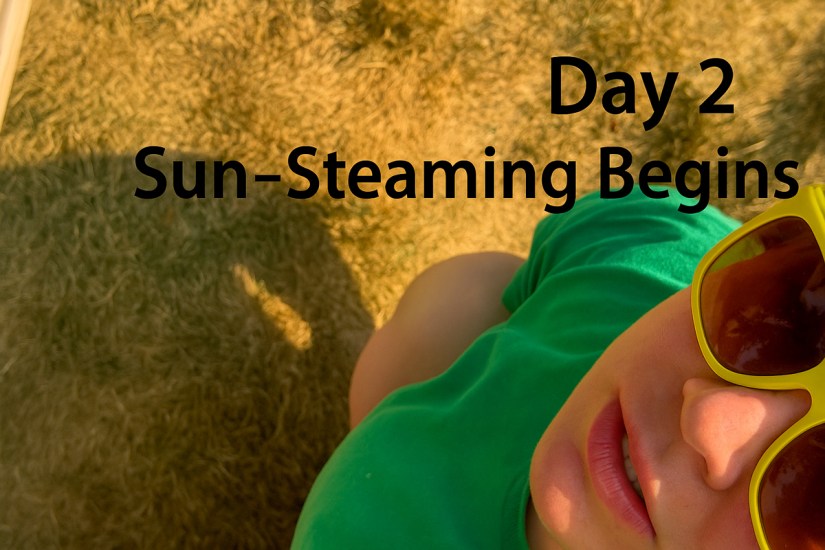
Day 2: Po begins her sun-steaming process for crafting hardwood drum frames.
Welcome to Day 2 of Drum December!
Today, Po begins the very first step in her innovative sun-steaming method — a sustainable process she personally developed to prepare kiln-dried hardwood for her premium drum frames and exposed stretchers.
Sun-steaming is a technique that Po pioneered to reduce the environmental impact of traditional wood steaming. Instead of soaking the kiln-dried wood for two days and then heating it with electricity, Po slides the carefully milled hardwood into a long black tube with ridges along its interior.
The ridges guide the wood as it slides in, producing a distinctive sound — the beginning of the transformation.
Once the hardwood is inside the tube, Po fills it with water and lets the sun do all the work. For three full days, the water naturally heats within the sealed tube, allowing the wood fibres to relax and prepare for bending.
An Energy-Conscious Method for Steaming the Wood:
Removes the two-day soaking stage
Uses no electricity
Reduces water consumption
Produces a more responsive bend
Creates the smooth, elite-quality curves Po’s drum frames are known for
This is where Po’s craftsmanship begins — with innovation, patience, and the sun itself.
Tomorrow, we’ll continue documenting this process as Drum December unfolds, one beautifully authentic step at a time.
Tomorrow, Po continues the transformation as she assesses the wood to see whether it has relaxed enough to become bendy and ready for shaping.
Shaping the curve of a drum frame — one of the first steps in Po’s rhythm-making process.
Today marks the beginning of Drum December, a month-long glimpse into the rhythm and process inside Po’s Studio. Instead of presenting finished pieces, this series brings you into the quiet, hypnotic motions that form the foundation of Po’s drum works.
The first video is just five seconds long — a looping moment that feels like it could play forever. Simple. Repetitive. Almost meditative. It captures a small piece of the energy that moves through Po’s creative process: the balance of sound, gesture, material, and breath.
Po has always worked from rhythm. Whether she’s painting, shaping rawhide, or exploring new concepts for future installations, there’s a pulse beneath everything she creates. Drum December is a way to share that pulse with you — not through explanation, but through small, visual experiences.
Throughout the month, you’ll see short clips from the studio: textures, movements, tools, surfaces, patterns, and the making behind upcoming work. Some loops will be raw; some will be visually polished. All of them come from Po’s hands and her way of seeing.
This series also sets the stage for the work she is developing for her upcoming installation, where drums and light will play an important role. Think of Drum December as the first heartbeat of that larger project.
Thank you for stepping inside her studio. More rhythm, more movement, and more behind-the-scenes moments will arrive soon.
[…] for the final clamp. If you missed the early stages of this journey, you can catch up on Day 5 and Drum December Begins to see how we prepare the wood to be […]
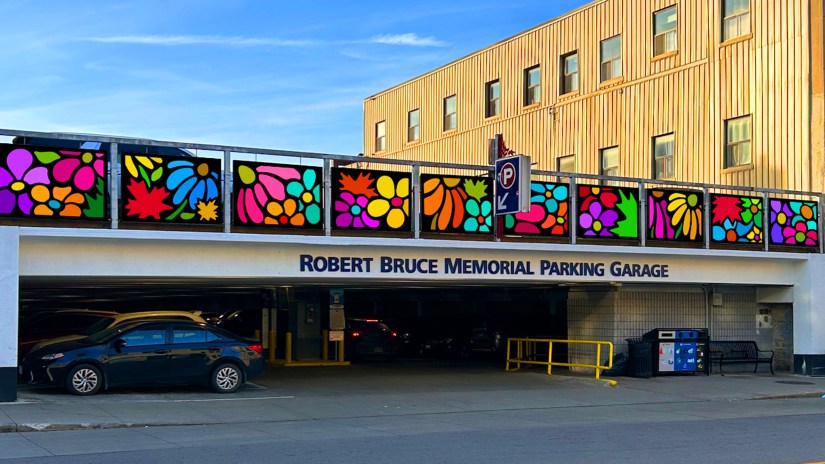
Shortlisted mural proposal by Kingston artist Portia “Po” Chapman for the Robert Bruce Memorial Parking Garage.
What Is a Mural? A Simple Definition
A mural is a large-scale artwork painted or applied directly onto a wall or architectural surface — indoors or outdoors. Murals often transform plain walls into powerful visual stories and can serve cultural, community, decorative, or branding purposes.
Where Are Murals Typically Found?
Murals are among the oldest forms of human expression. Prehistoric communities painted animals and symbols inside the caves of Lascaux and Altamira, creating one of the earliest records of human imagination and daily life.
Over time, murals appeared in:
Egyptian tombs
Roman villas
Byzantine churches
Renaissance cathedrals
royal courts
civic buildings
These early murals documented history, mythology, religion, social order, local life, and cultural values.
Unlike portable canvases, murals were integrated directly into the spaces where people lived and gathered — making art part of everyday life rather than a luxury object.
Murals as Social Voice and Public Expression
In the 20th century, murals became powerful tools for social storytelling and cultural empowerment.
The Mexican Mural Movement
Artists like Diego Rivera, José Clemente Orozco, and David Alfaro Siqueiros used murals to:
depict working-class lives
celebrate Indigenous heritage
critique colonialism and oppression
advocate social change
Murals became visual public conversation.
Community & Identity
In many places — including Ireland, South America, and North America — murals have been used to:
assert identity
preserve memory
inspire civic pride
spark dialogue
Murals allow communities to see themselves reflected in public space.
Modern Murals — Transforming Urban Environments
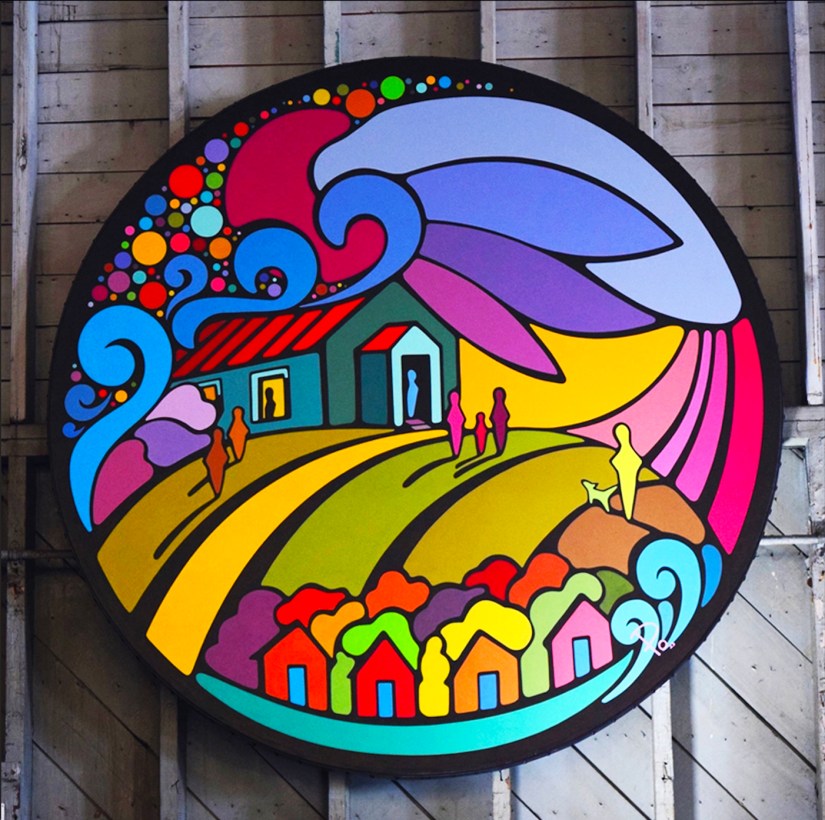
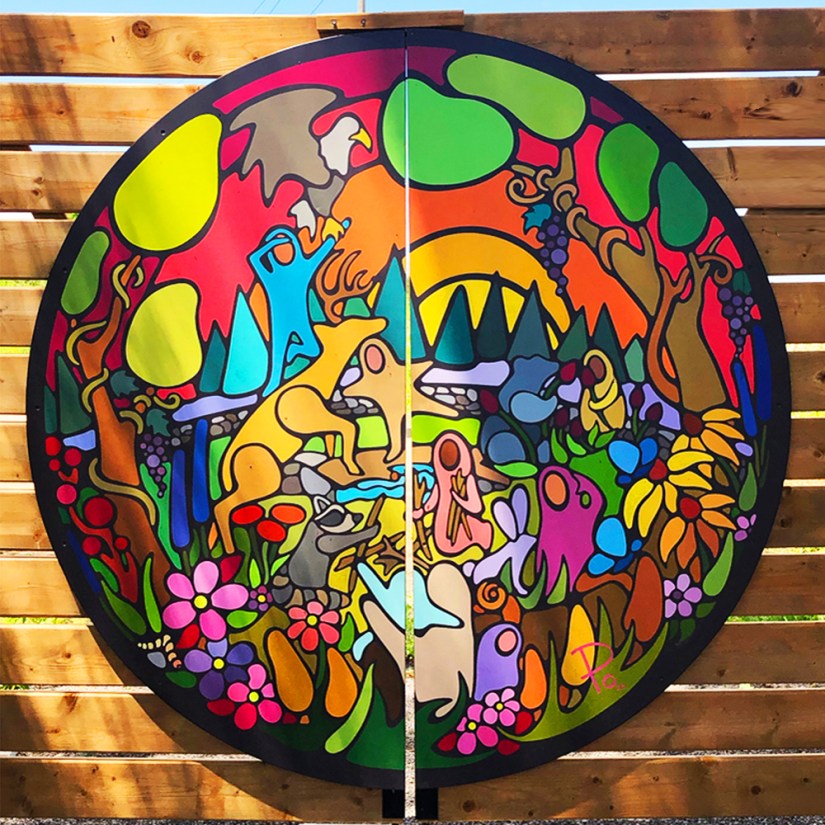
‘Building a Bright Future’ — a circular mural by Kingston artist Portia ‘Po’ Chapman created for Base31 in Picton, celebrating the site’s historic past and its new cultural identity.
Today, murals are commissioned for:
homes
offices
cafés
cultural centers
schools
playgrounds
public buildings
city walls
They add character, colour, and emotional connection to environments that might otherwise be plain or anonymous.
A mural can: ✔ make a neighbourhood feel cared for ✔ help a business stand out ✔ brighten a public walkway ✔ create community engagement ✔ become a local landmark
Murals invite people to pause, look, and feel.
Murals as Transformative Elements in Modern Spaces
One powerful example of this is Po’s large-scale custom mural created for Strong Enterprises in Belleville, Ontario. Designed specifically for a contemporary open-concept headquarters, the mural functions not just as artwork, but as an architectural feature woven into the identity of the space. With its Bauhaus-inspired forms, generational story, and colours that echo the landscape seen through the building’s floor-to-ceiling windows, the mural becomes both a visual anchor and a narrative centrepiece — a living expression of the company’s values, past, and future.
“Strong and Growing Stronger” — a custom mural by Kingston artist Po Chapman for Strong Enterprises headquarters, celebrating four generations of family legacy and growth.
Mural Techniques — From Classical Fresco to Contemporary Methods
Po painting final details on her ‘Exploring the Senses’ mural at Base31’s Sensory Garden.
Modern mural artists use many techniques, including:
Fresco — pigment applied to wet plaster
Acrylic painting — durable and colour-strong
Oil on mounted canvas — later installed on walls
Spray paint & aerosol art
Projection-based layout
Digital-to-wall transfer
Mixed media & textural methods
Today, murals are both an art form and a technical craft — requiring knowledge of materials, architecture, weather resistance, and scale.
For examples of Po’s hand-painted techniques, you can explore her custom mural services.
Why Murals Matter
Murals bring art to everyone — not just those who visit galleries or museums.
They are:
accessible
democratic
collaborative
culturally meaningful
Murals change how people feel about their city, their workplace, their community — and themselves.
They are landmarks, memory-anchors, and emotional colour in physical space.
Murals in Kingston & the Surrounding Region
Po’s murals in Kingston connect contemporary colour-blocking and modern visual storytelling to the fabric of the city. Each mural is designed in conversation with:
the space
the community
the history
the client’s vision
Whether for a home interior, a business storefront, or a community space, a mural by Po brings:
✔ warmth ✔ identity ✔ energy ✔ meaning ✔ visual harmony
Example of Po’s colourful mural designs in a children’s playroom.
While Po is based in Kingston, many of her mural and installation projects extend throughout the surrounding region — including Prince Edward County and other Eastern Ontario communities. One of the most beloved examples is “Exploring the Senses,” a large interactive mural created for Base31’s Sensory Garden in Picton.
Po’s ‘Exploring the Senses’ mural installed at Base31’s Sensory Garden in Picton, Ontario.
Commissioning a Mural — The Process
Working with a professional mural artist typically involves:
Initial conversation & intention
Site visit & measurements
Concept sketches
Colour & mood selection
Timeline & technical planning
Execution of the mural
Protective finishing
If you’re considering a mural for your home, business, or community space, visit Po’s Mural Commissions Page for details.
How to Choose the Right Wall for a Mural
Consider:
Lighting
Visibility
Surface texture
Environmental exposure
Audience & purpose
Long-term durability
Indoor vs outdoor application
Custom Murals by Love Art by Po
Great spaces don’t happen by accident — they are shaped with intention. Whether you’re creating a place for families, communities, students, or a growing business, a mural becomes a statement about the environment you’re building. It communicates care, identity, and the desire to shape an experience that people genuinely feel.
And when you’ve poured vision, effort, and heart into what you’re creating, you deserve a space that reflects that same level of purpose and pride.
Po offers:
interior murals for homes
business & office murals
restaurant & café murals
children’s room murals
faith-space and reflective murals
public / exterior murals for community areas
Po works out of Kingston and serves clients across the wider region, from Toronto to Ottawa.
Bring Your Story to Life Through Mural Art
Art has a way of meeting people exactly where they are. Whether you’re building a home that feels magical, shaping a space where children learn and explore, revitalizing a community environment, or leading a business with a story worth telling — a custom mural changes how people experience a place.
Po’s murals are created for families, founders, educators, dreamers, doers, community builders, and anyone who wants a space to feel alive with meaning and colour. Every project — big or small, playful or powerful — begins with a conversation about your story.
If you’re ready for a mural that reflects who you are, what you value, and what you’re building for the future, Po would love to create something unforgettable for you.











Let Me Know What You Think! Start or Join the Convesation